

Step-By-Step Making My
Eight-Ring Circus
Upright Rings Teapot

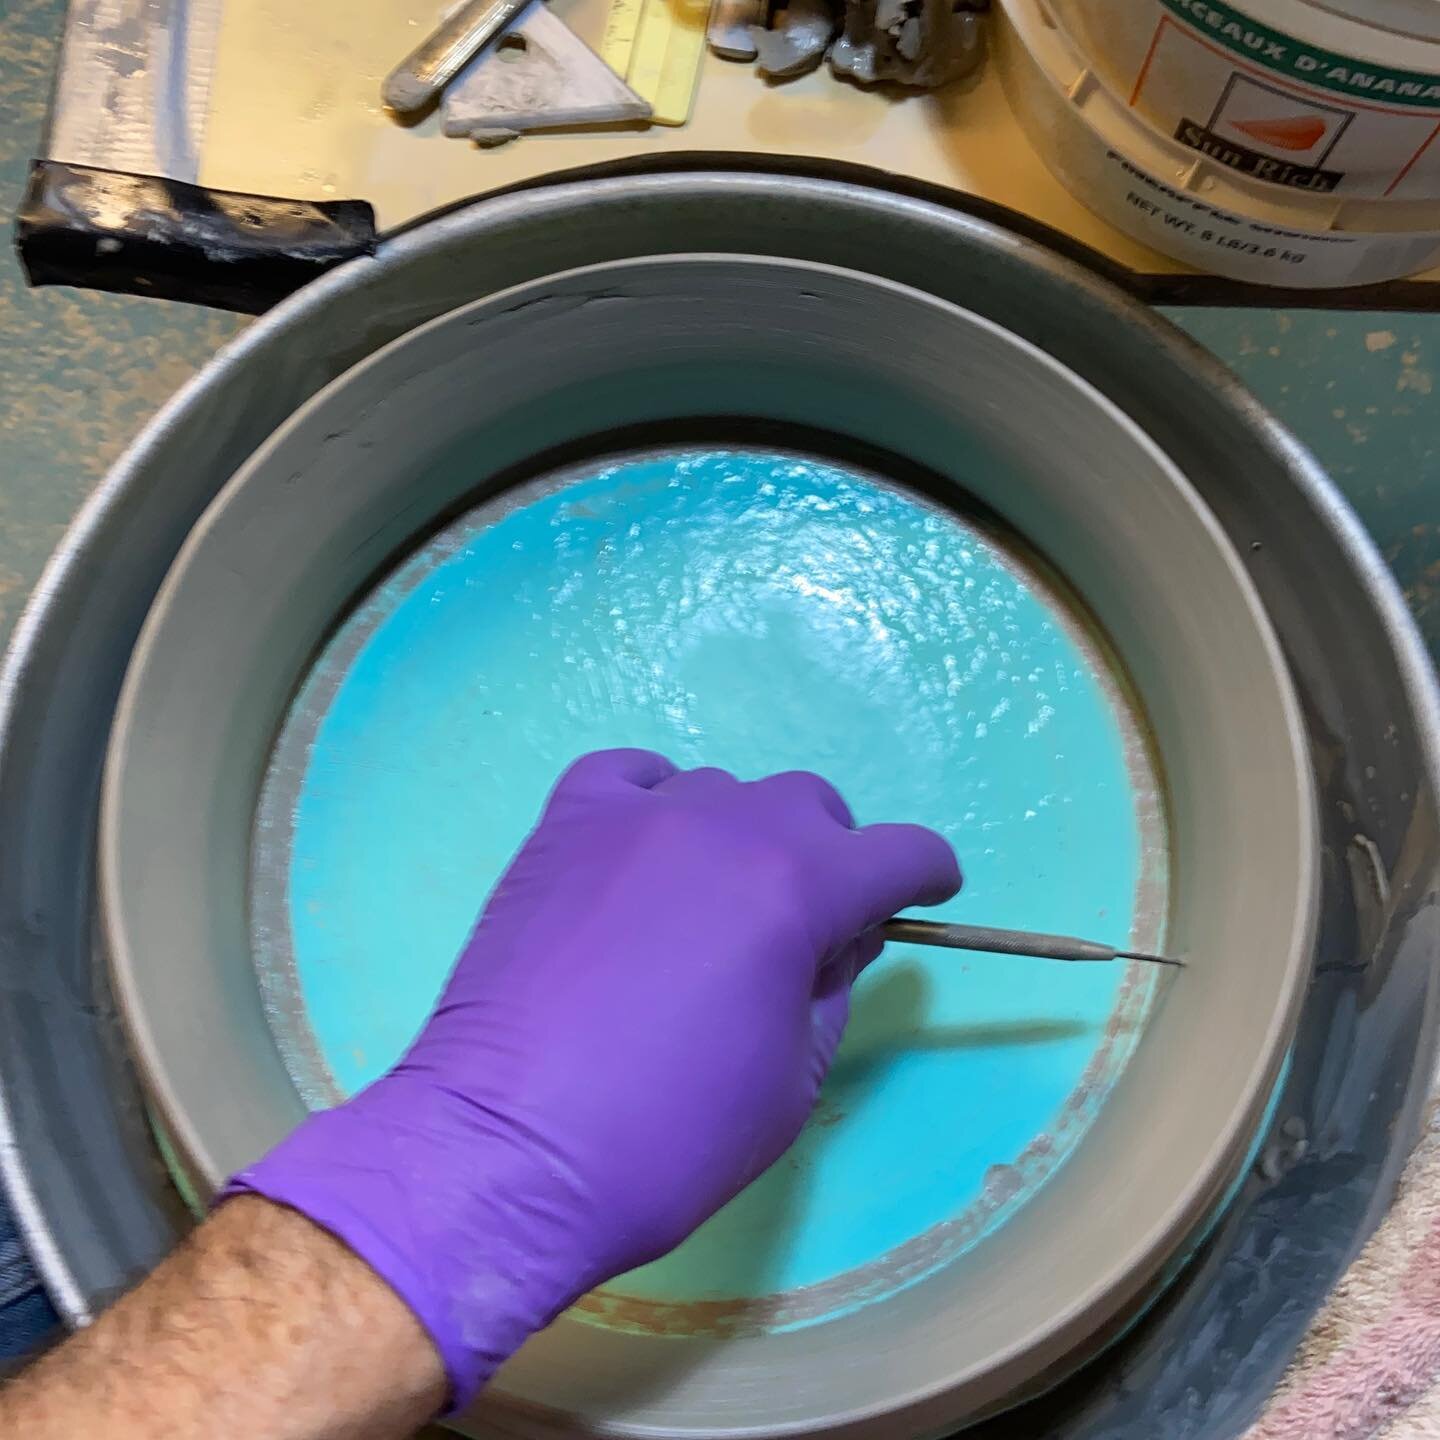
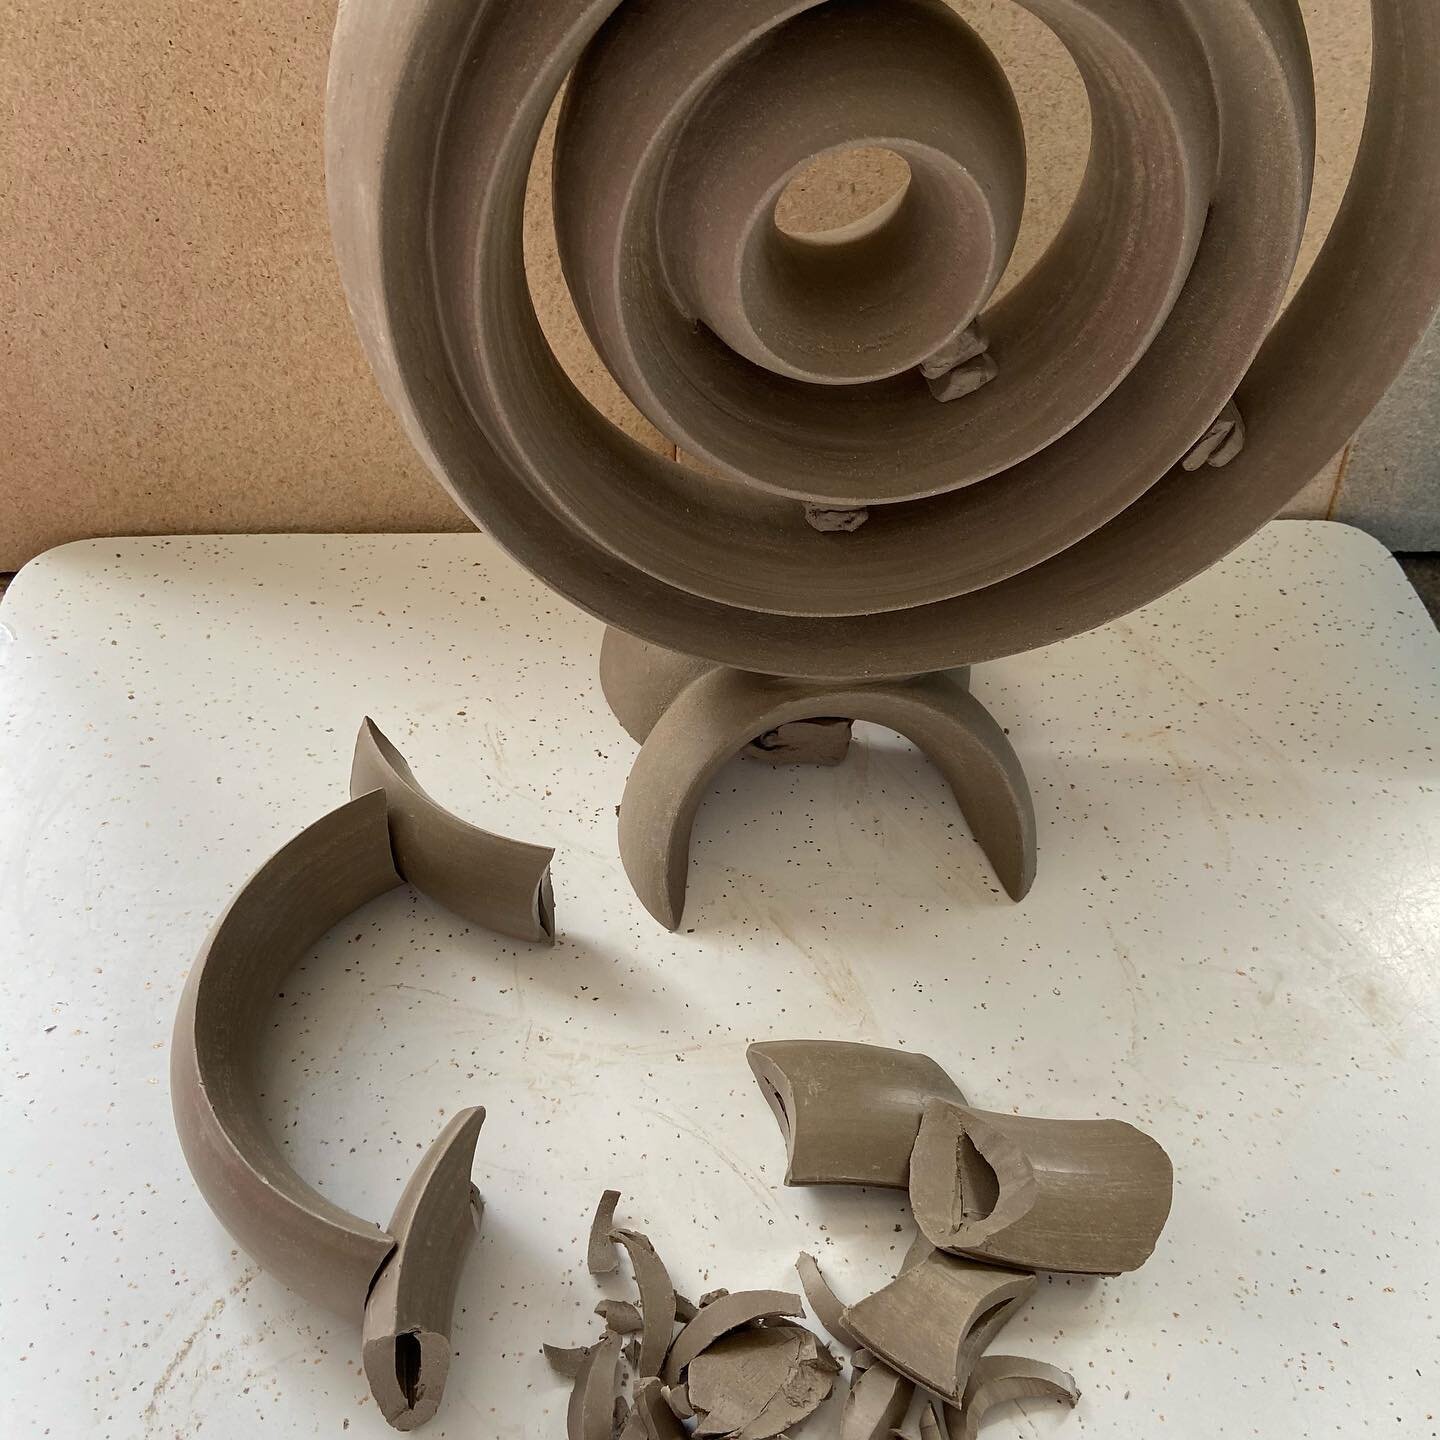
I have been thinking/planning this Teapot design for about two years, but something else always got in the way. Now is the time! I will document its construction going forward. As the Teapot ring dries, it shrinks and slightly compresses the air trapped inside. You have to poke a (temporary) hole in it to let the air out. Otherwise the weakest bond, usually along the top bond/seal splits open.
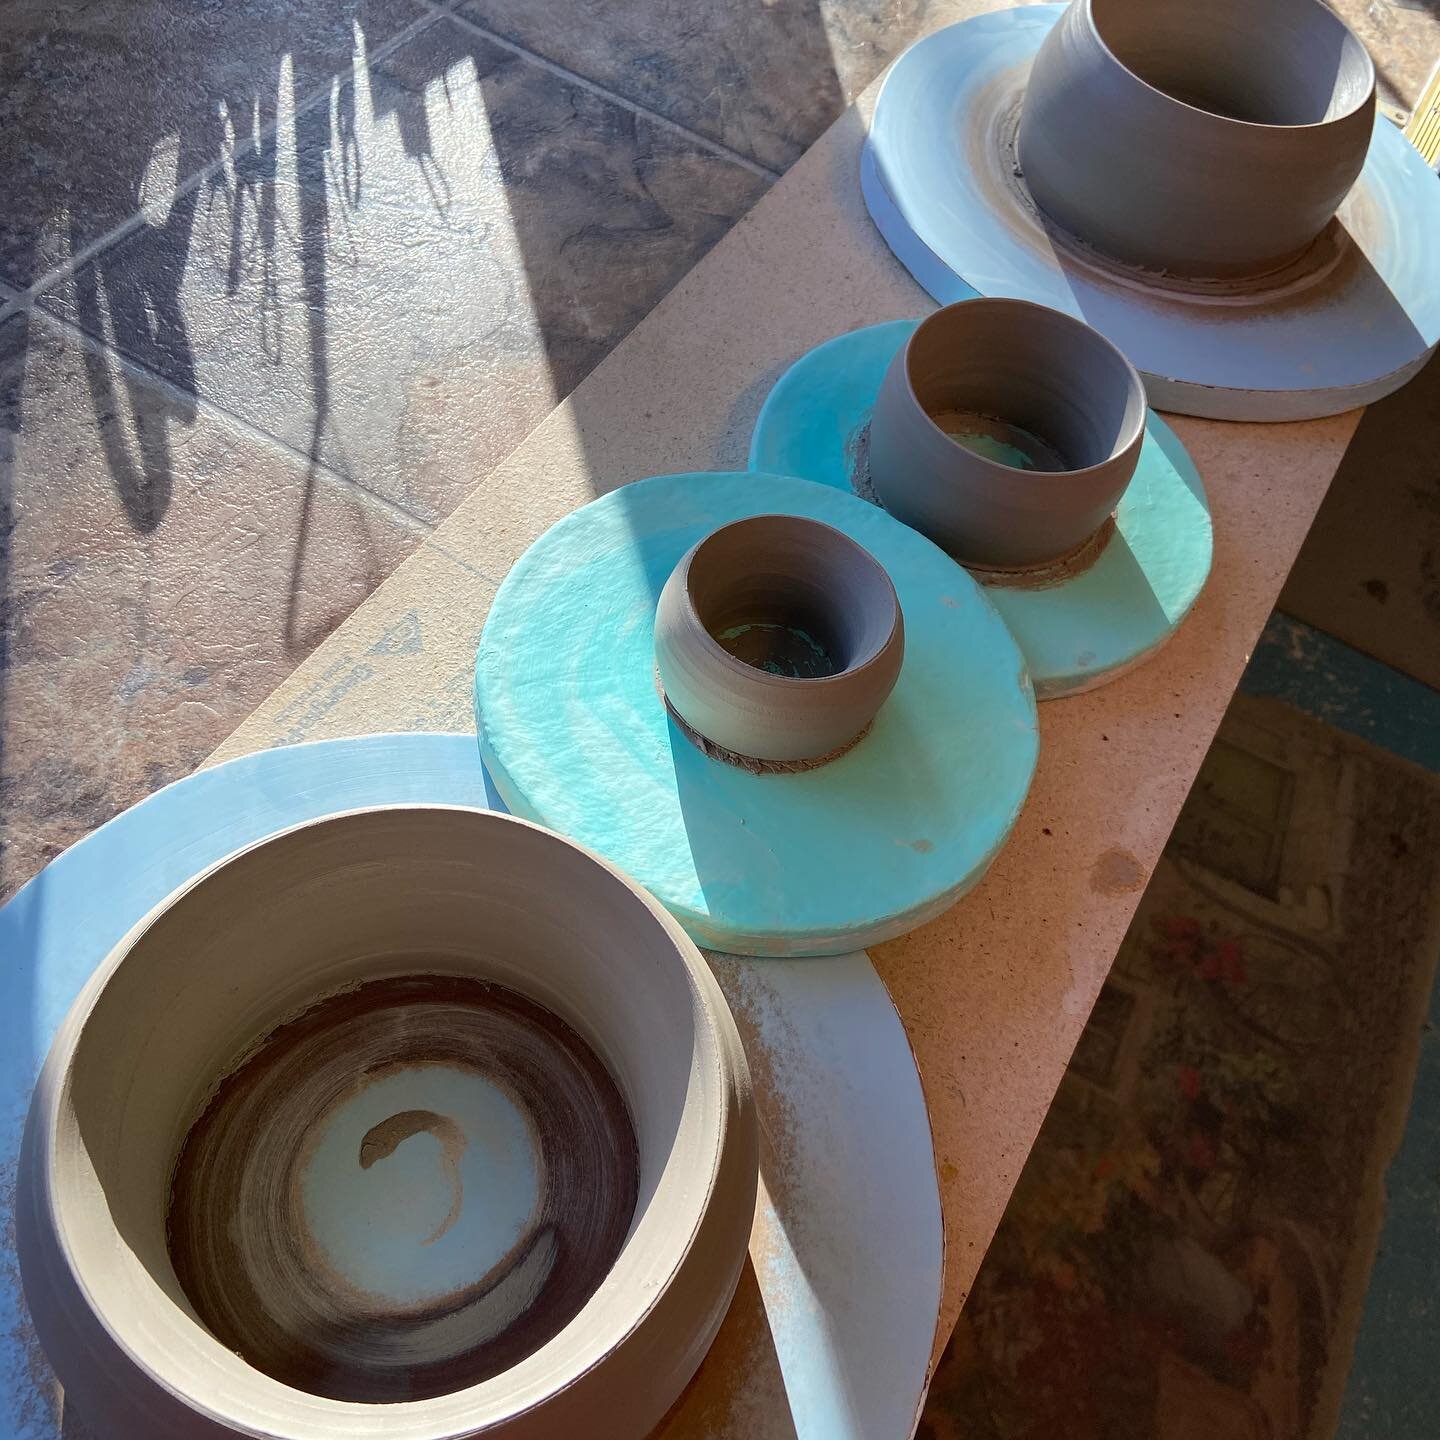
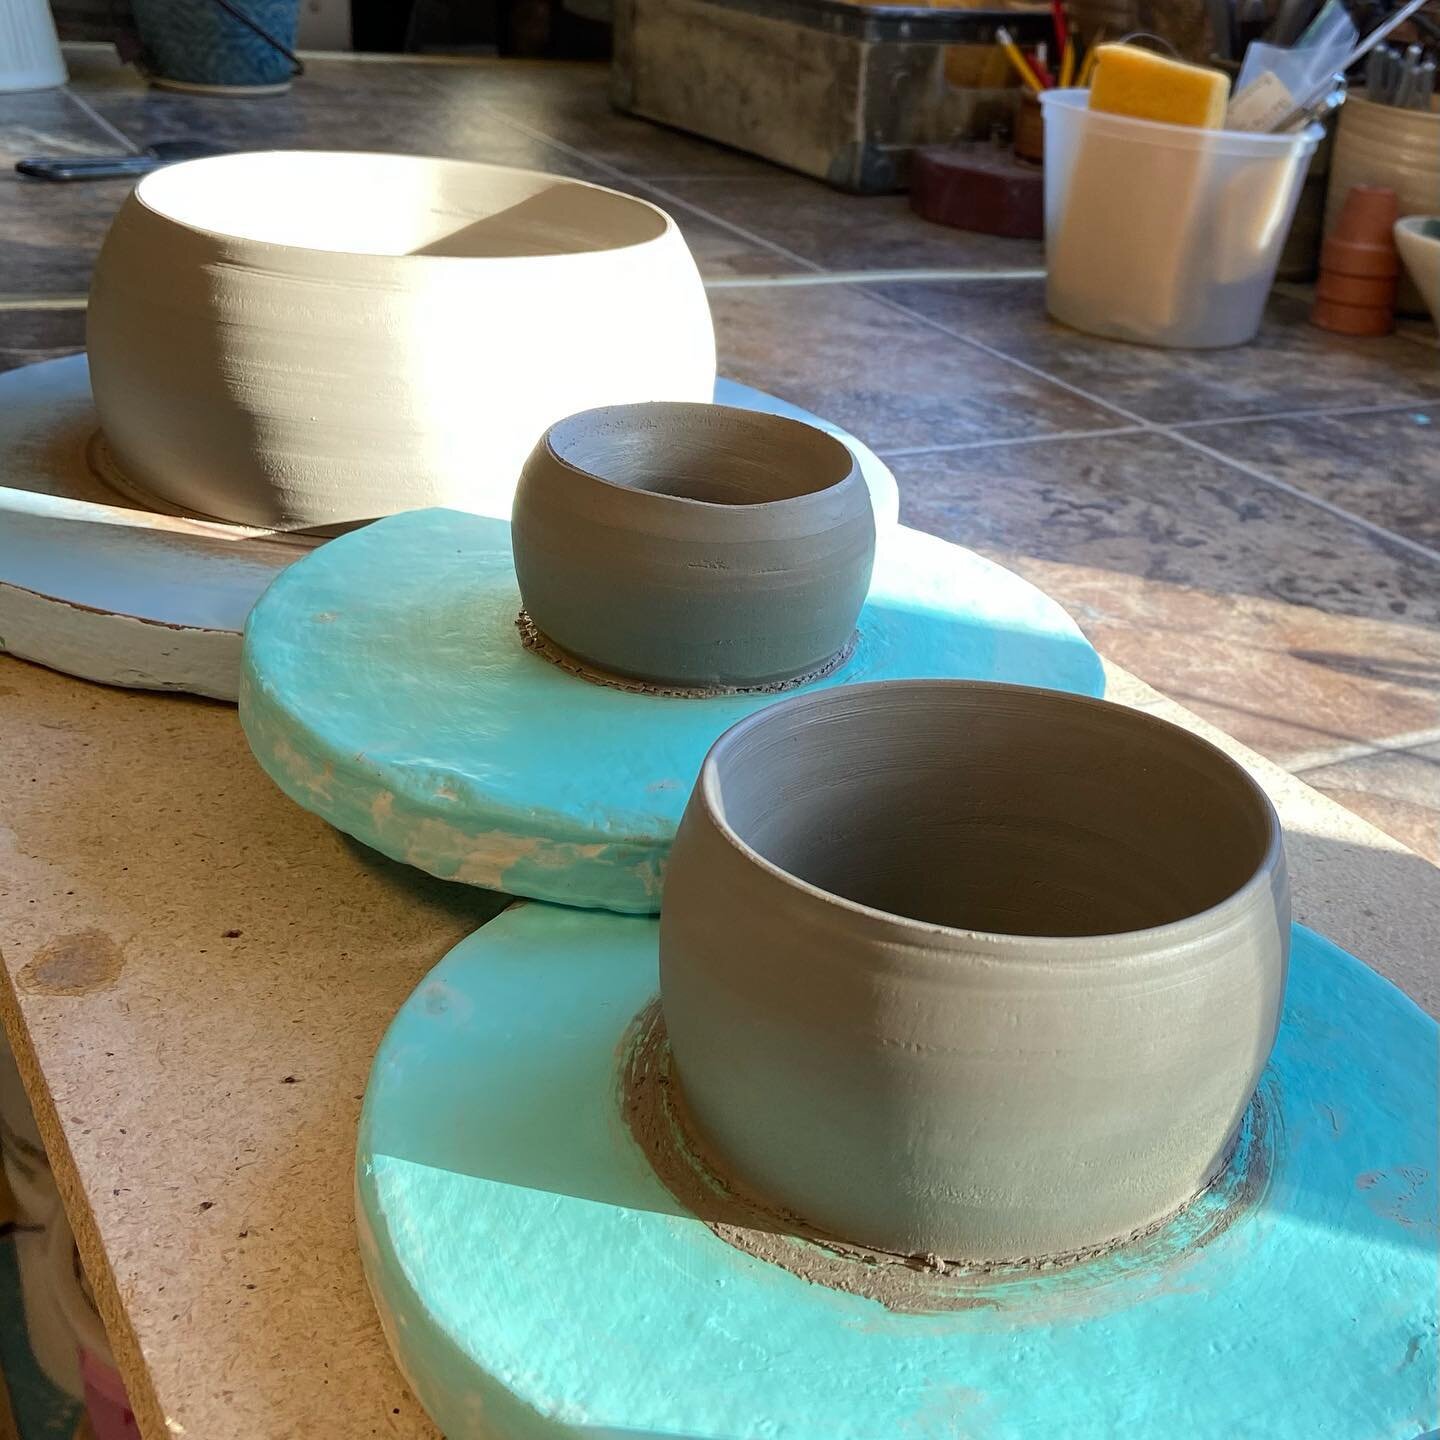
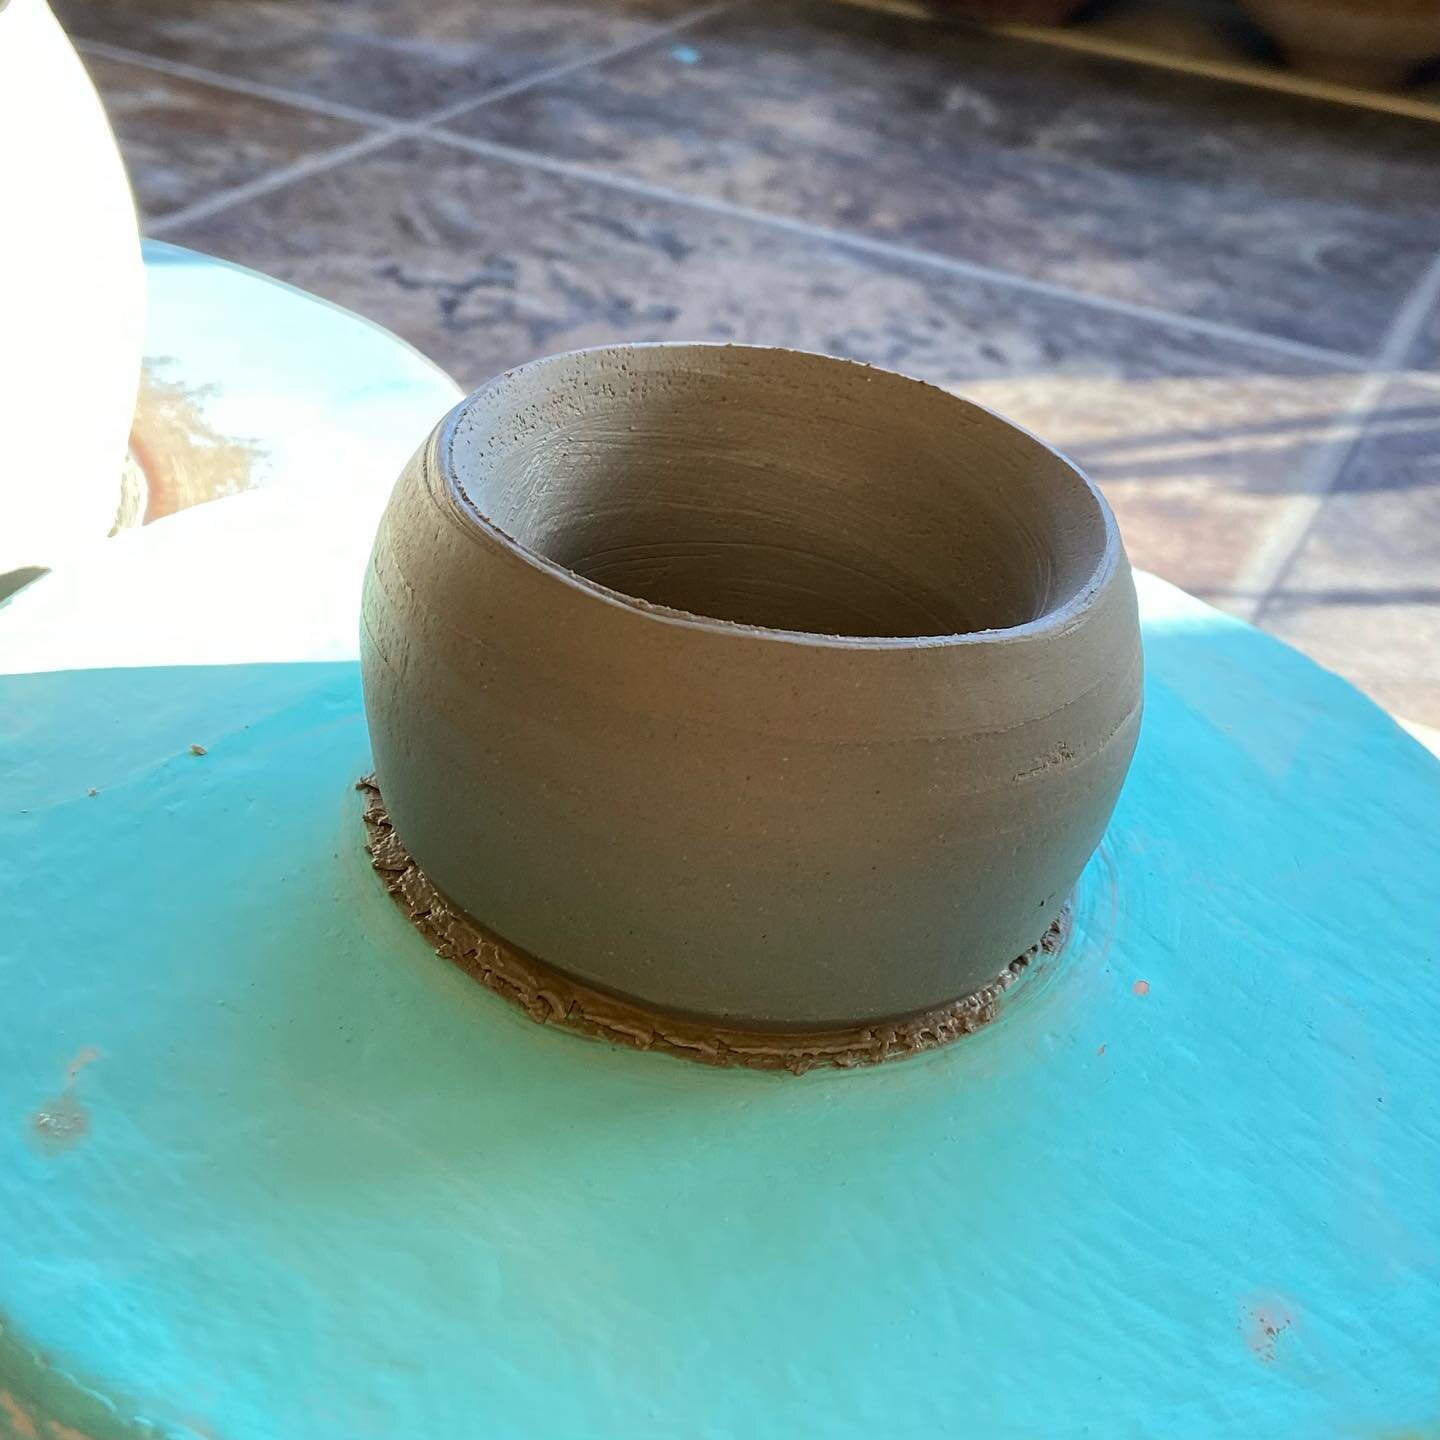
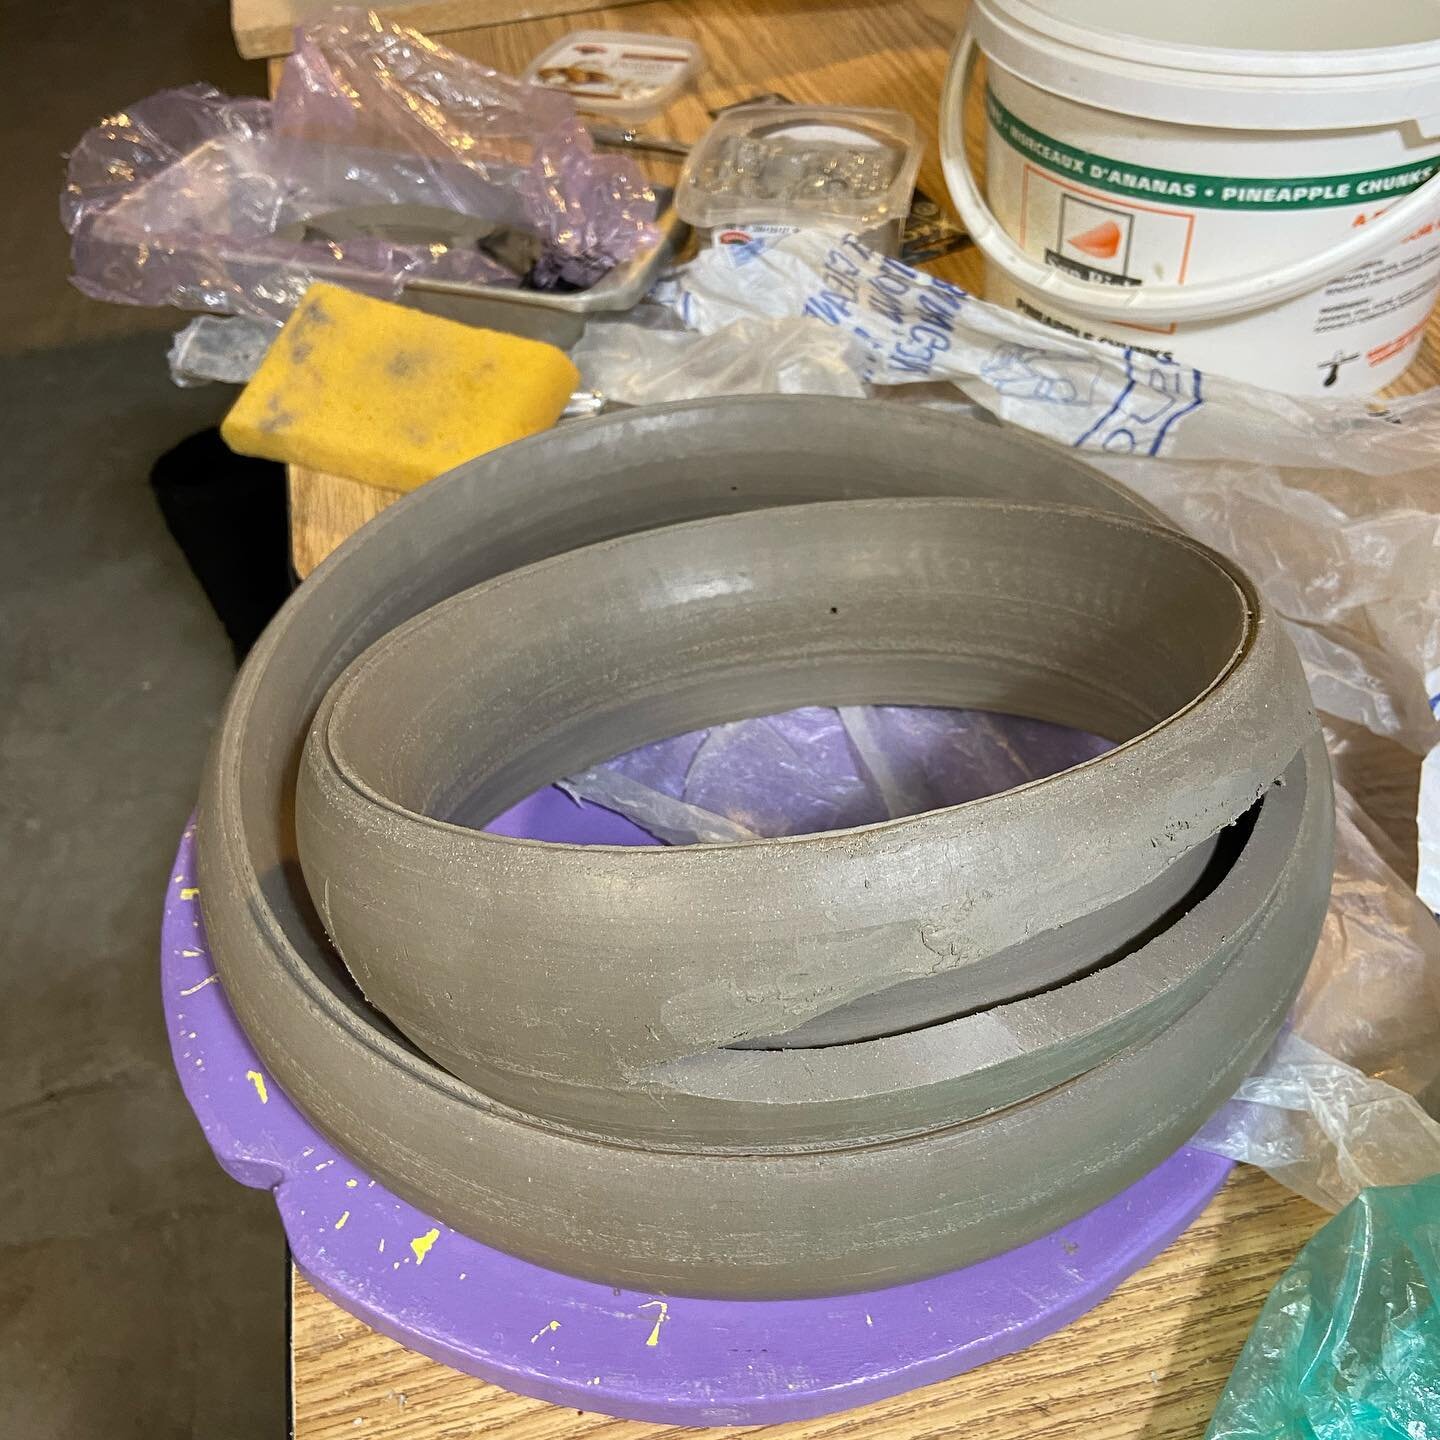
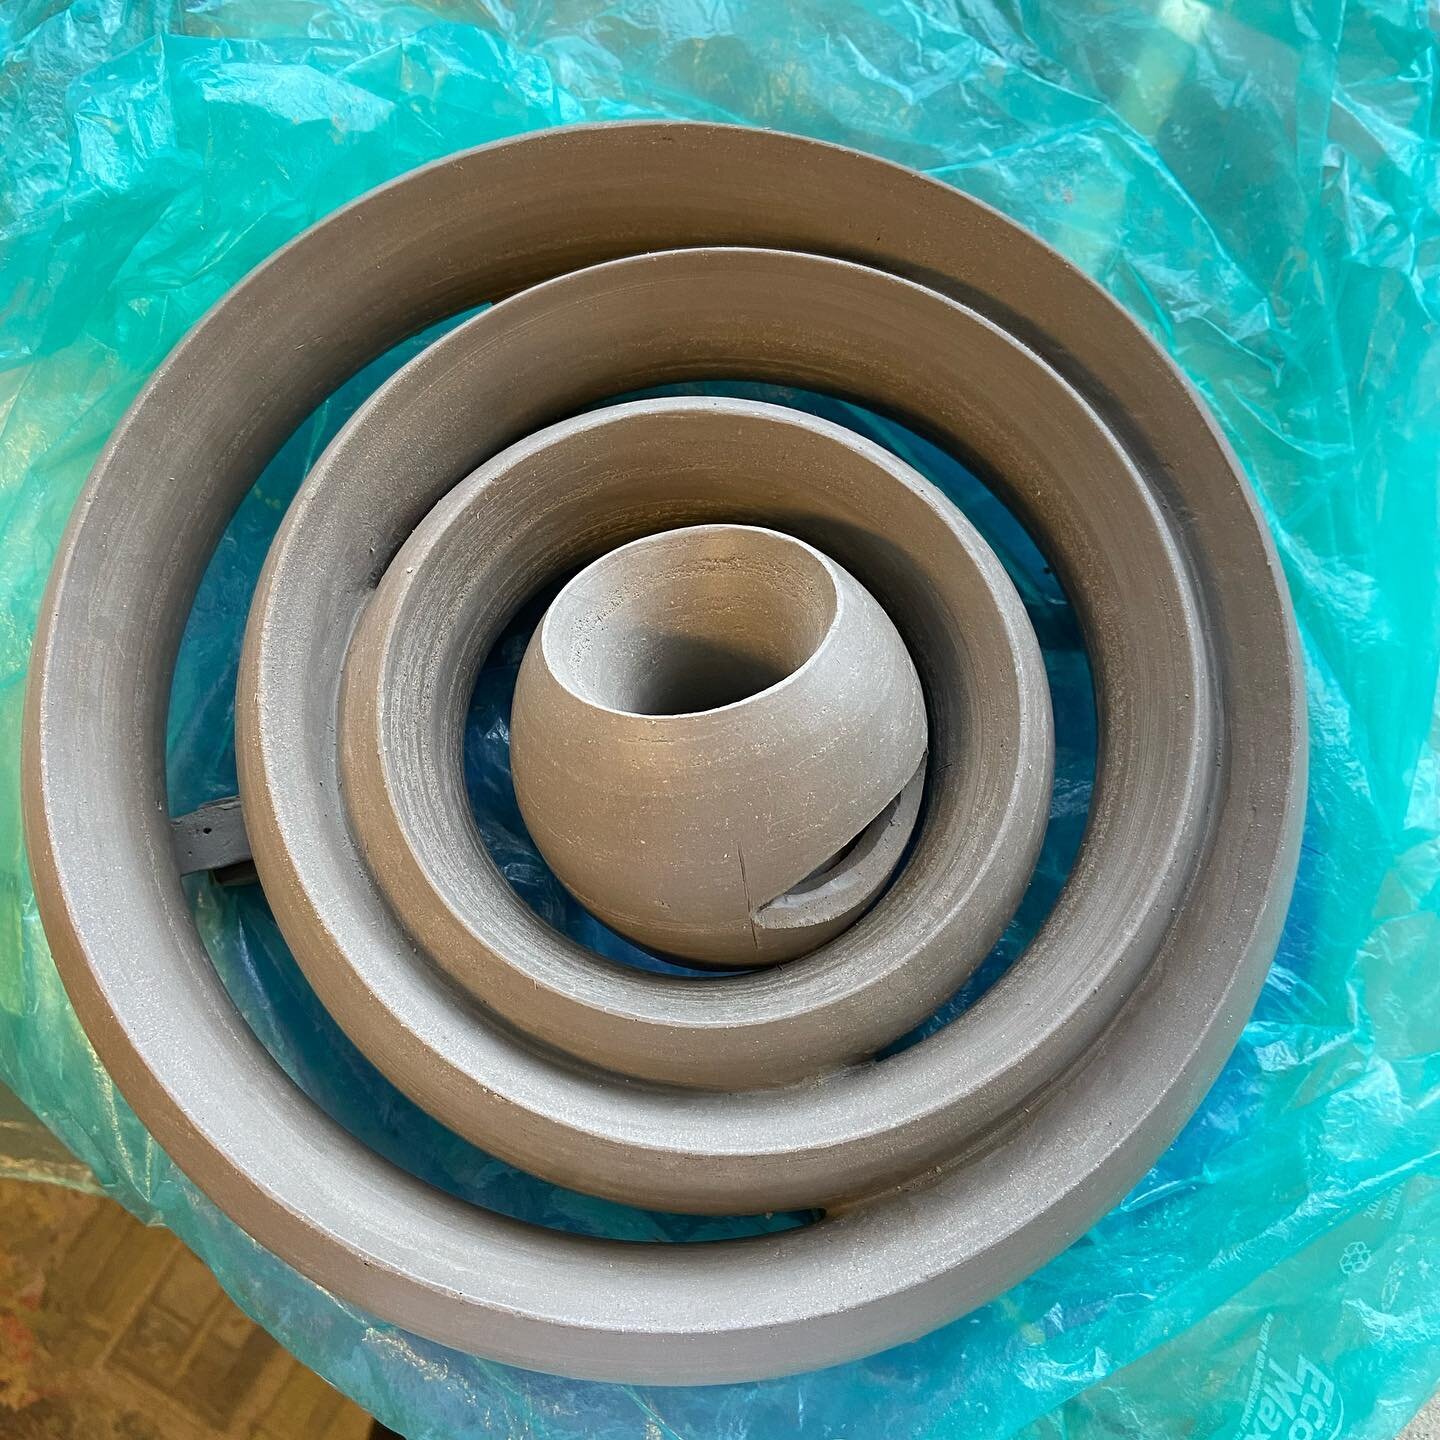
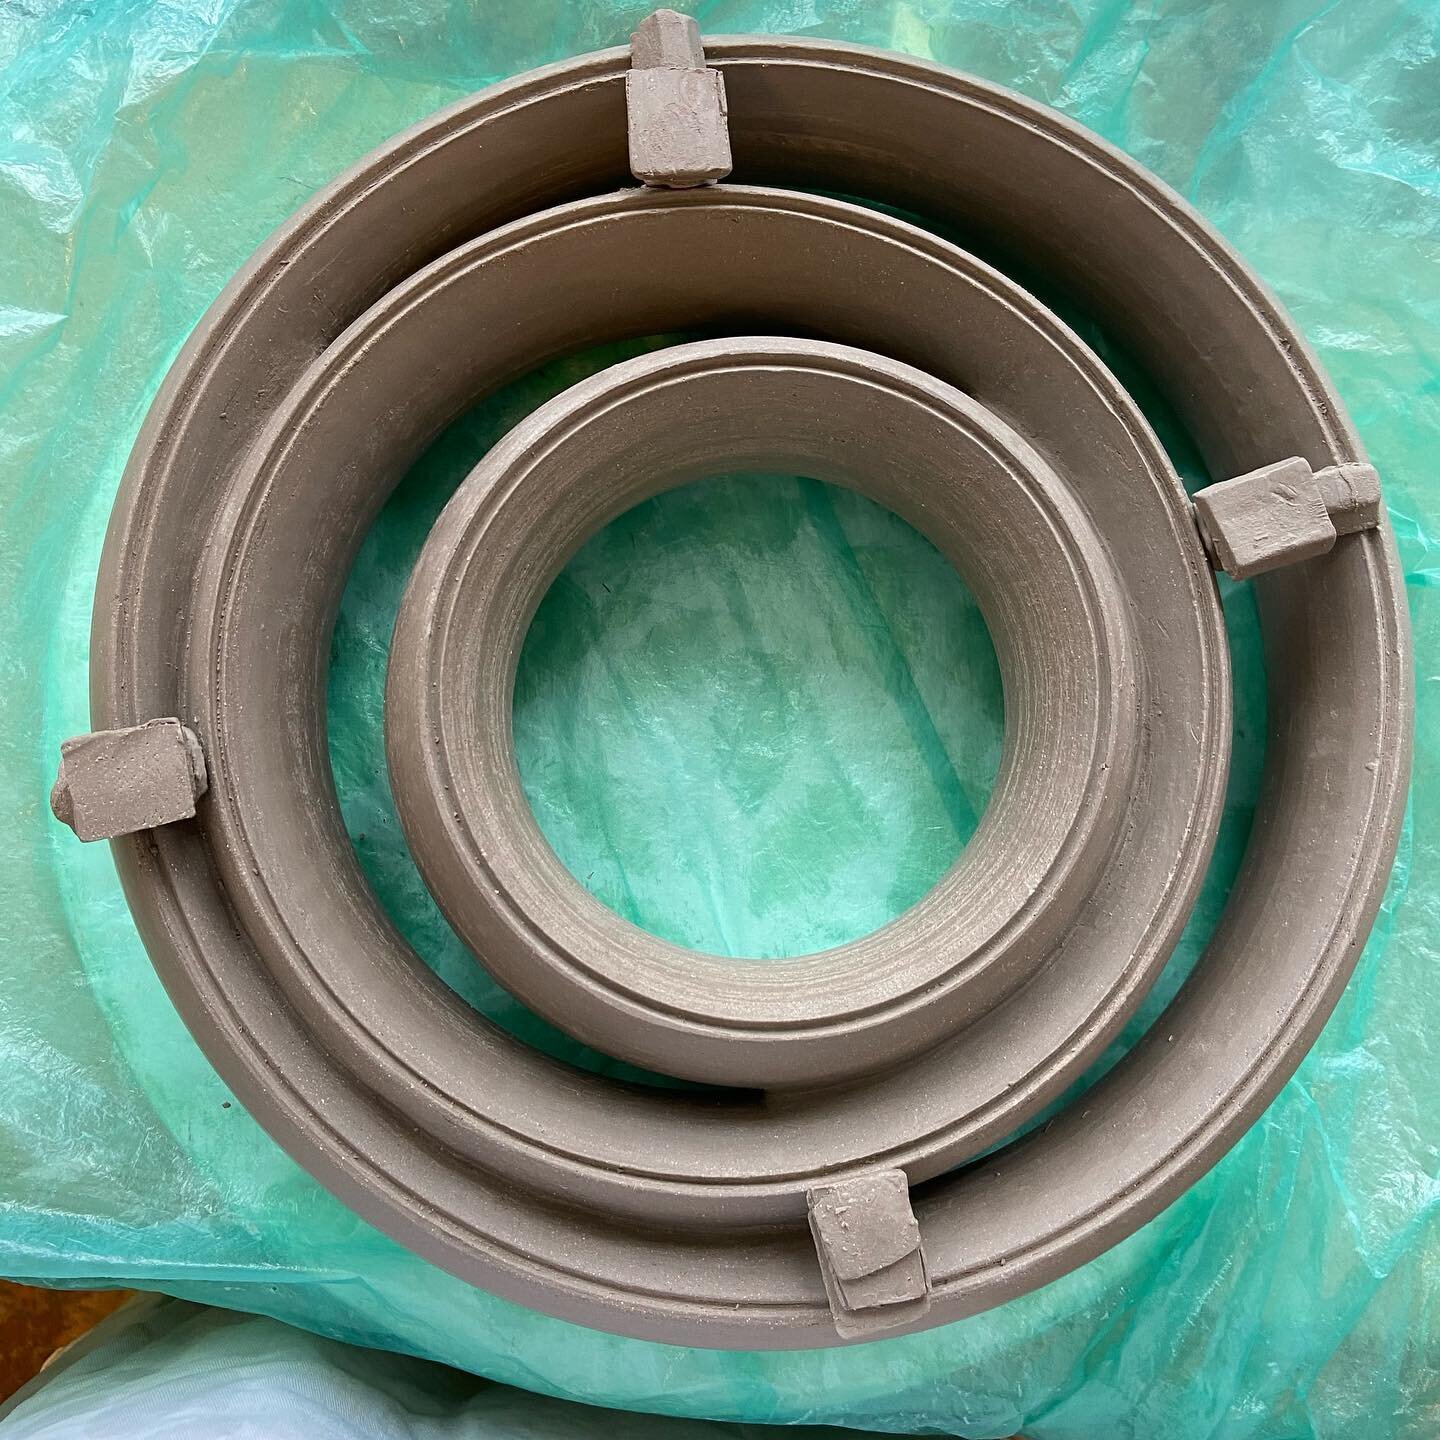
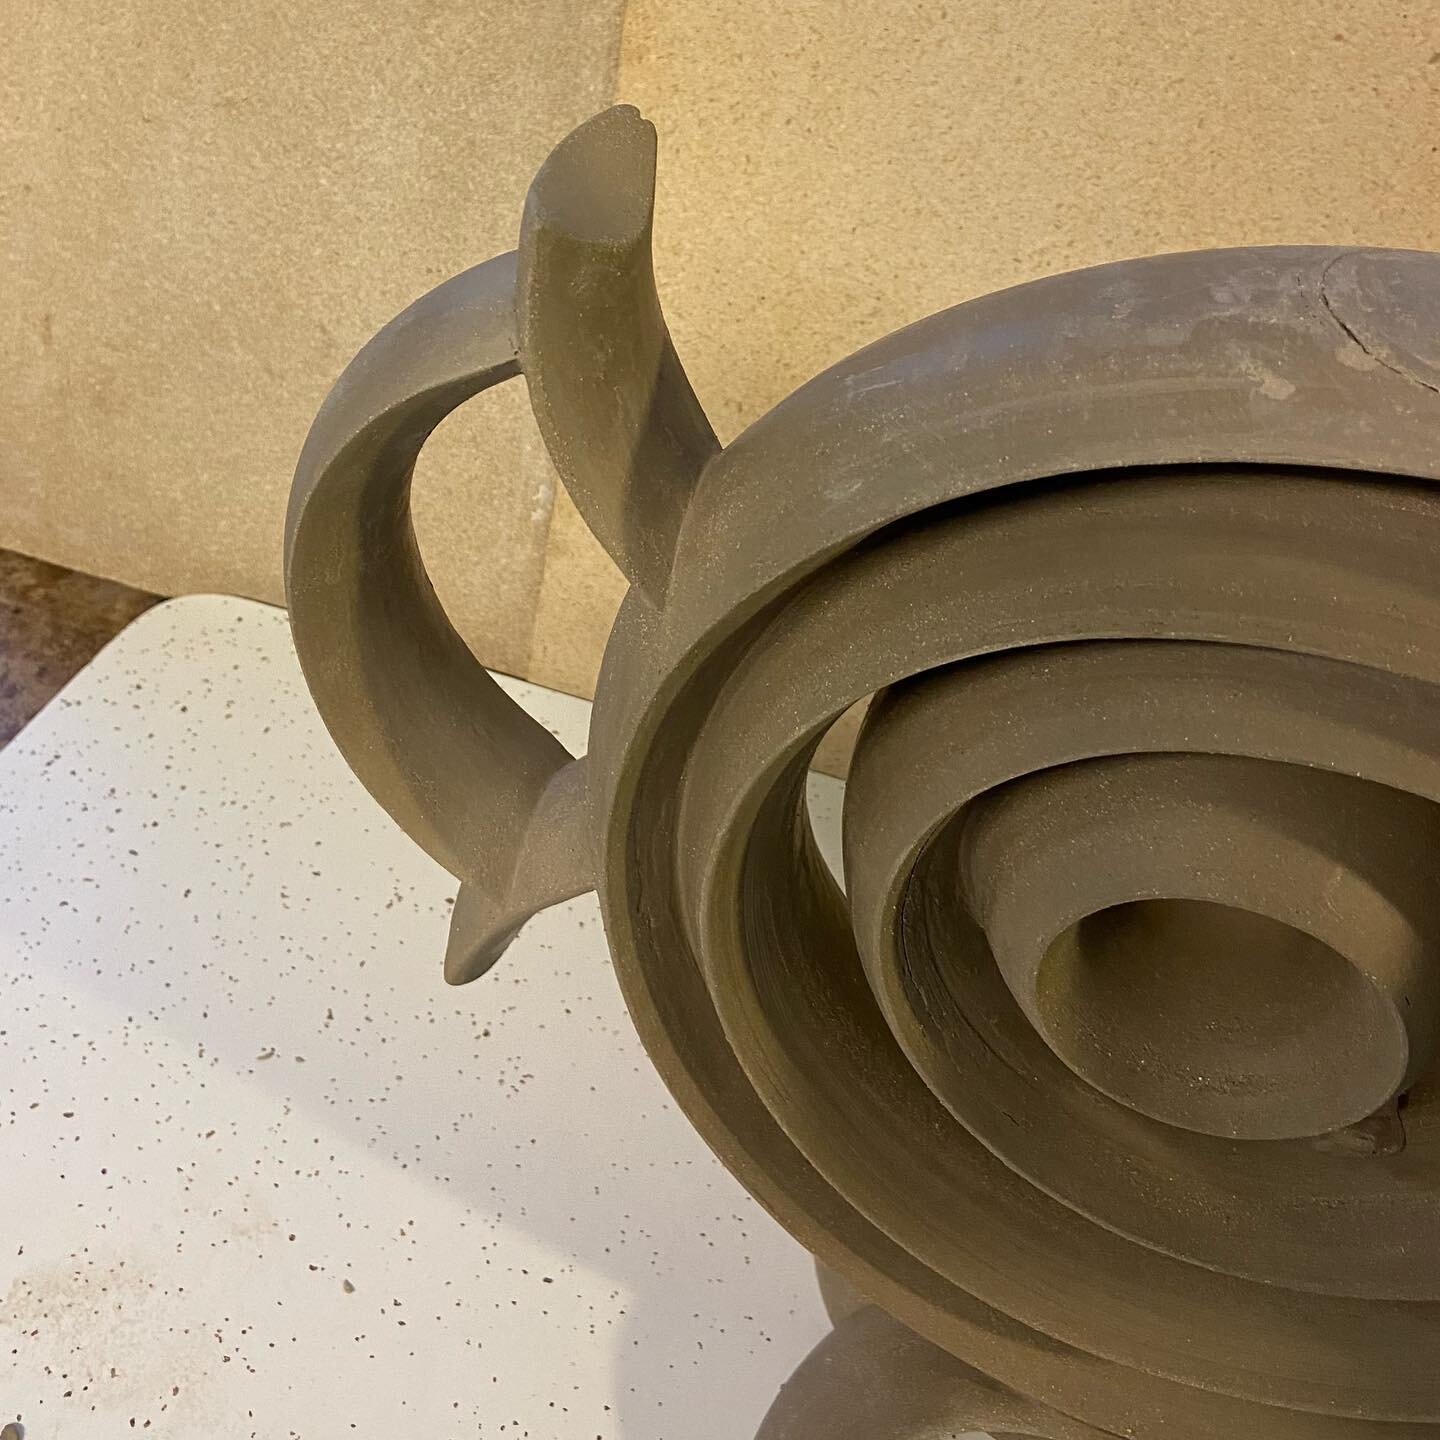
More rings made this afternoon, 2/04/21 for my new Teapot. The larger ones are hollow, the two smaller ones are solid. I don’t know how they will go together yet. I always have a clear idea, and the final Teapot never comes out like I visualize it.


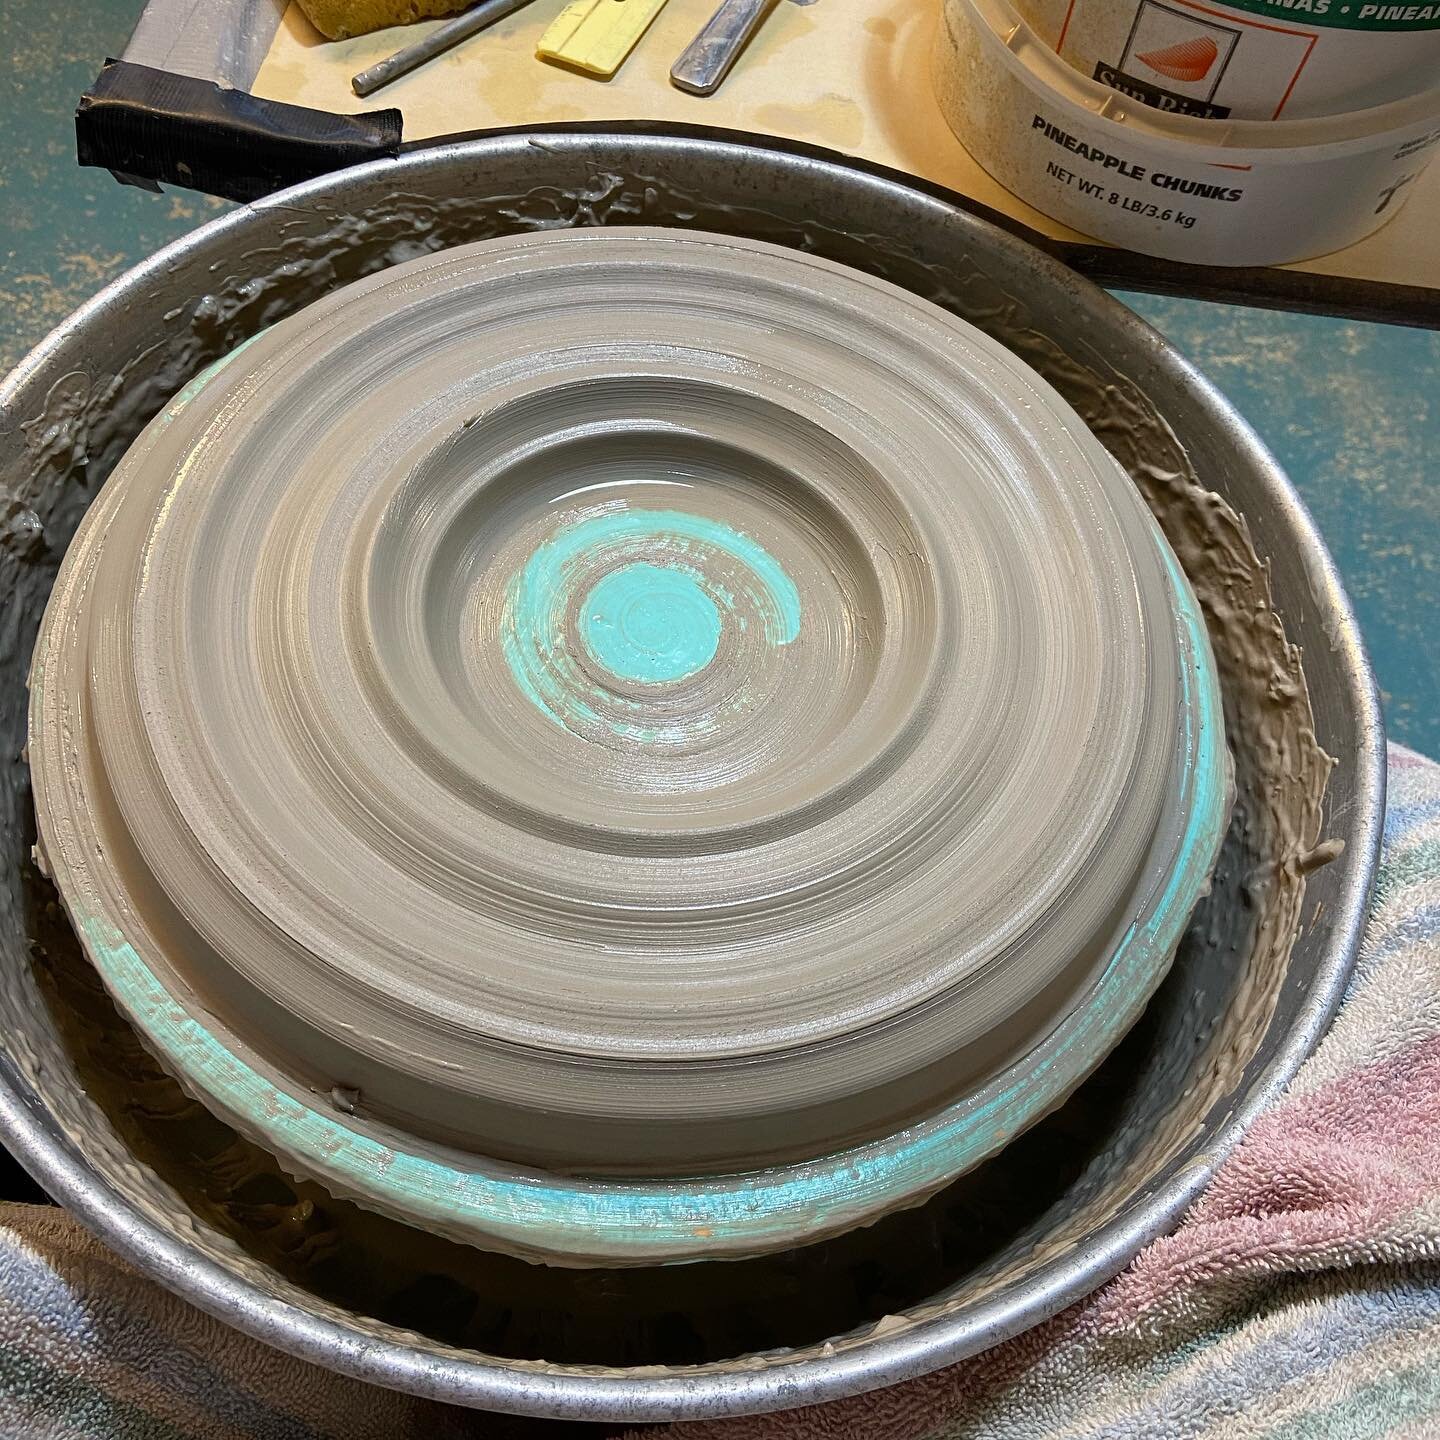
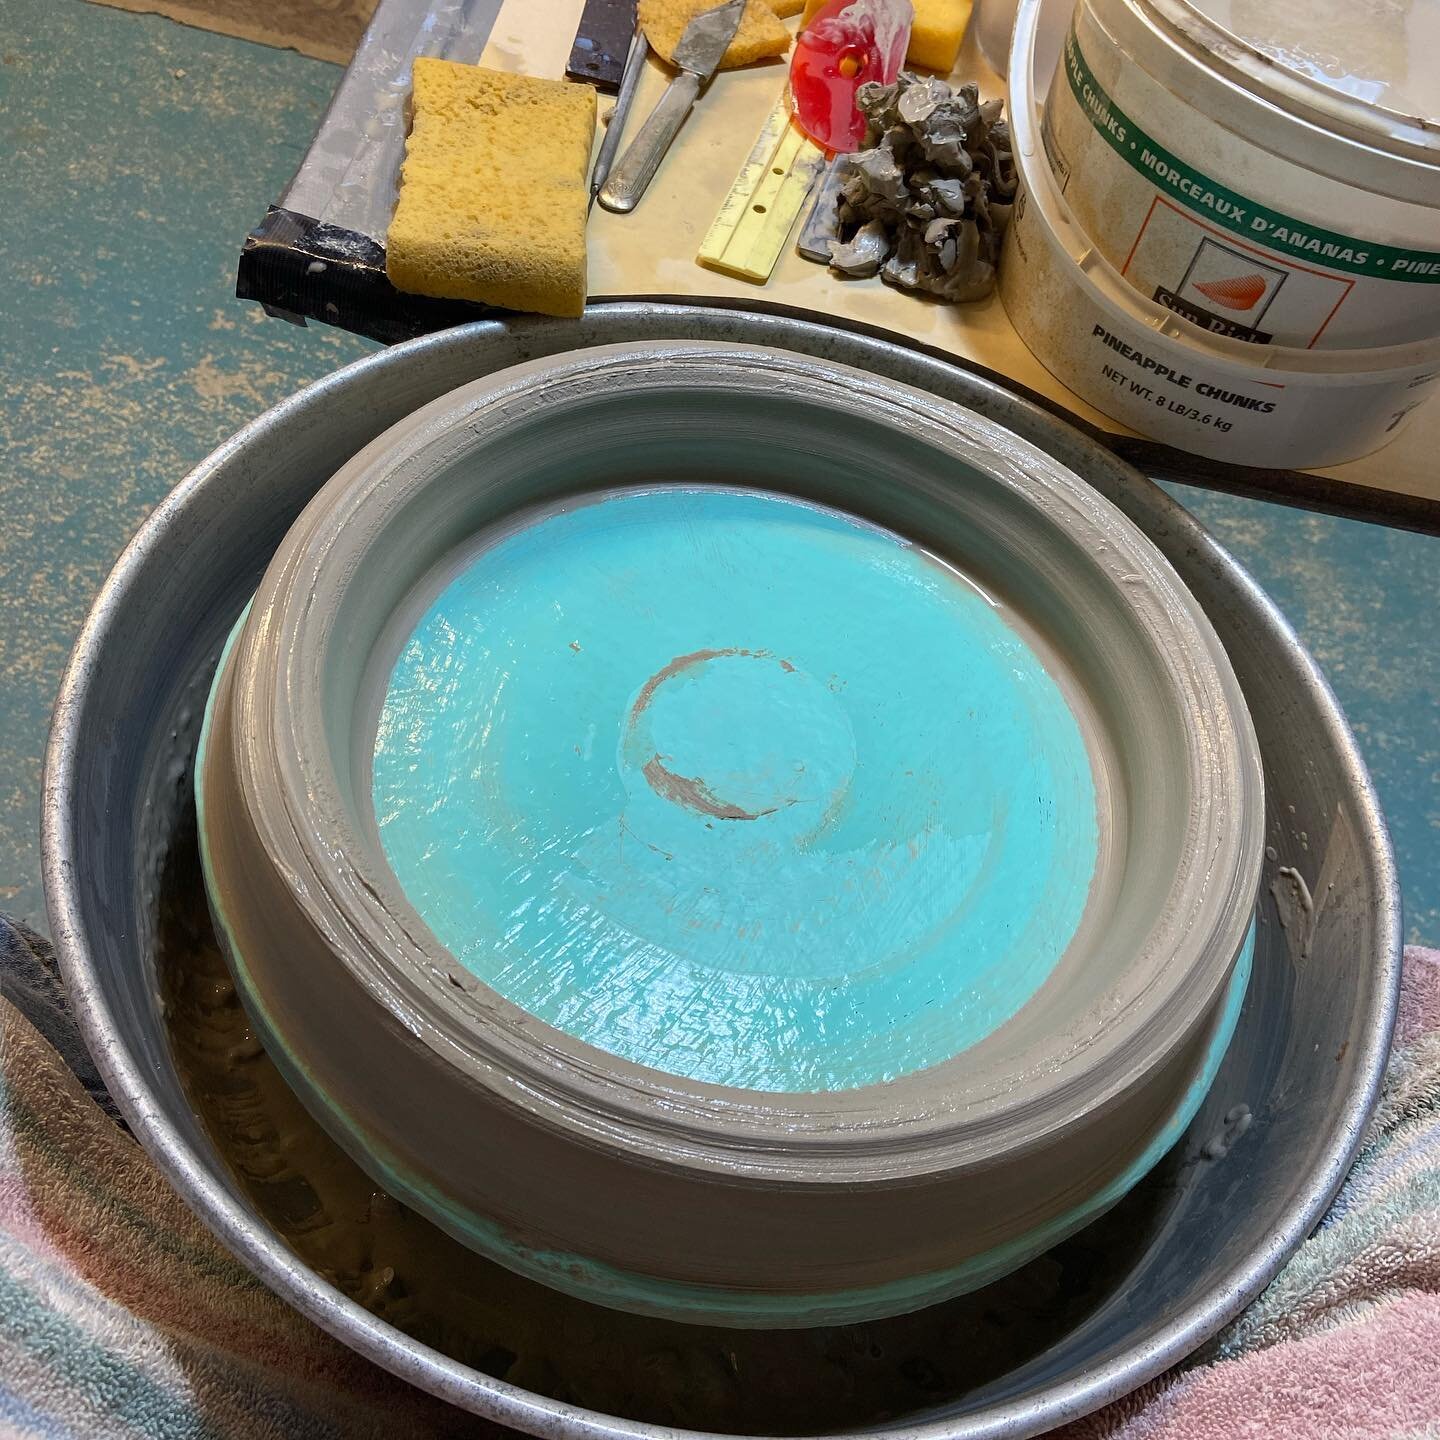
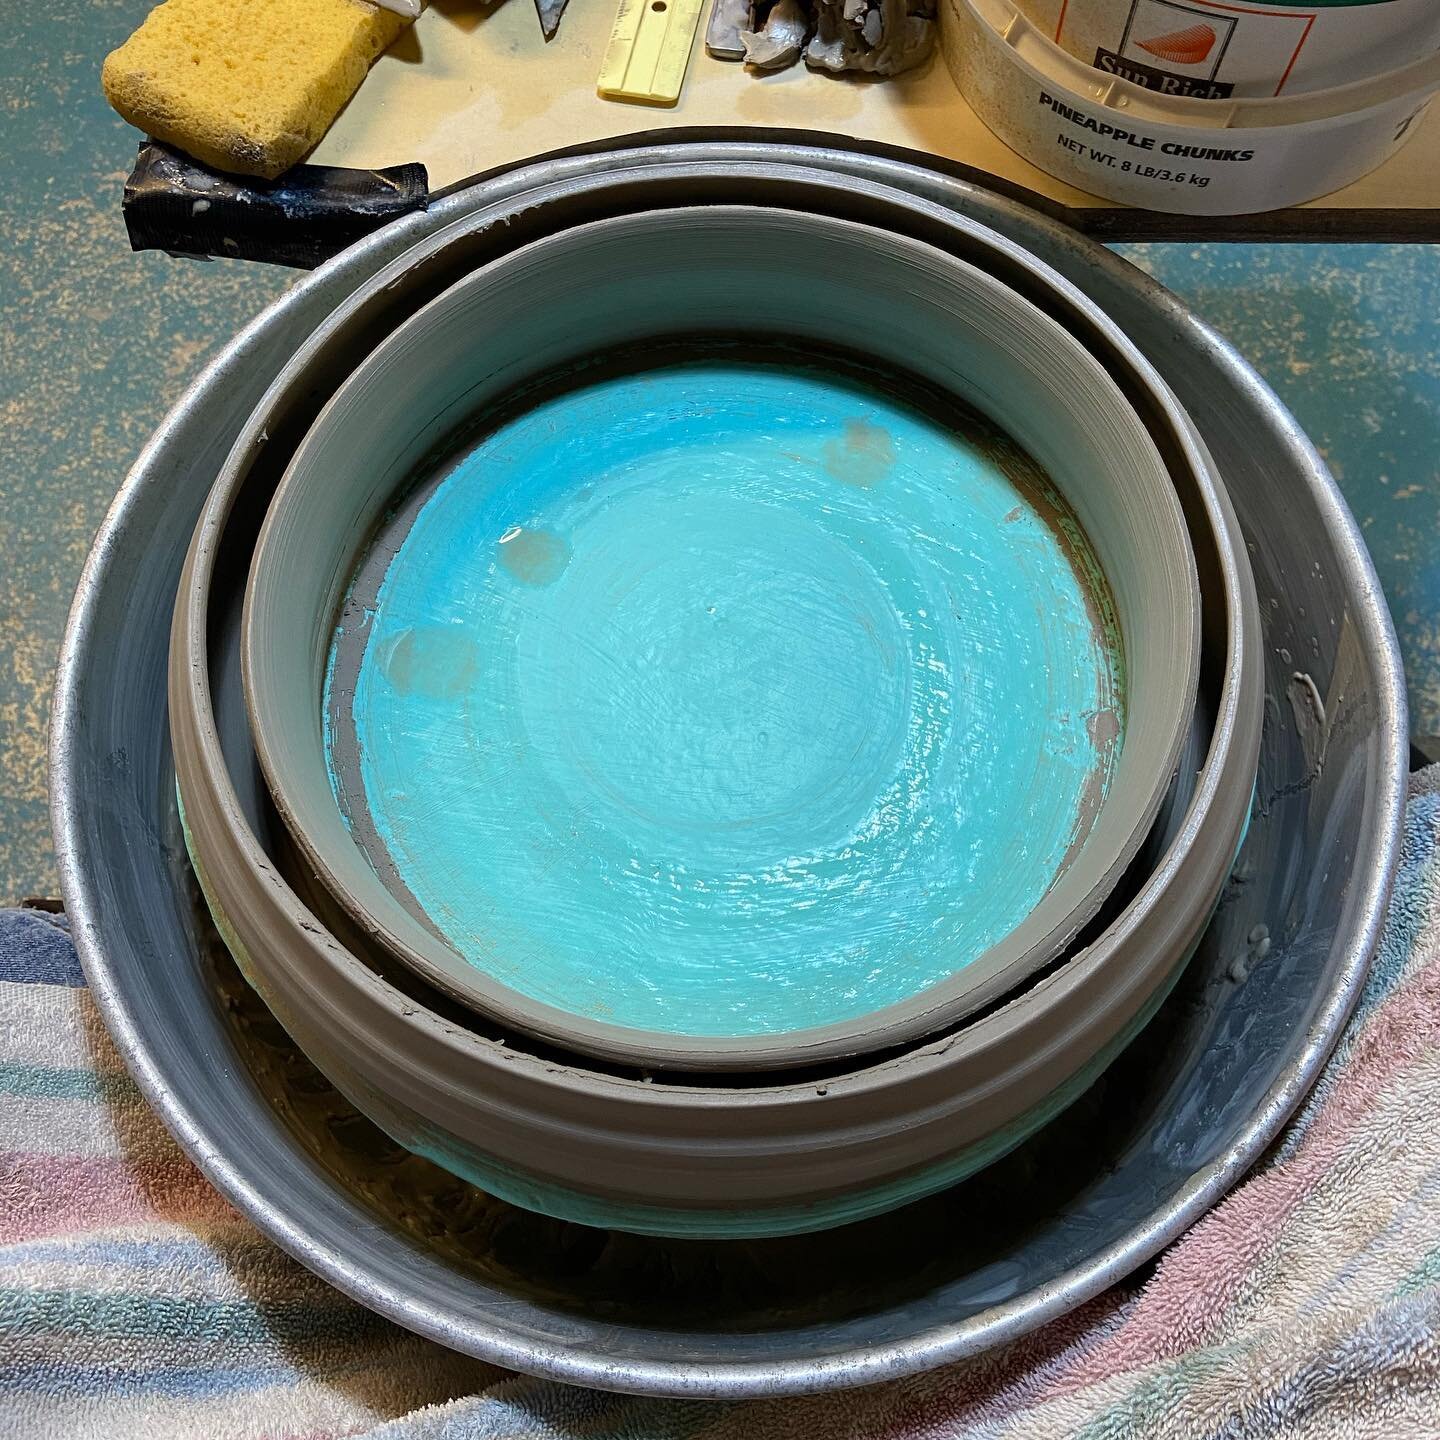
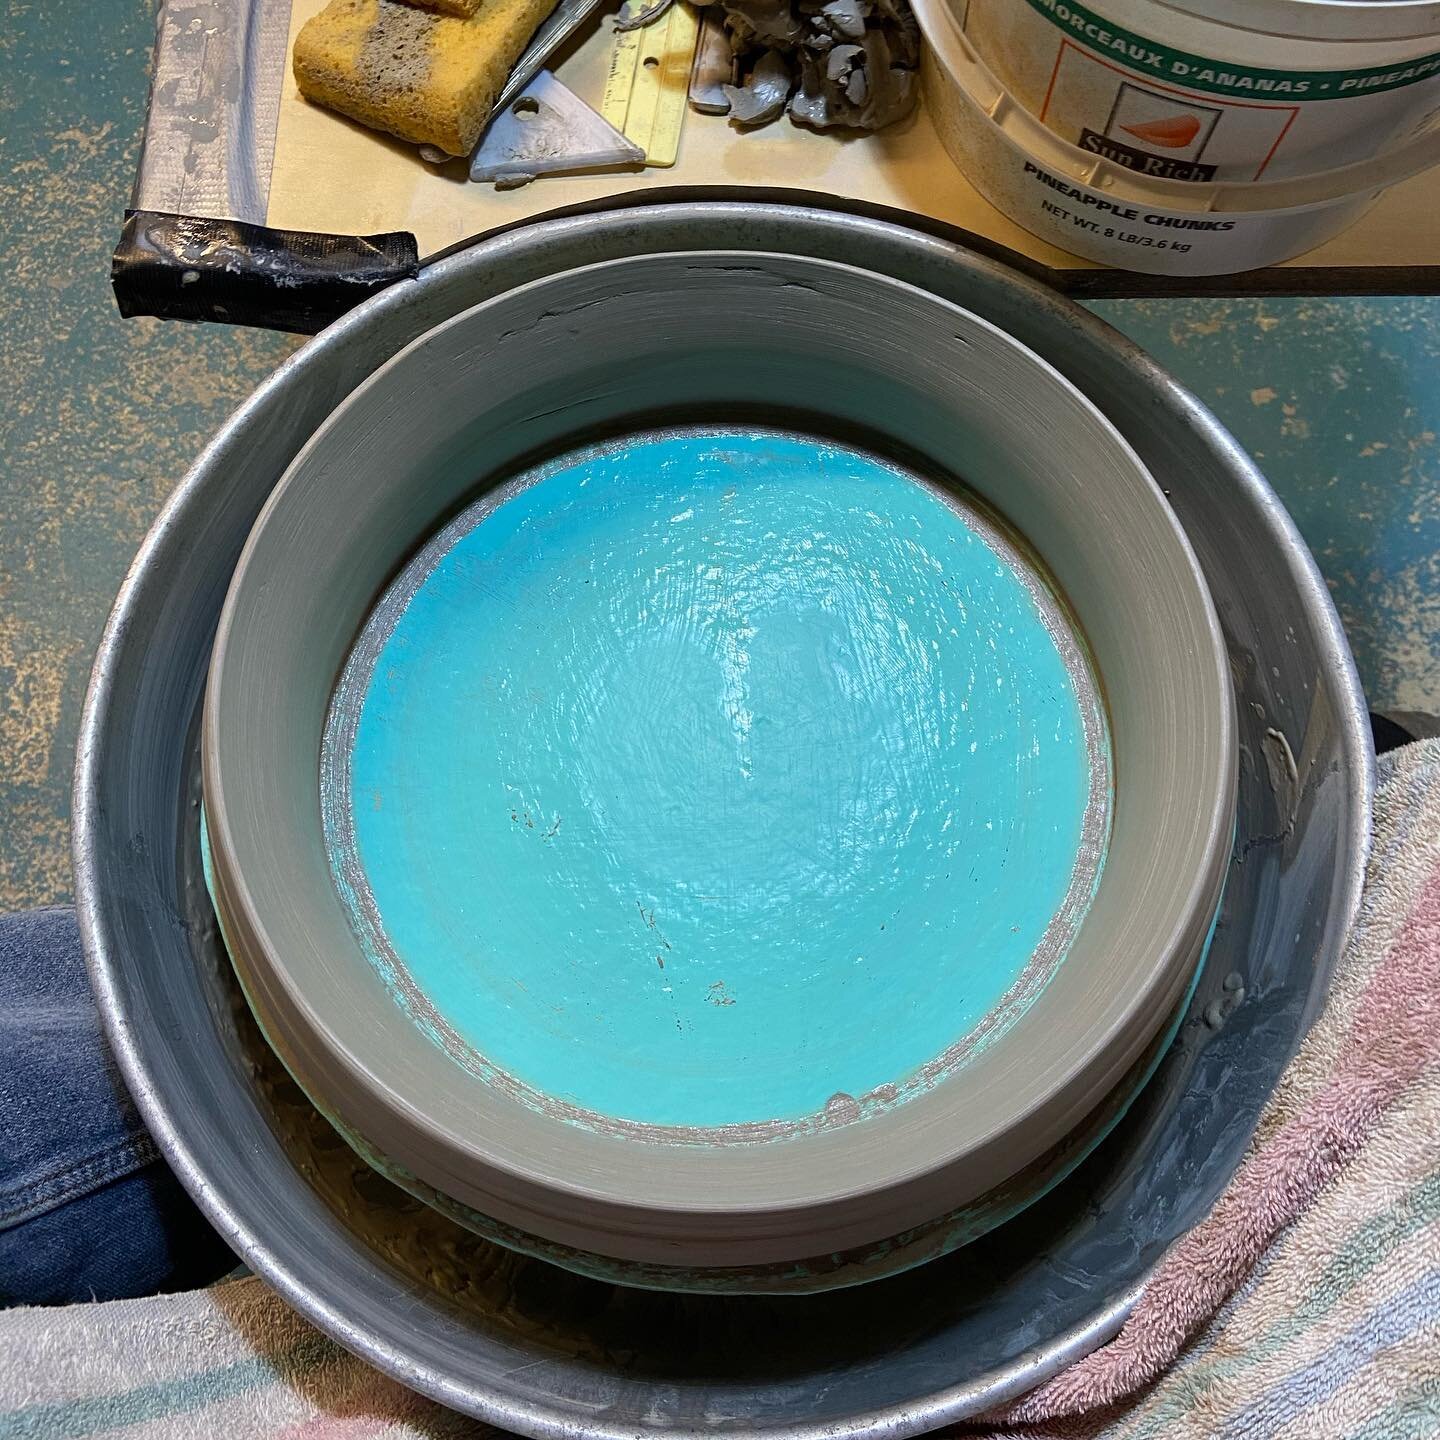
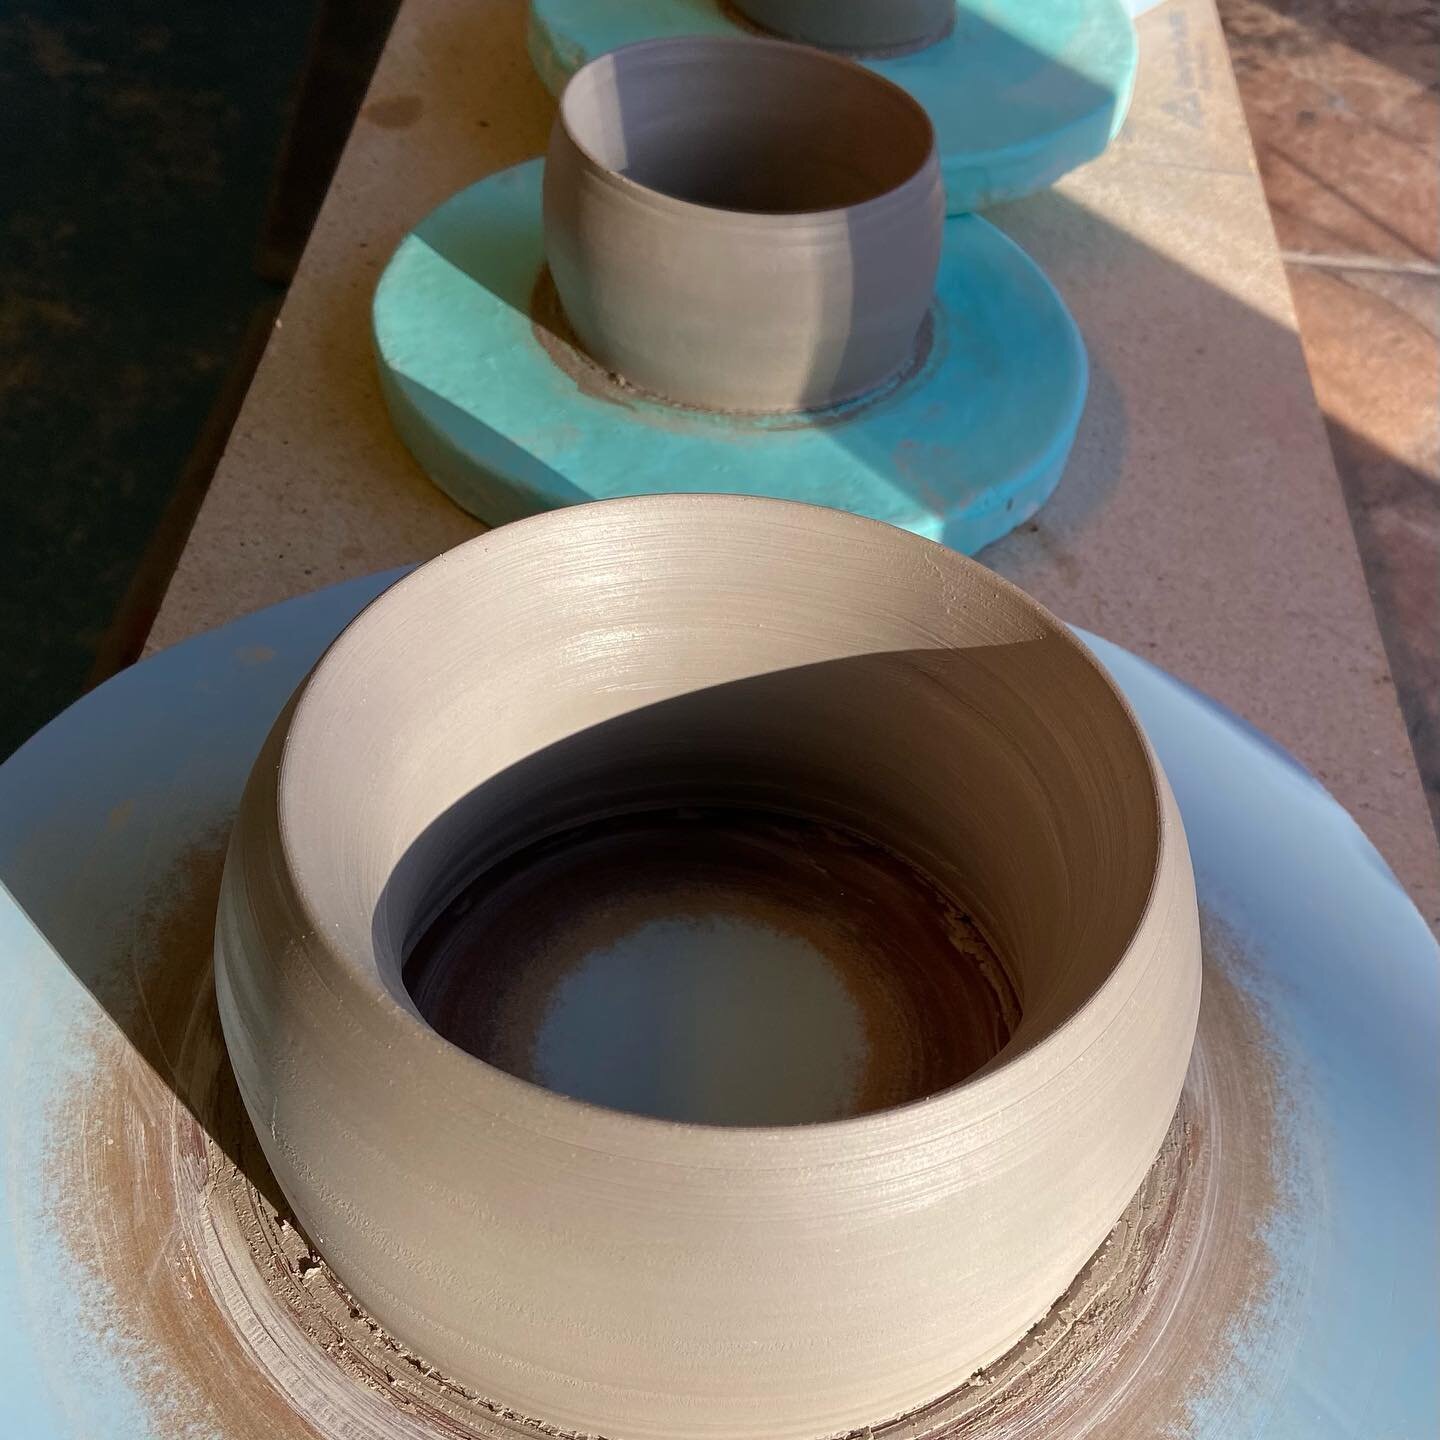
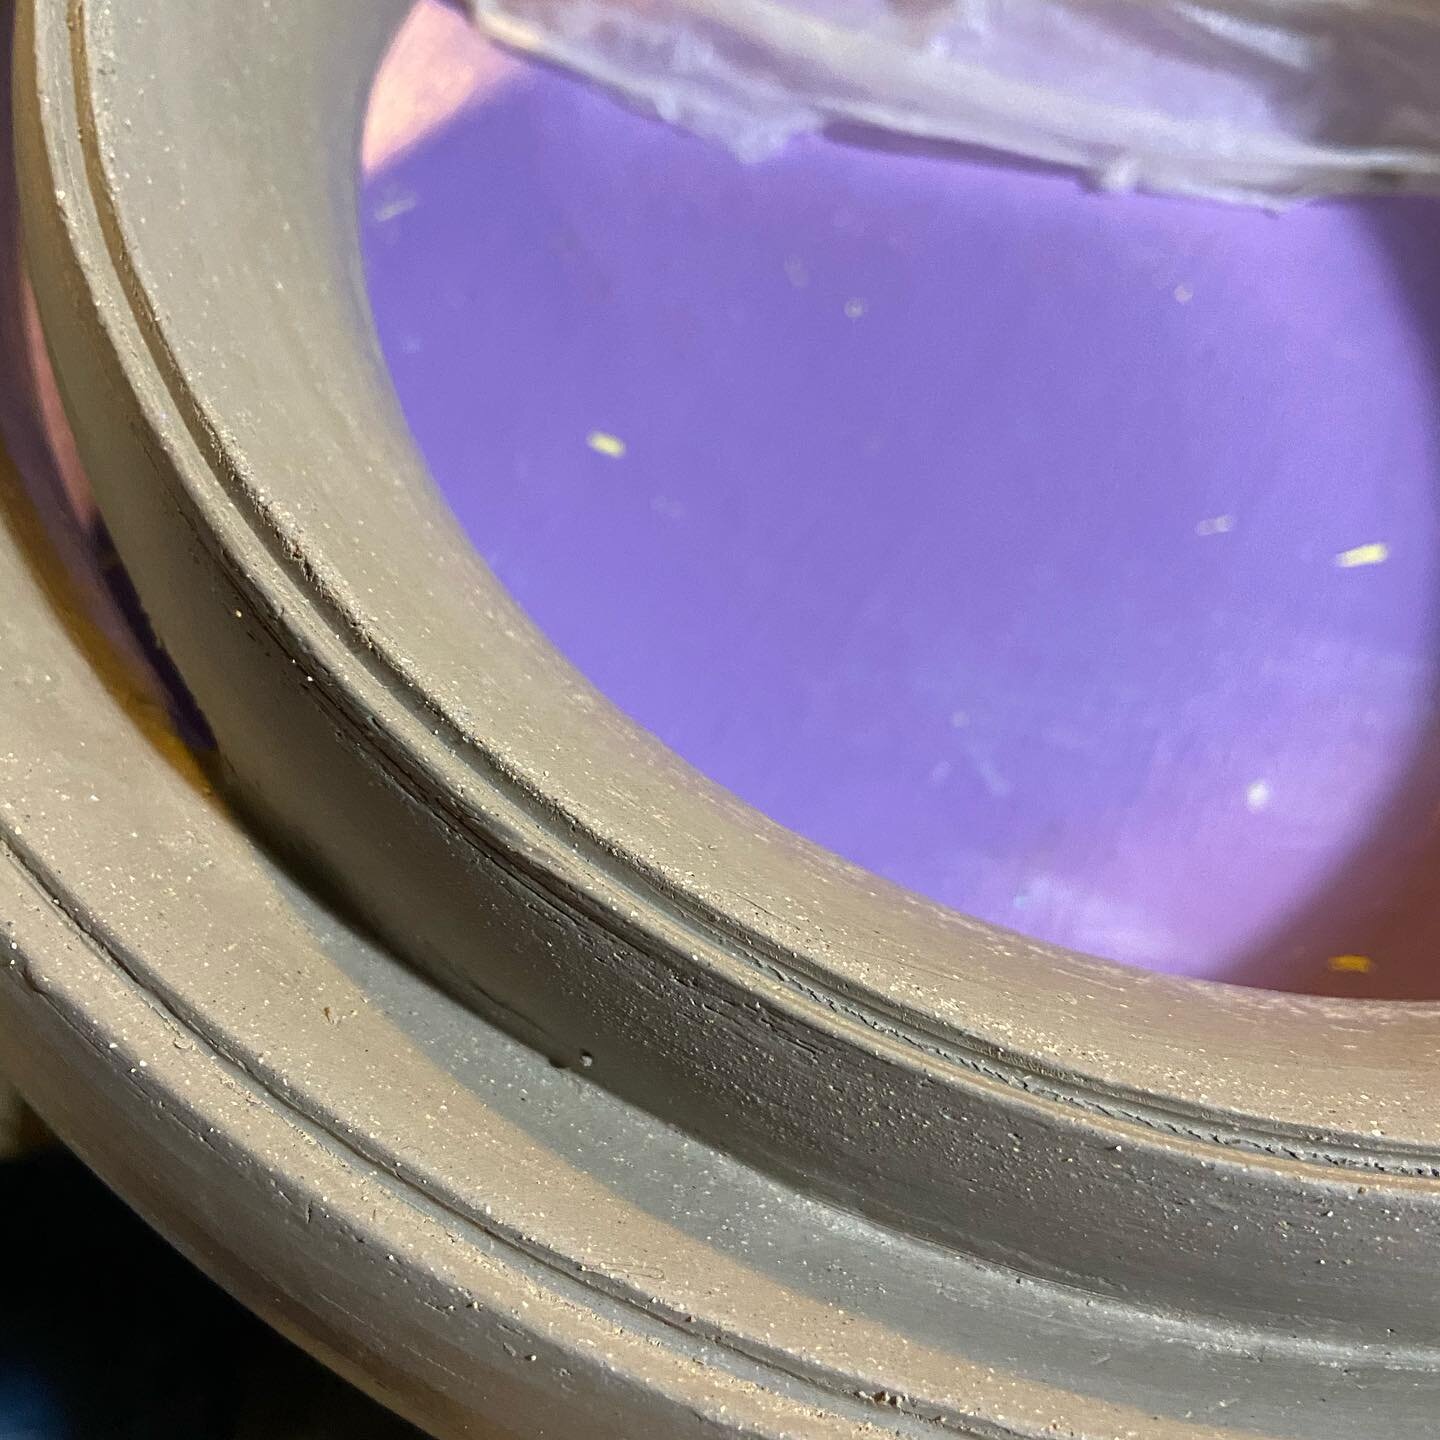
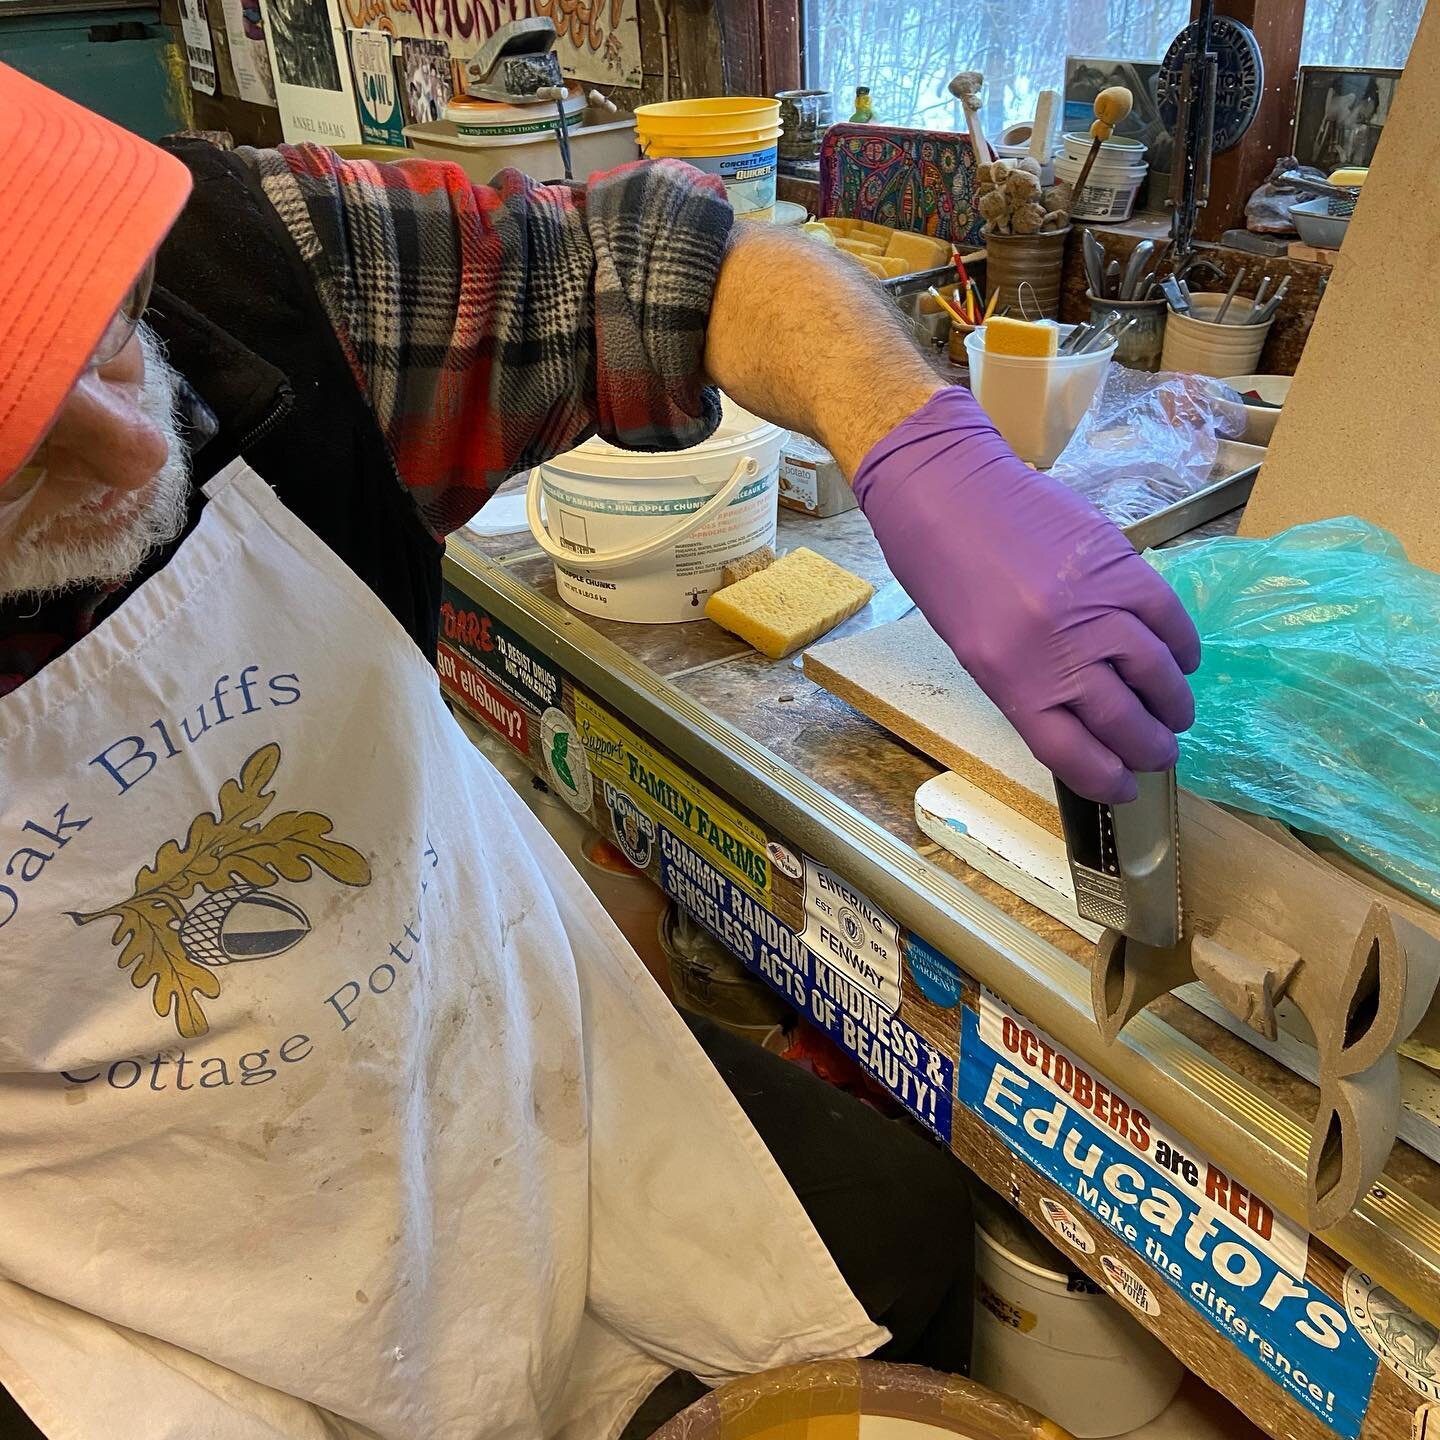
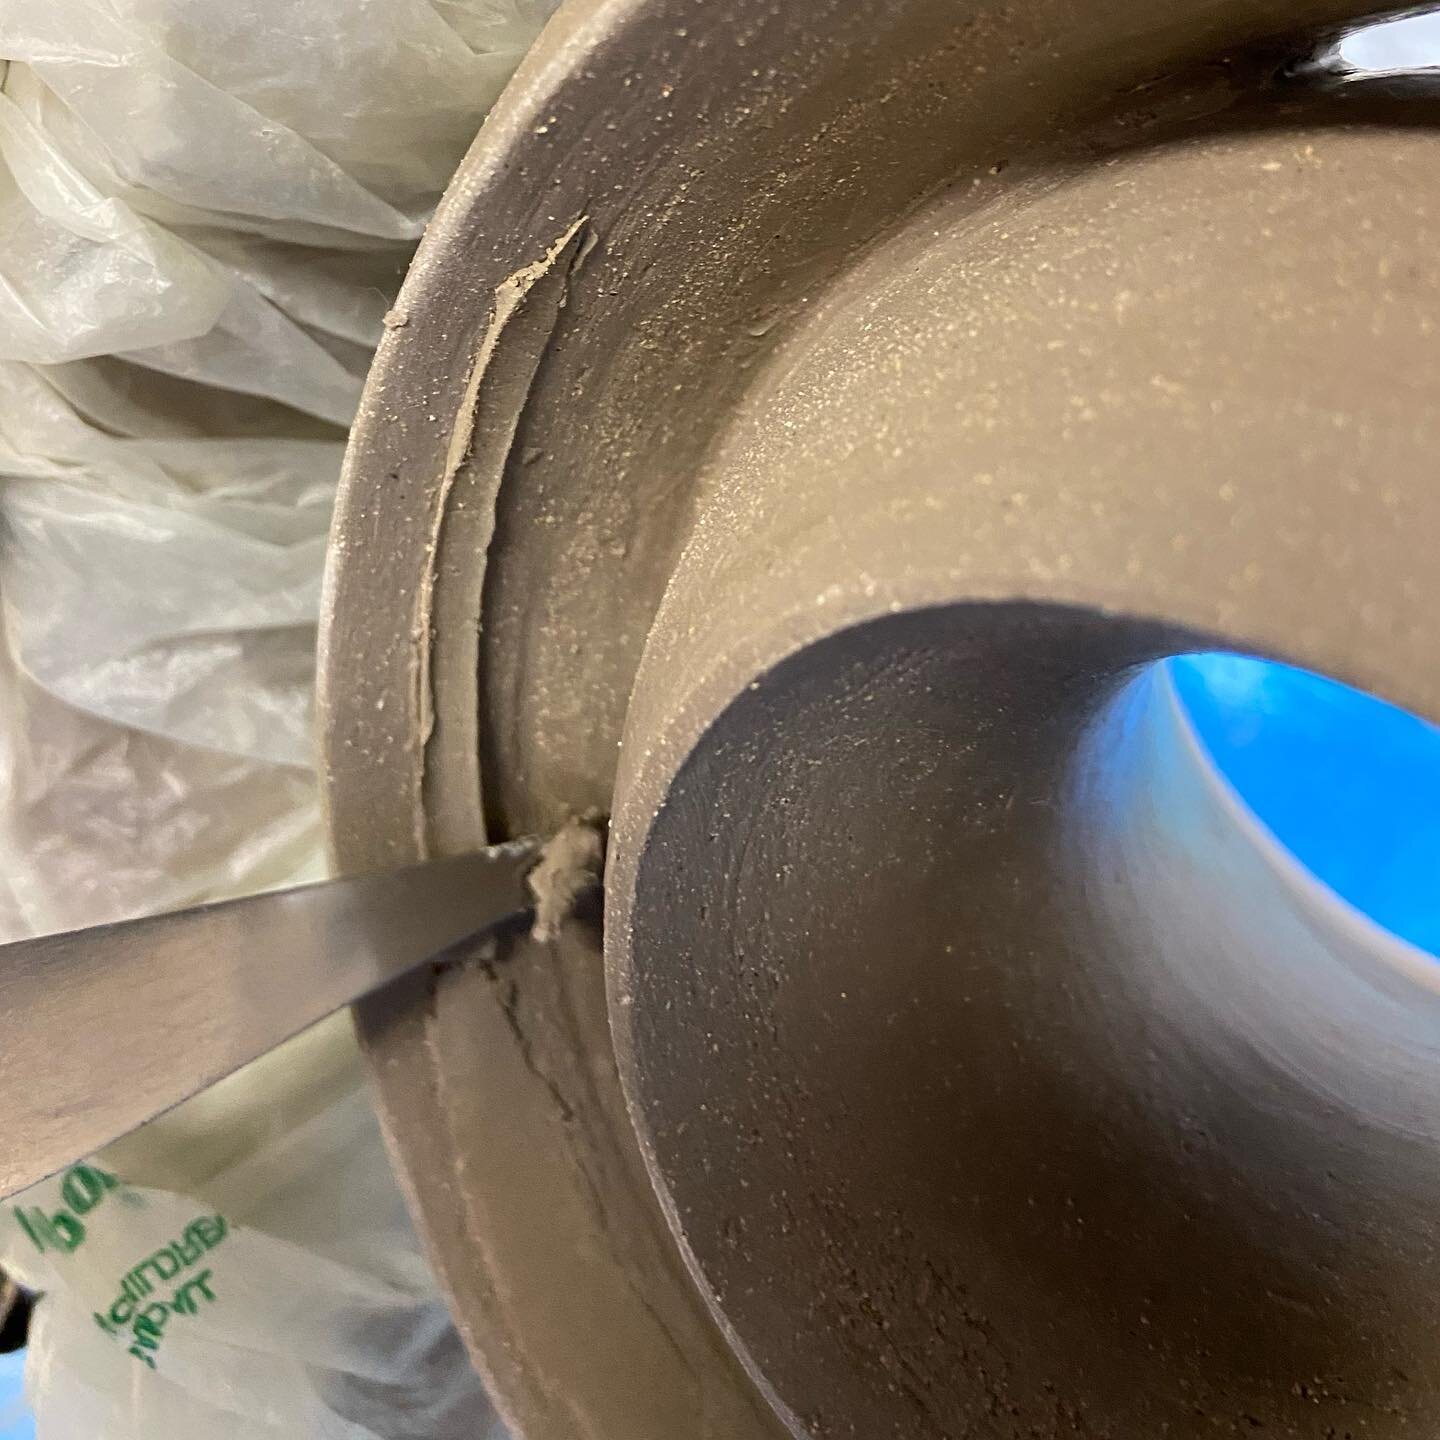
Trimming the bottom side of the hollow ring where it touched the bat. I can’t see inside the closed ring so I am relying on my memory of where I left extra clay thickness to support the shape, and am hoping to not trim through the ring wall. Smoothing the ring with the plastic rib, cutting the groove feature with the knife tool.


More rings. The flat base of the ring before trimming, small rings. Now I start assembling!


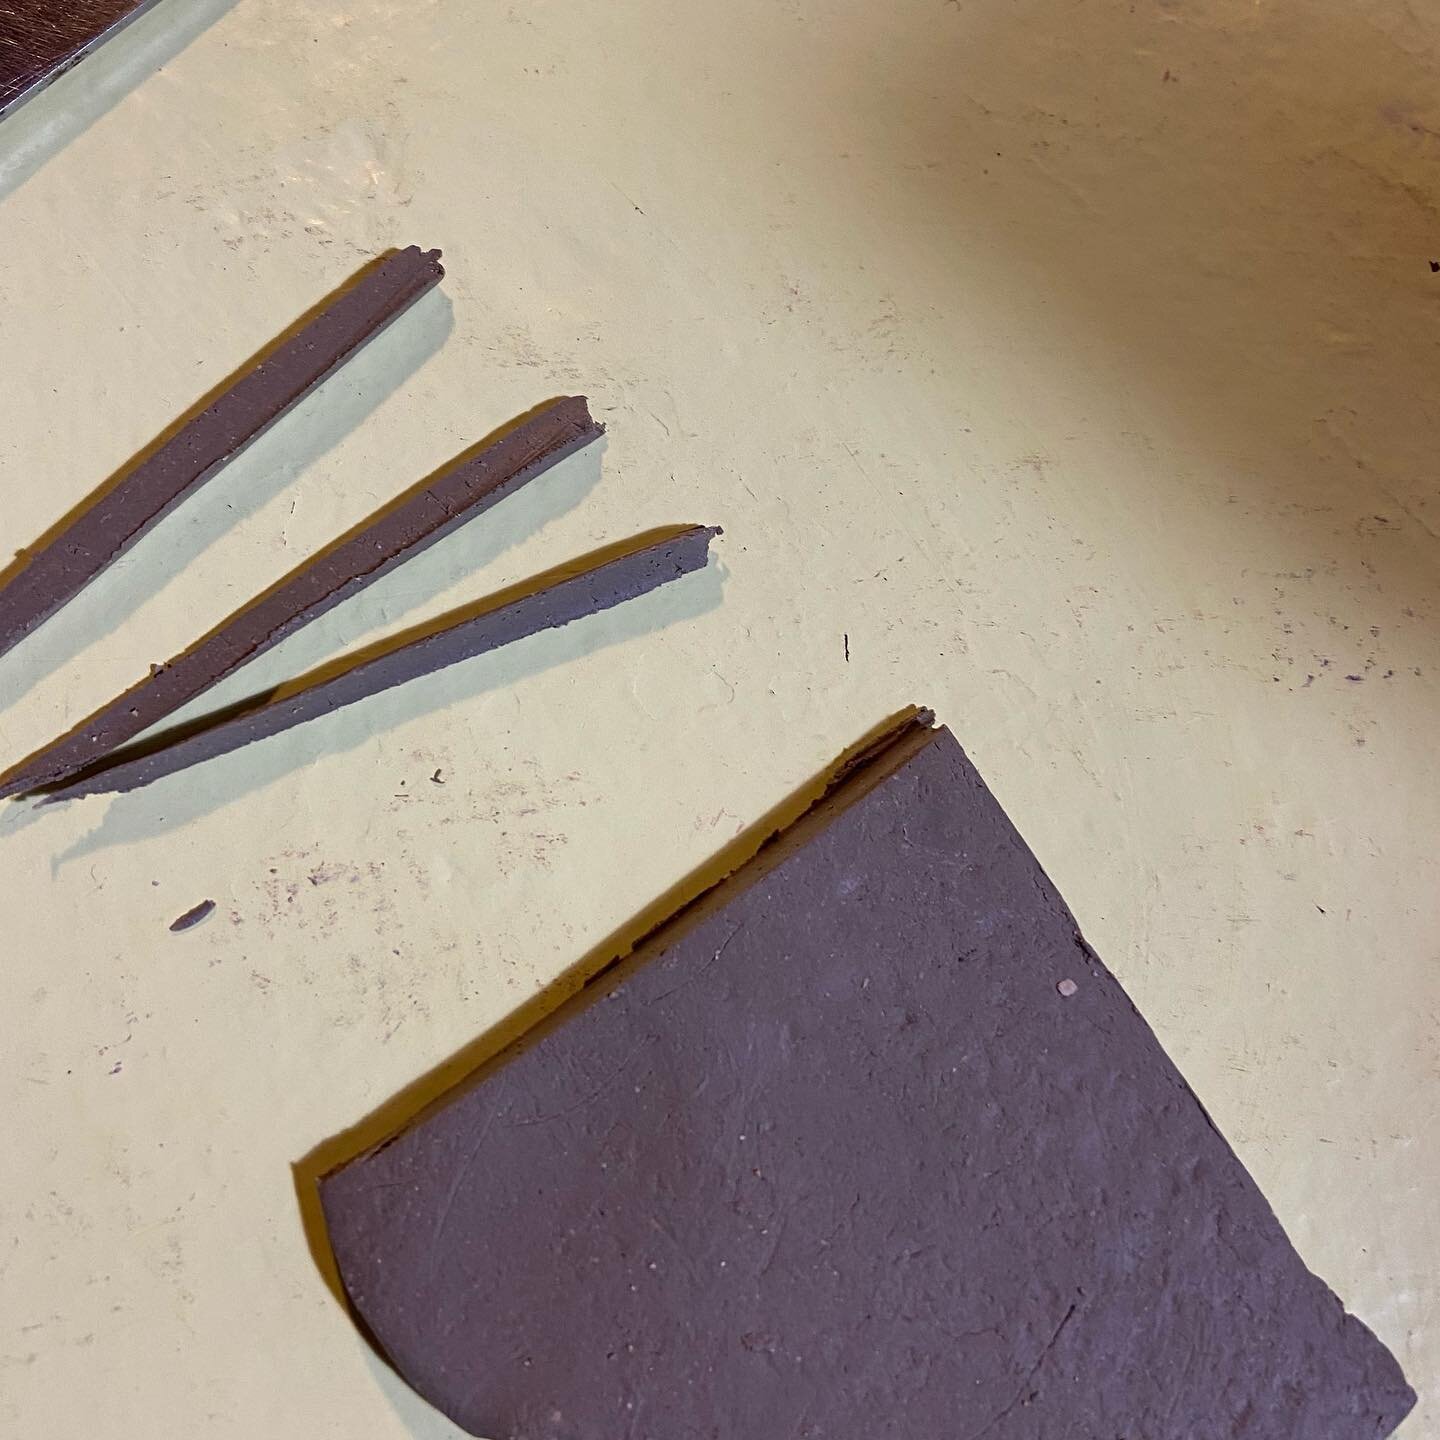
Both leather-hard rings to be bonded have mating cutouts so the hollow teapot rings share interior space for tea to flow. The cutouts don’t perfectly fit together––there are gaps. Then strips of the same hardness clay are jammed into the gaps along the cutouts. After that the bonded attachment zone surfaces are scraped clean. The last picture shows the third ring to be attached inside, not yet cutout for bonding.
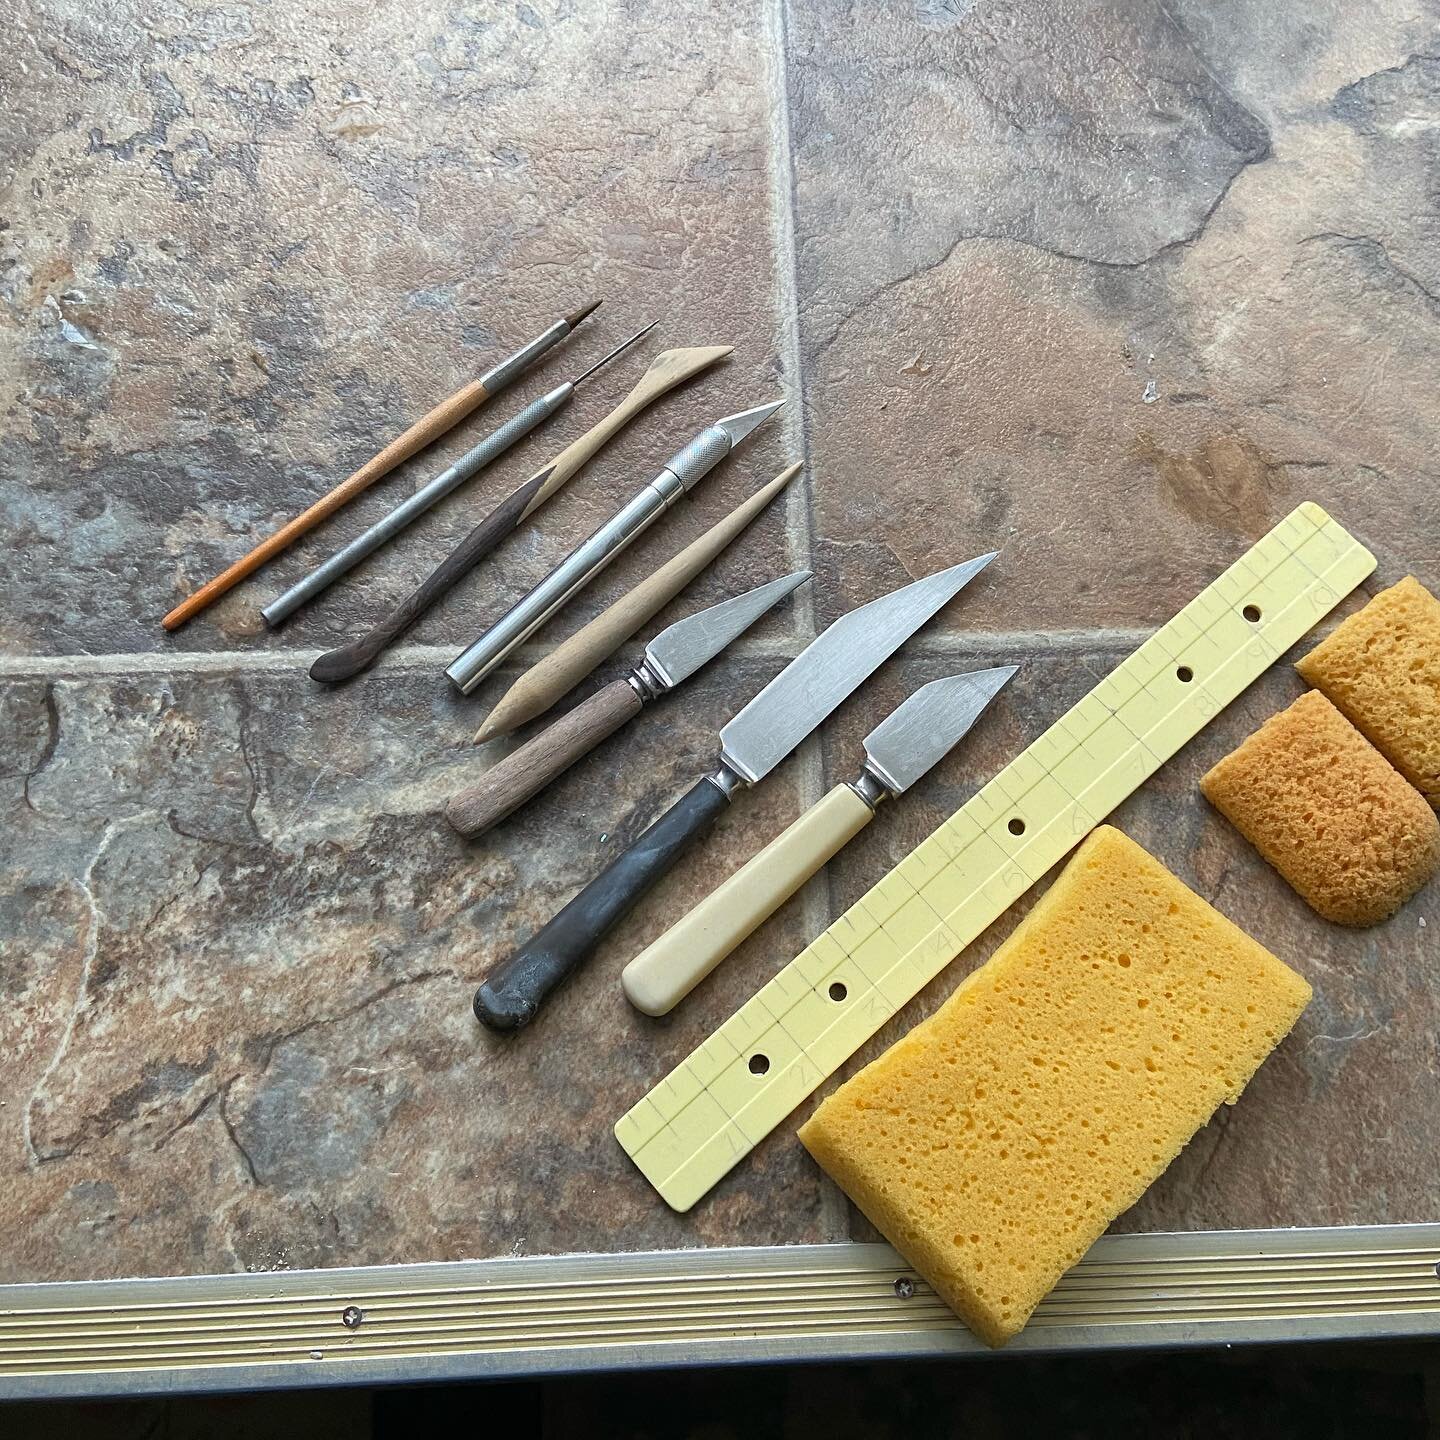

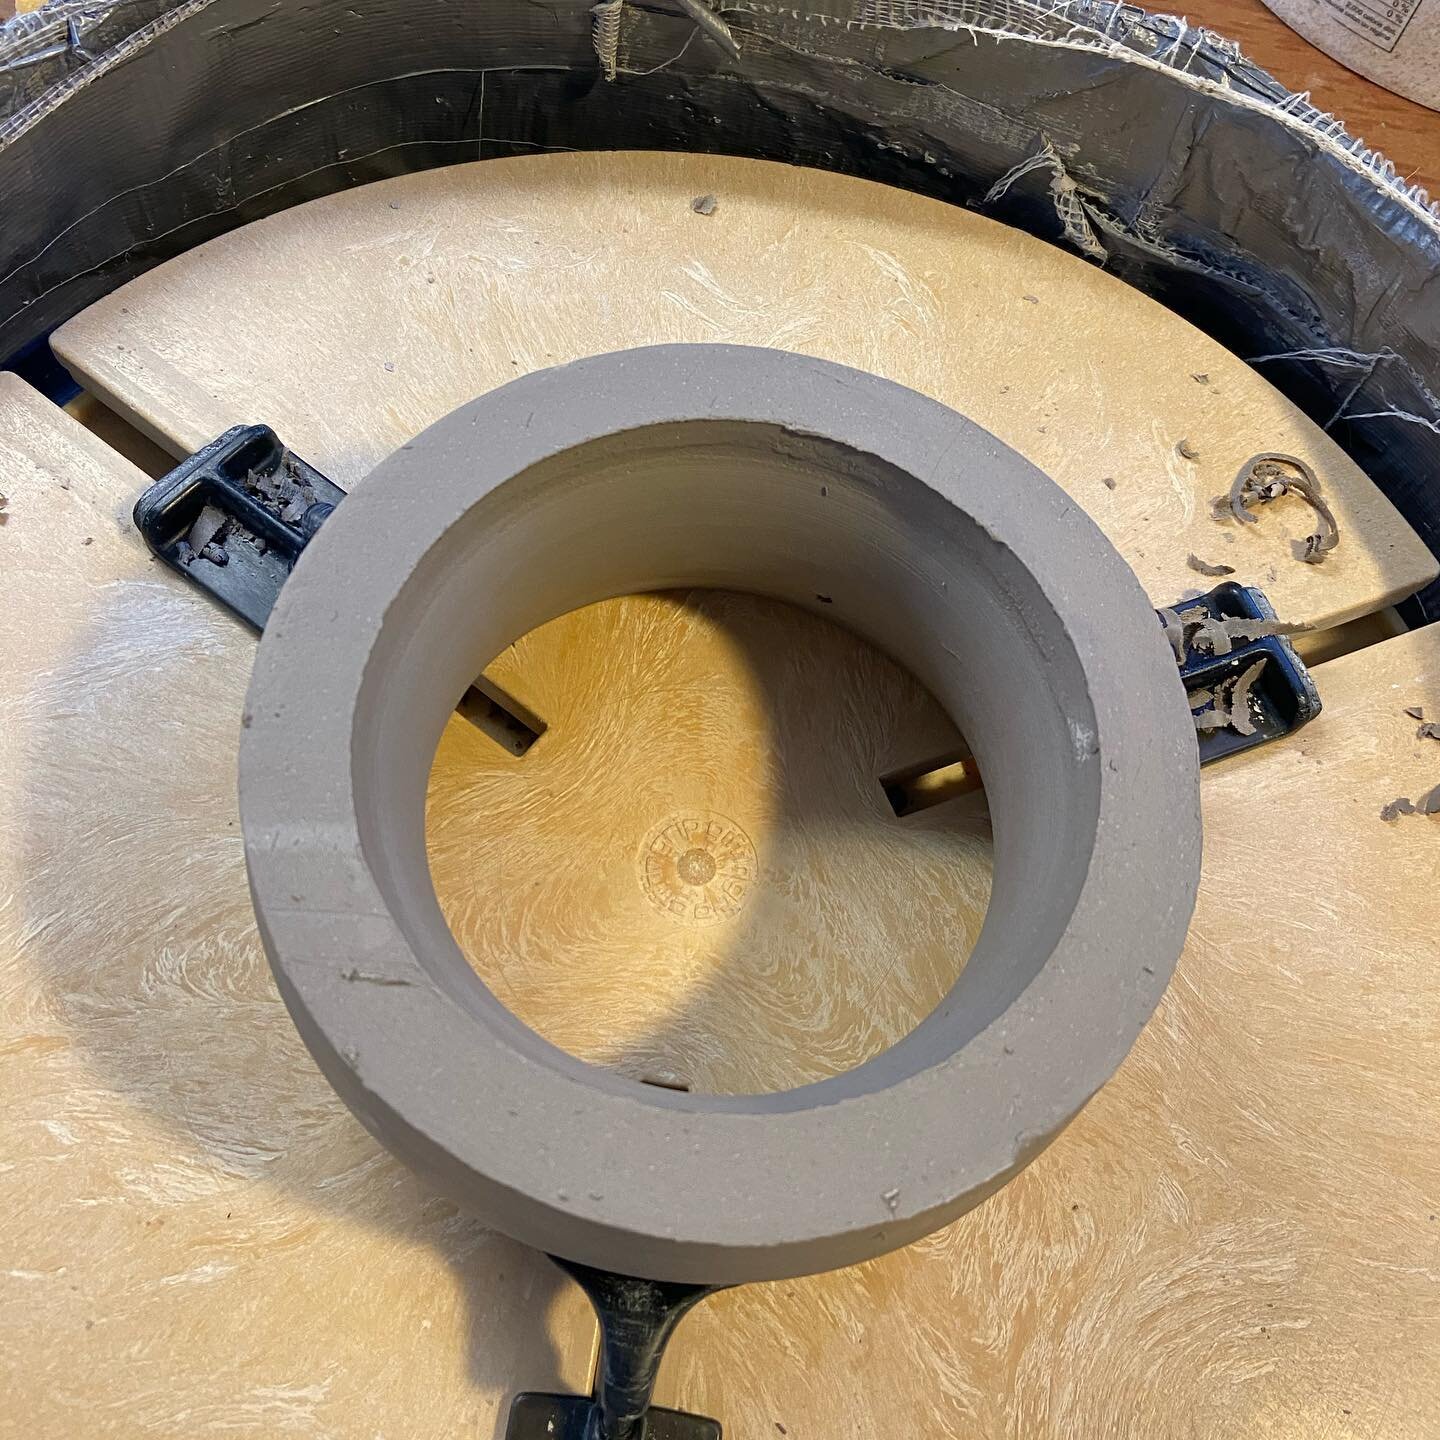
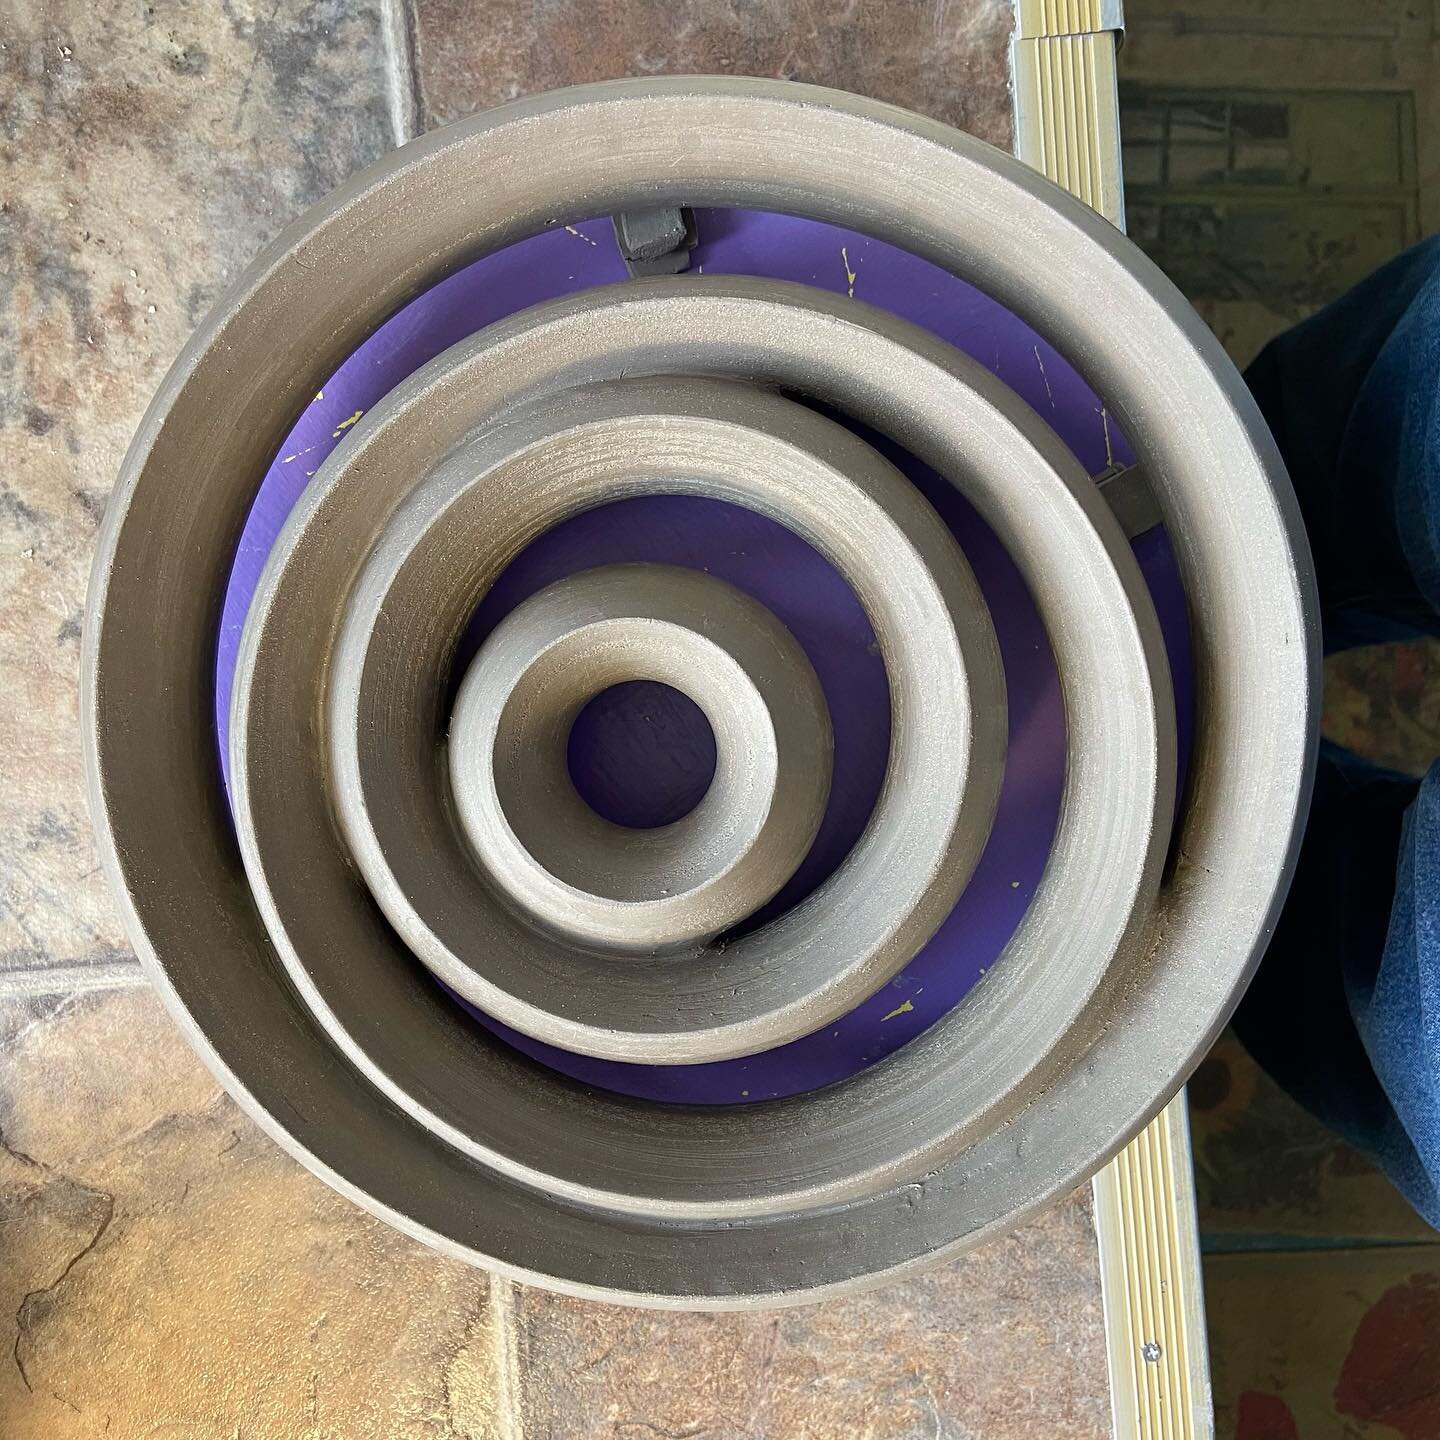
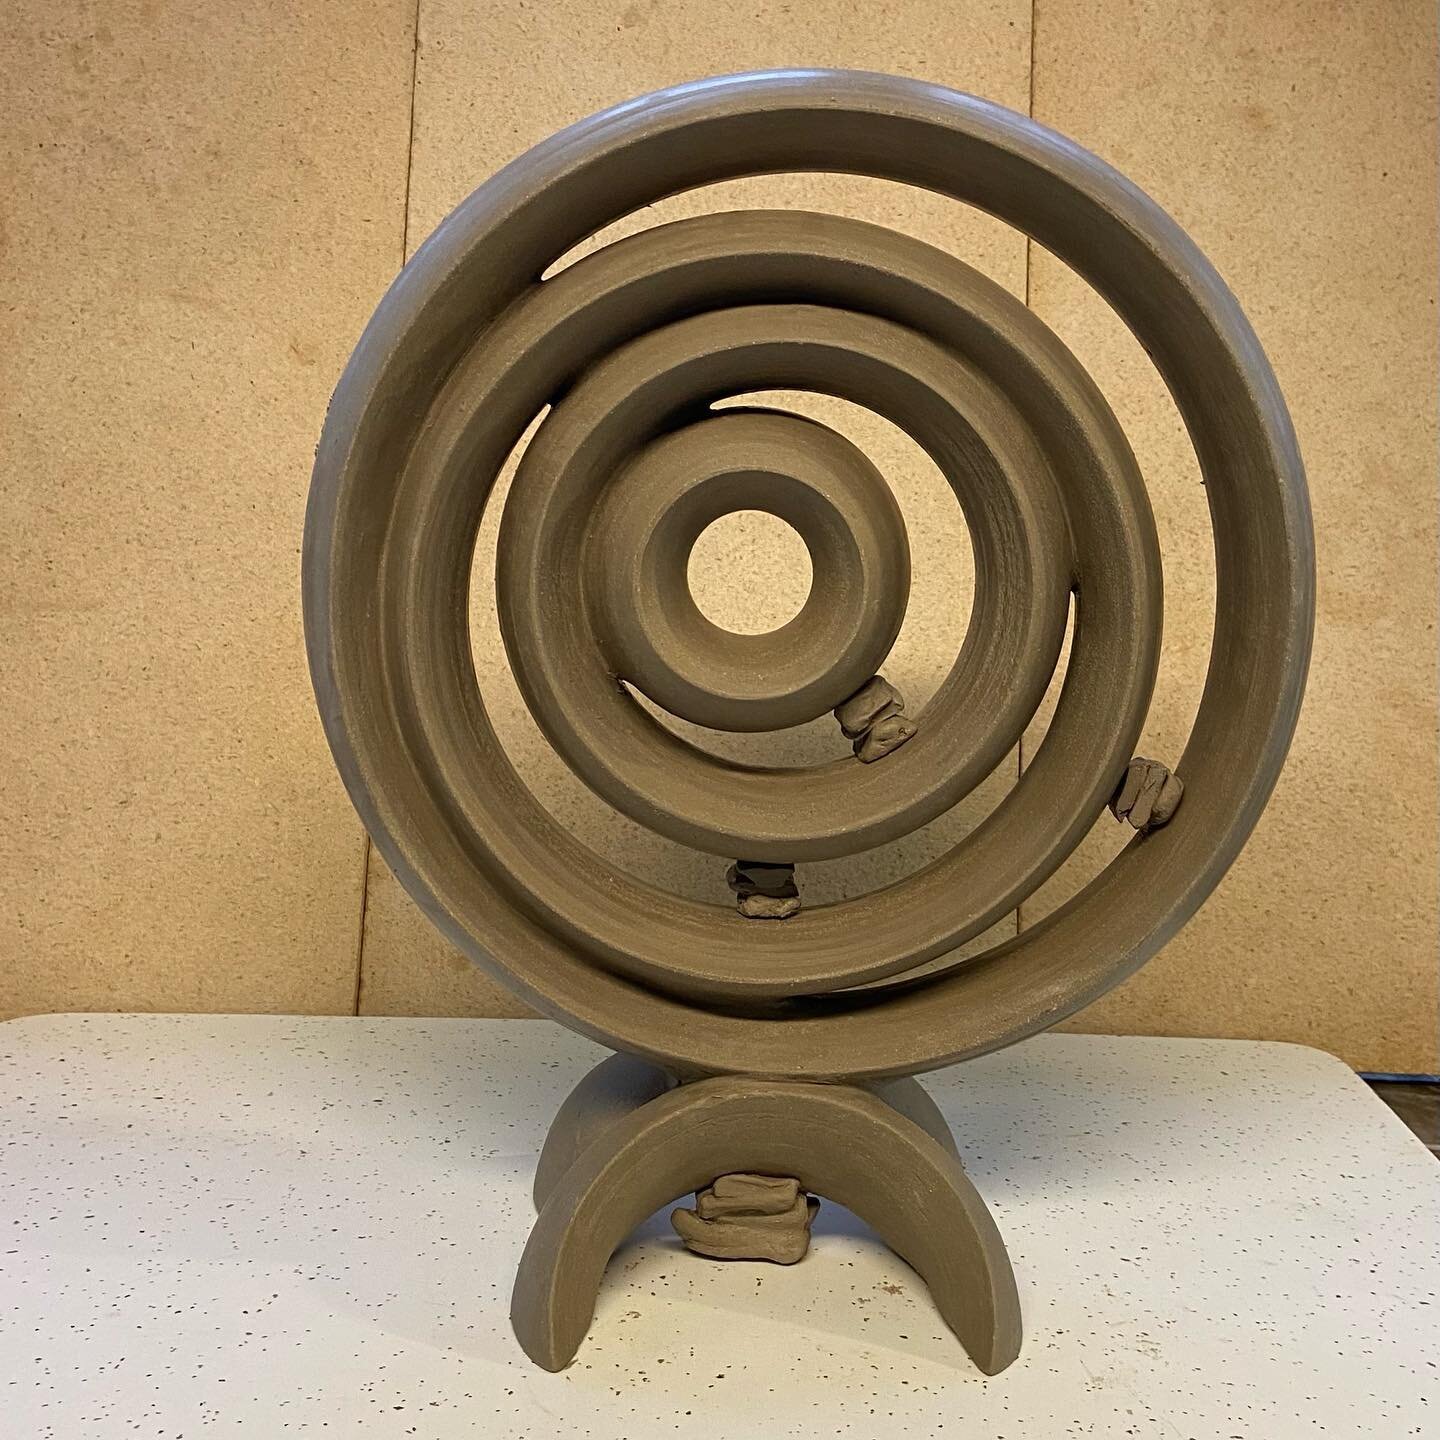
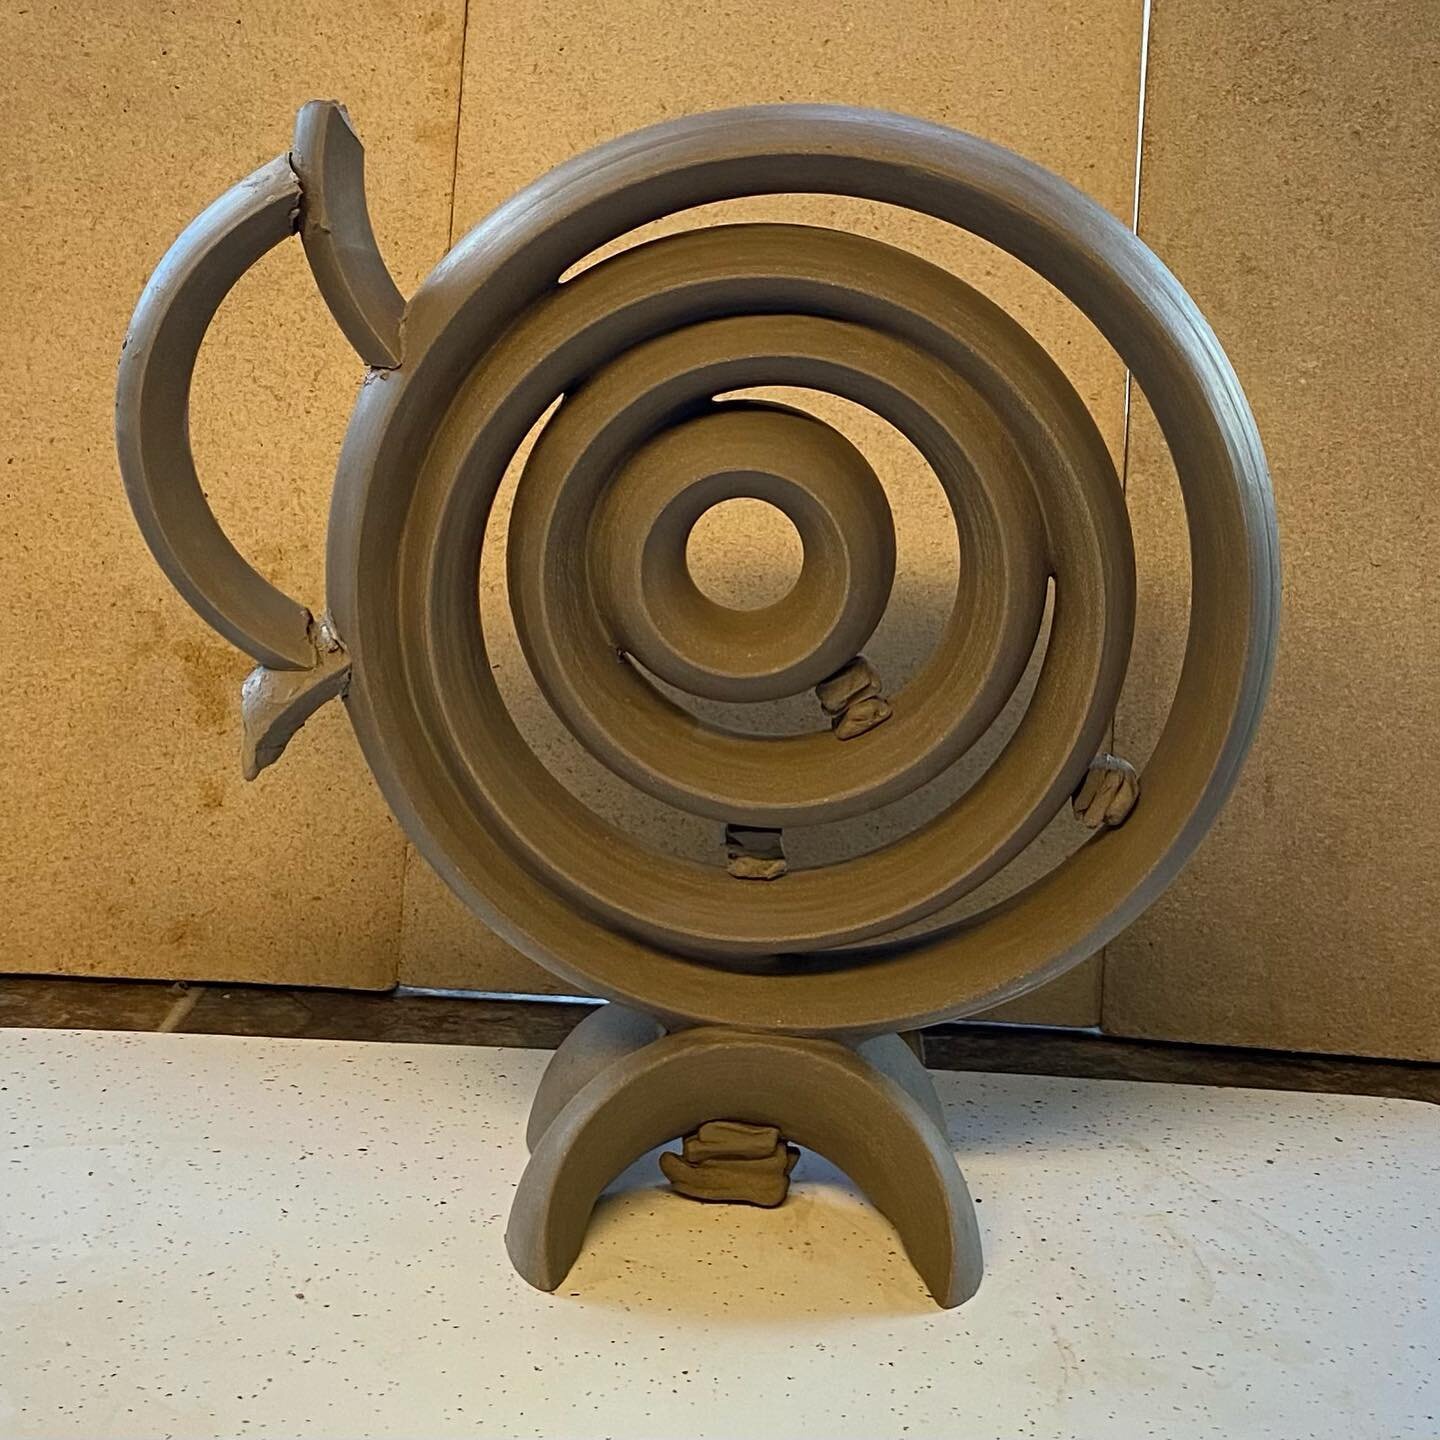
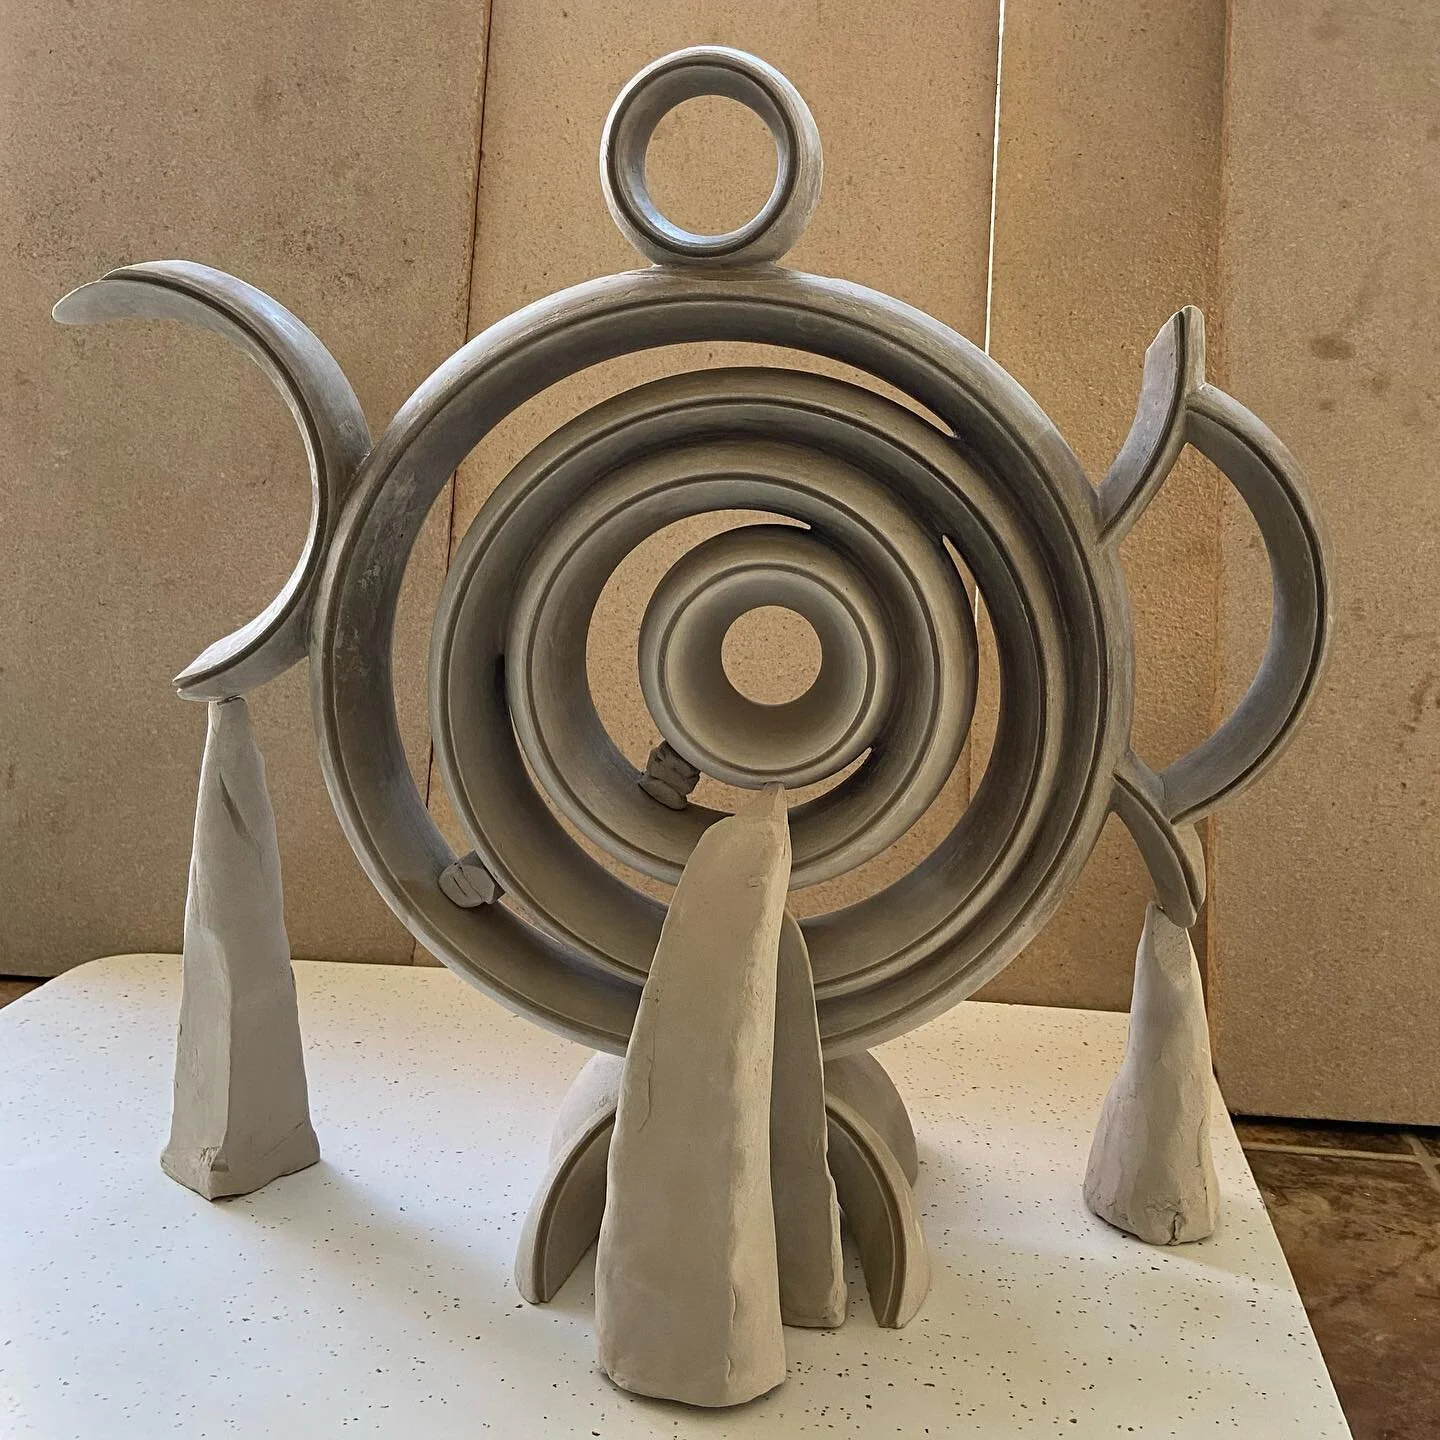
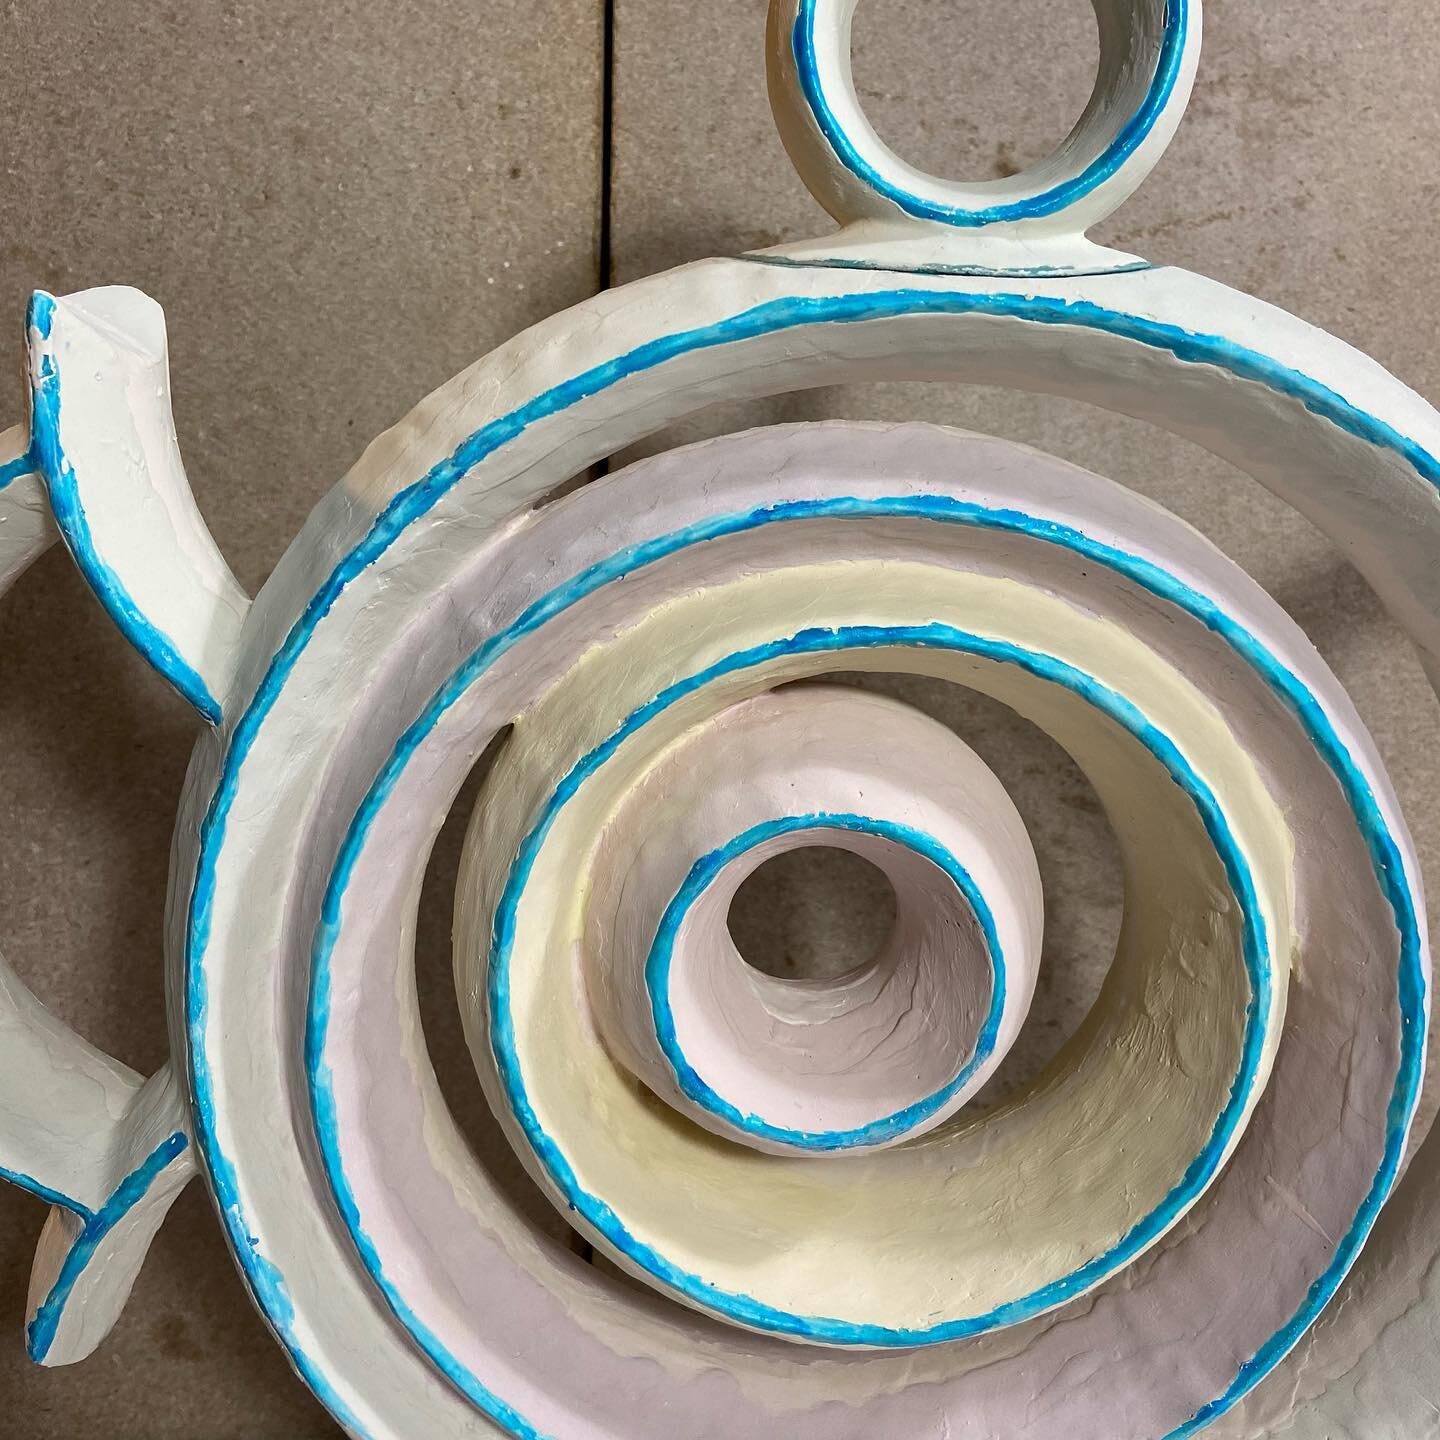
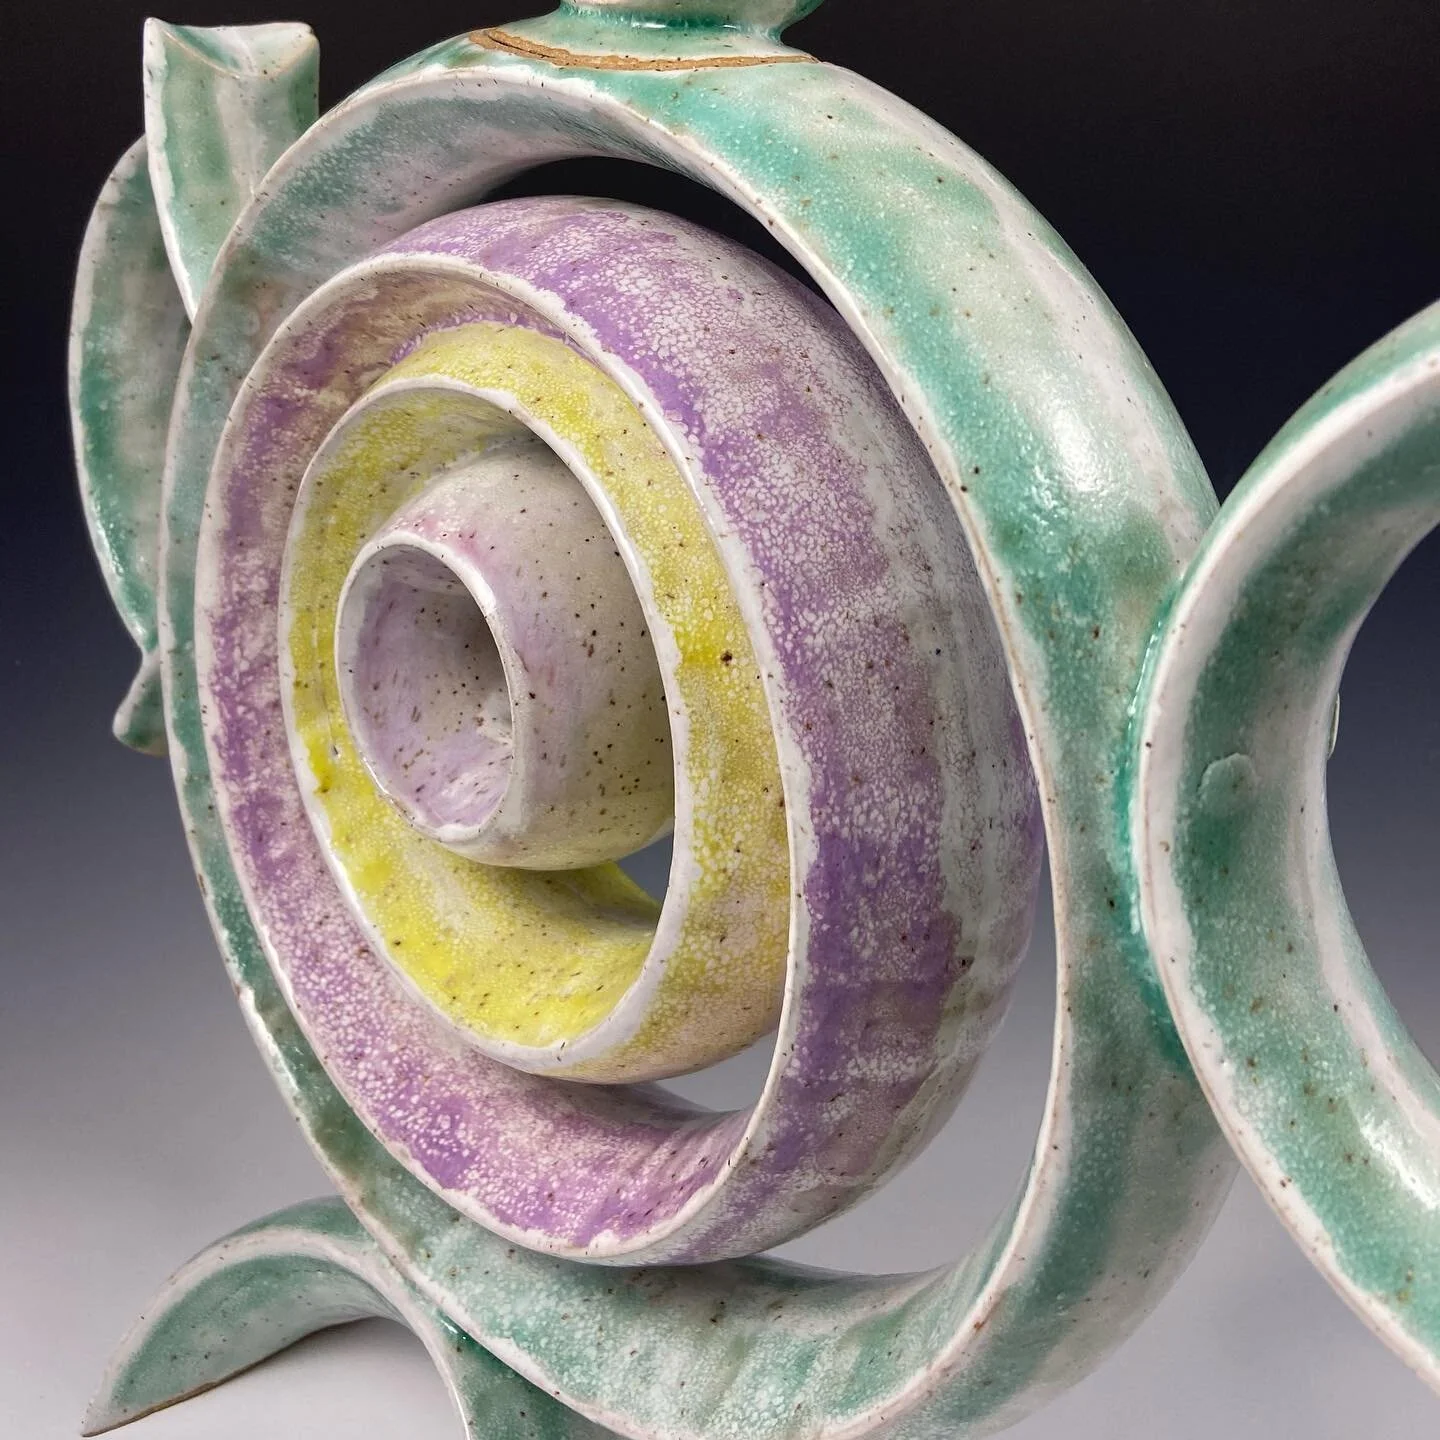
My tools. Trimming the inner fourth ring. The connecting opening to the outer three rings is cut out. The rings are slightly taller from outer to inner—not planned, but now accepted and an essential design feature. The four temporary risers on the outer ring allow the assembly to be turned over and sit supported by the outer ring while bonding the inner rings.

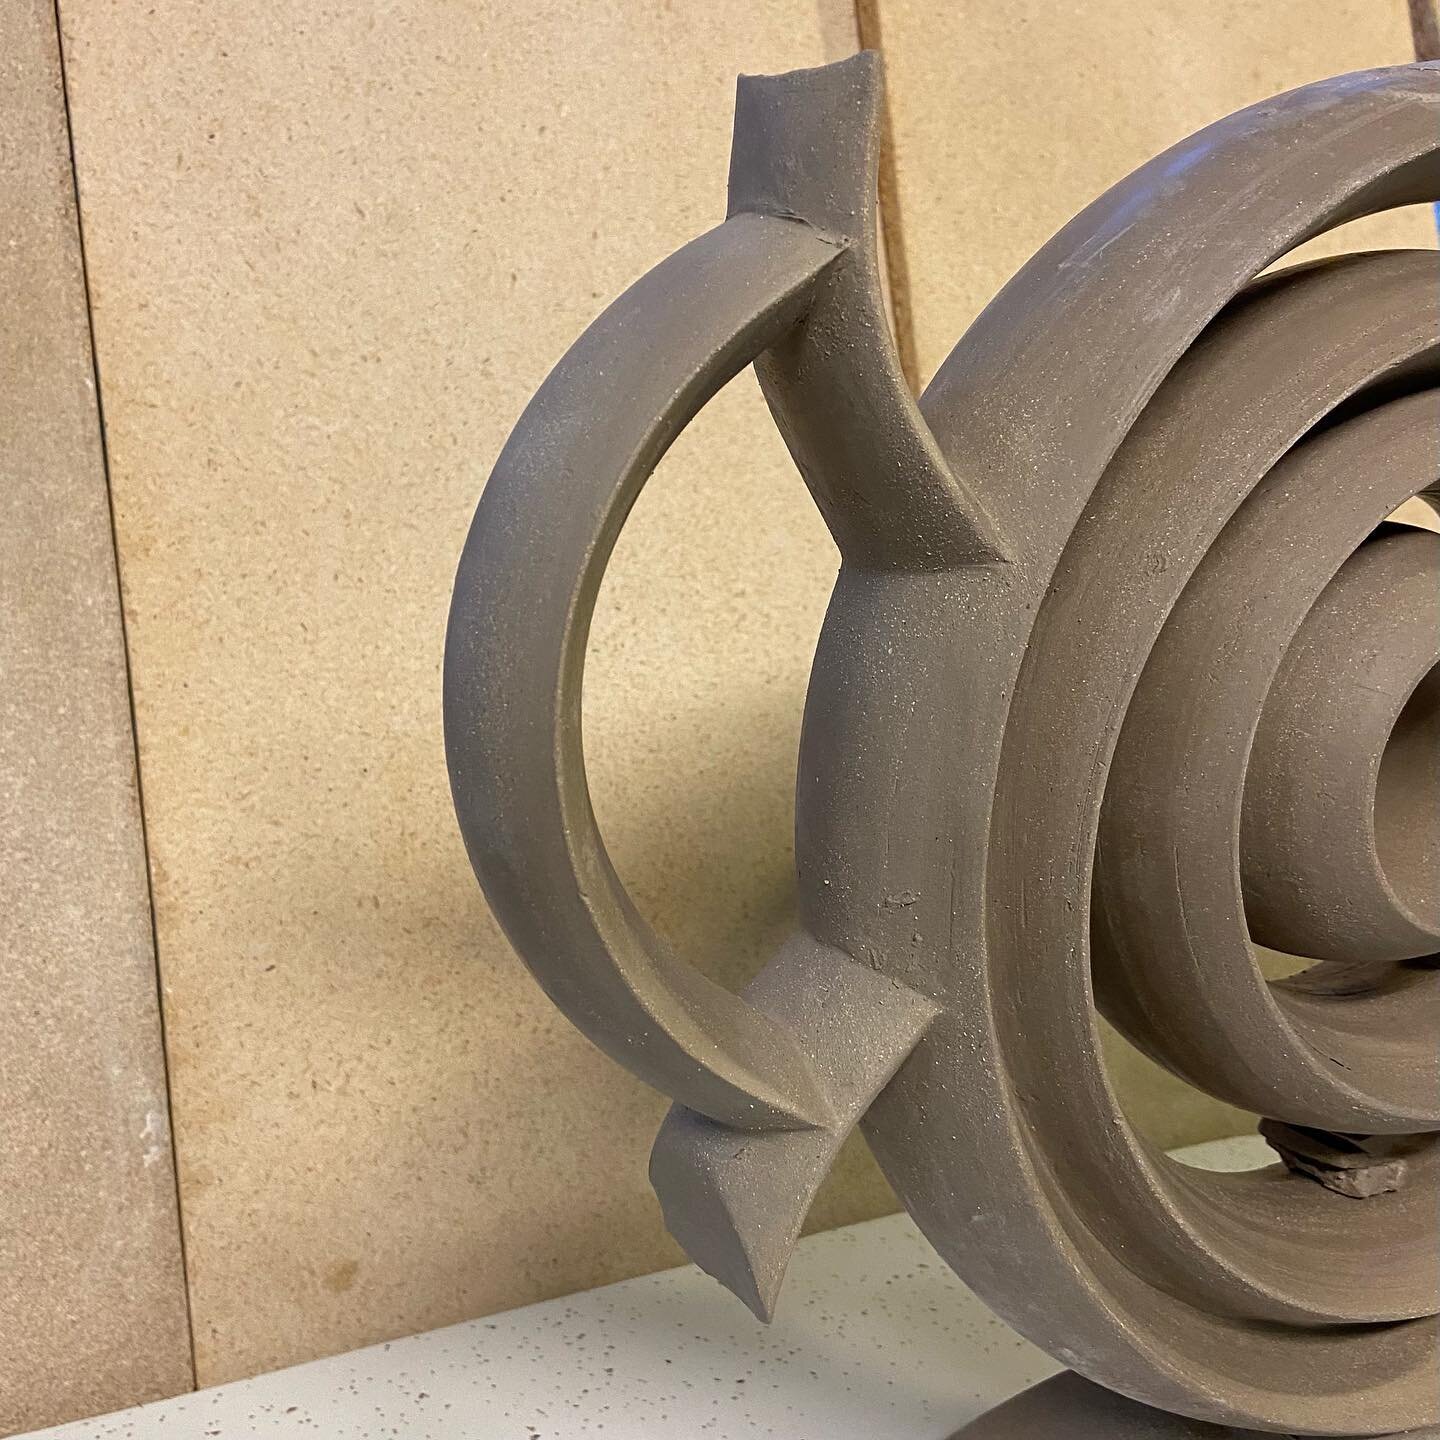
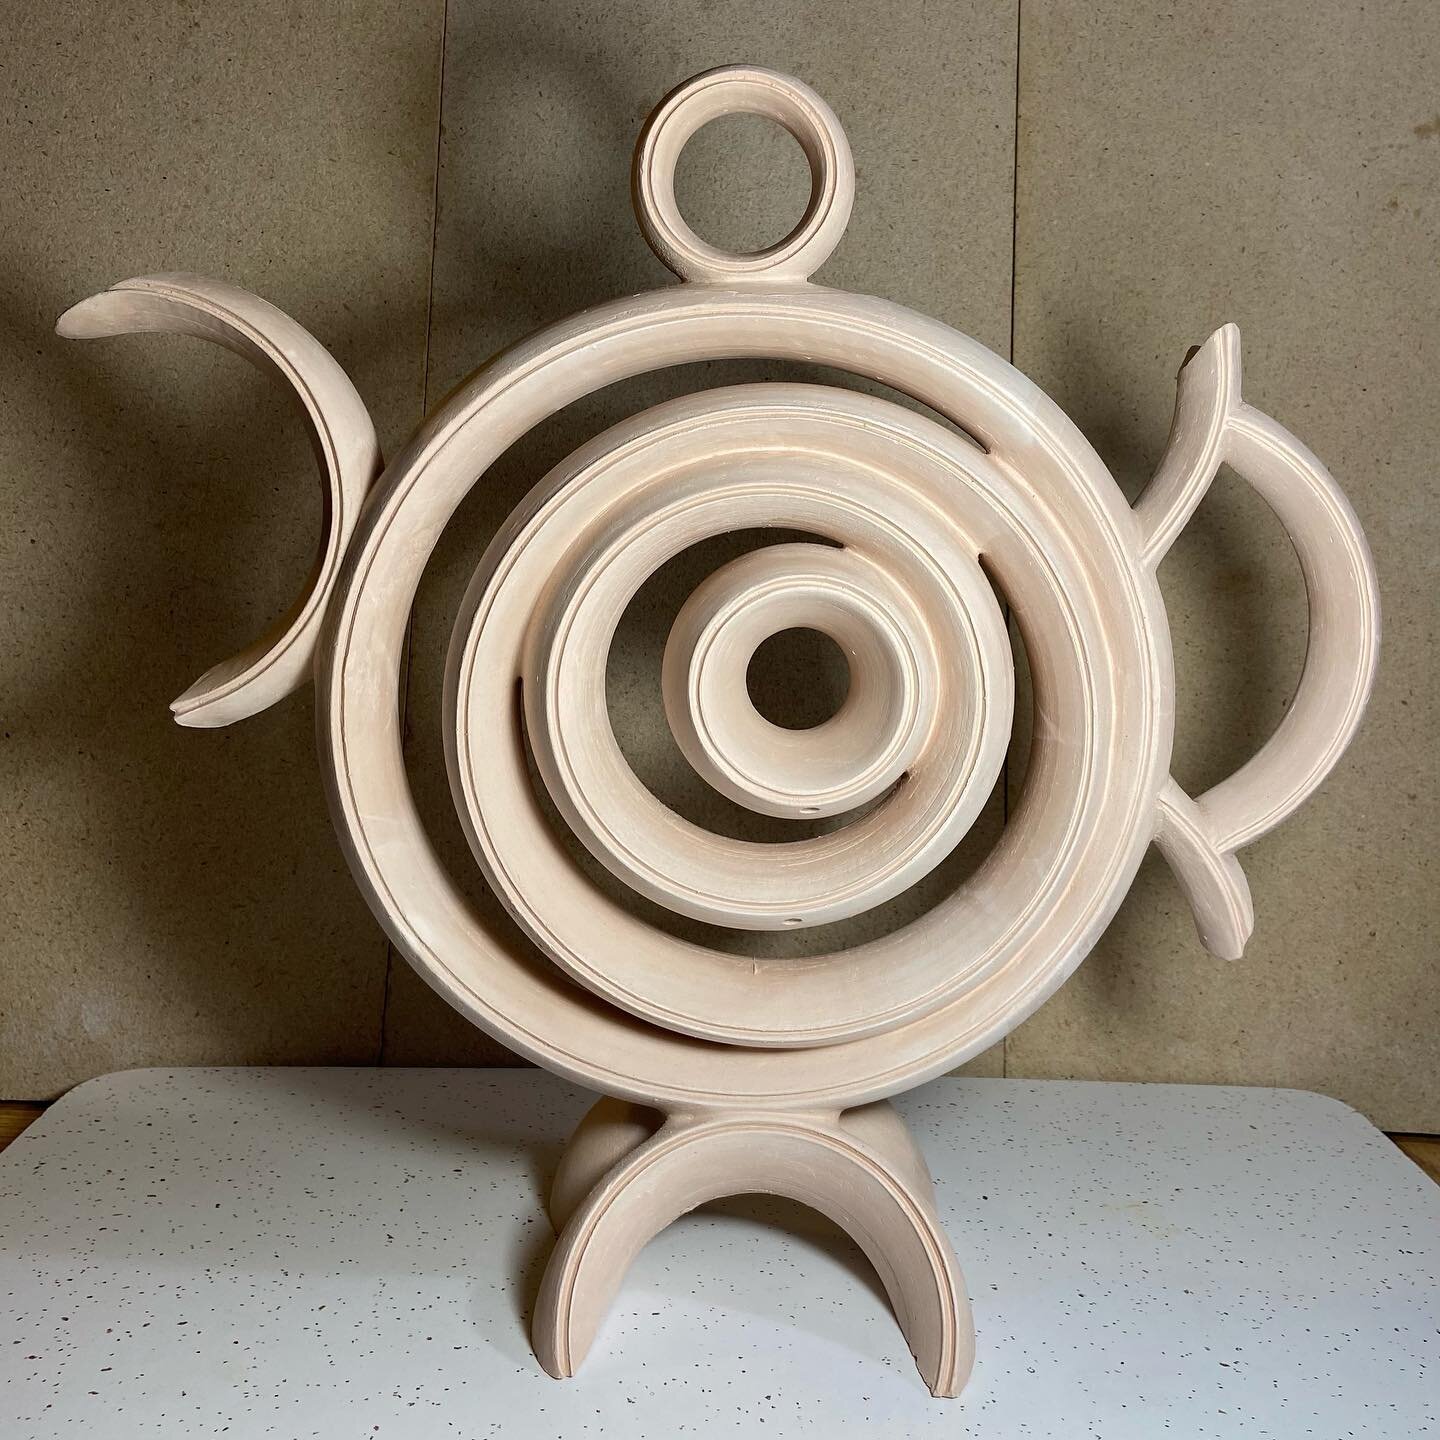
The four rings joined together. Grooved side, plain side.


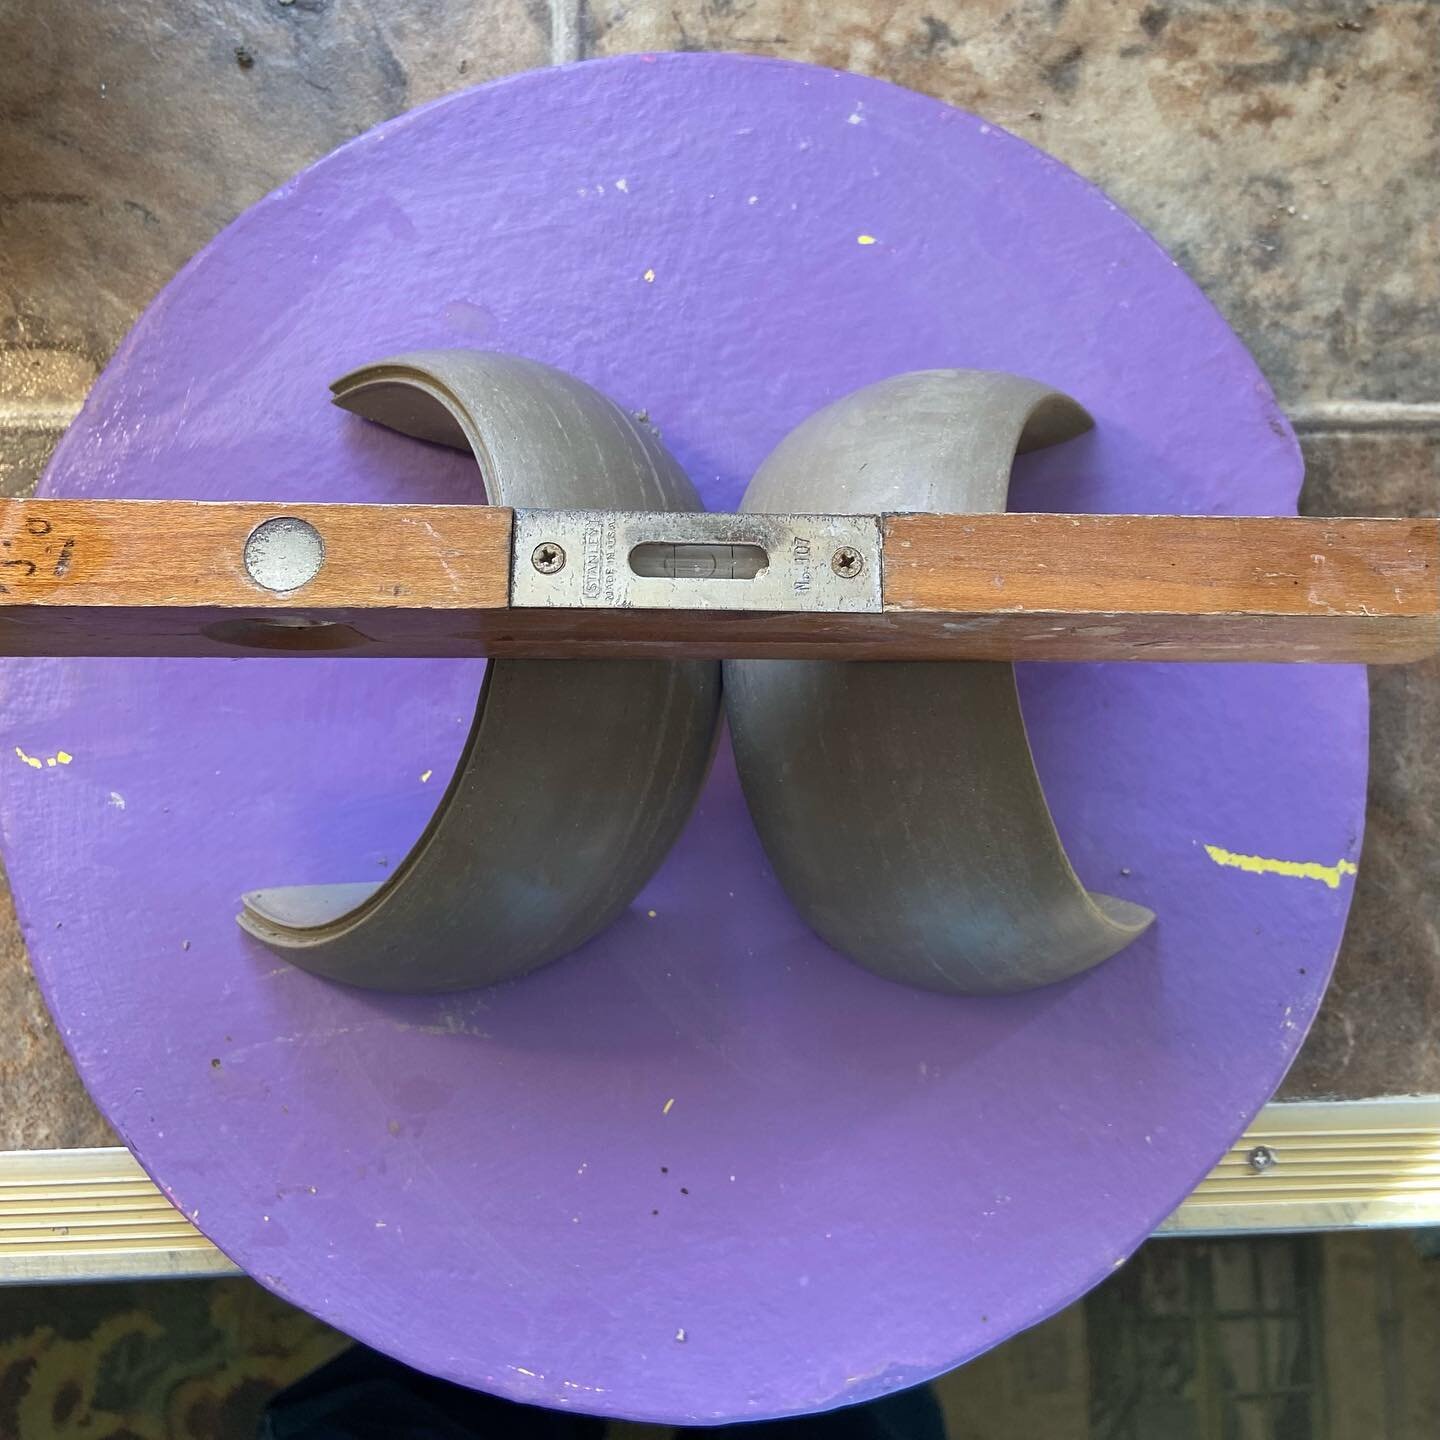
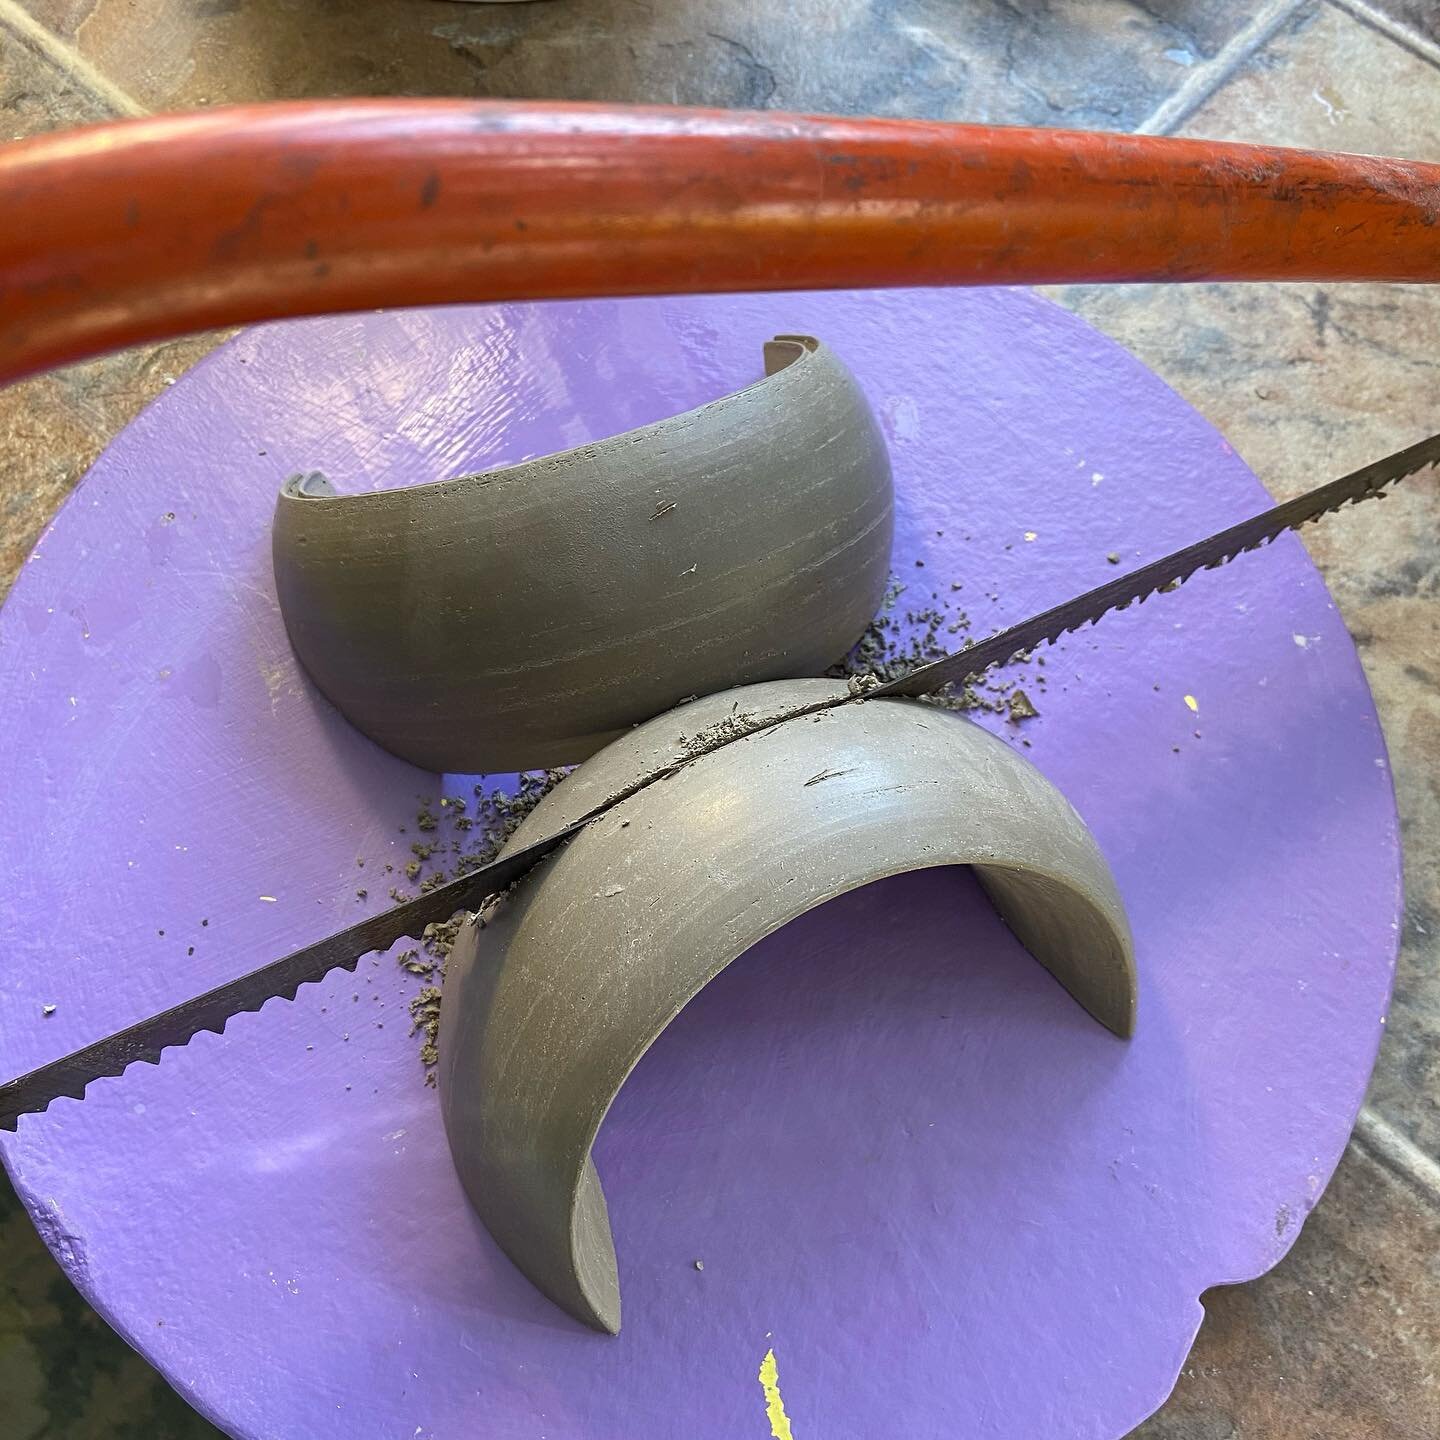


Making the Teapot base from a ring. Cutting the ring in half at an angle. Cutting each ring half vertically. clay-slip-gooing the two mating sides to join together. The base upside down, then right side up. I will cut out a curved scooped section to pose the ring assembly on, then join them together.


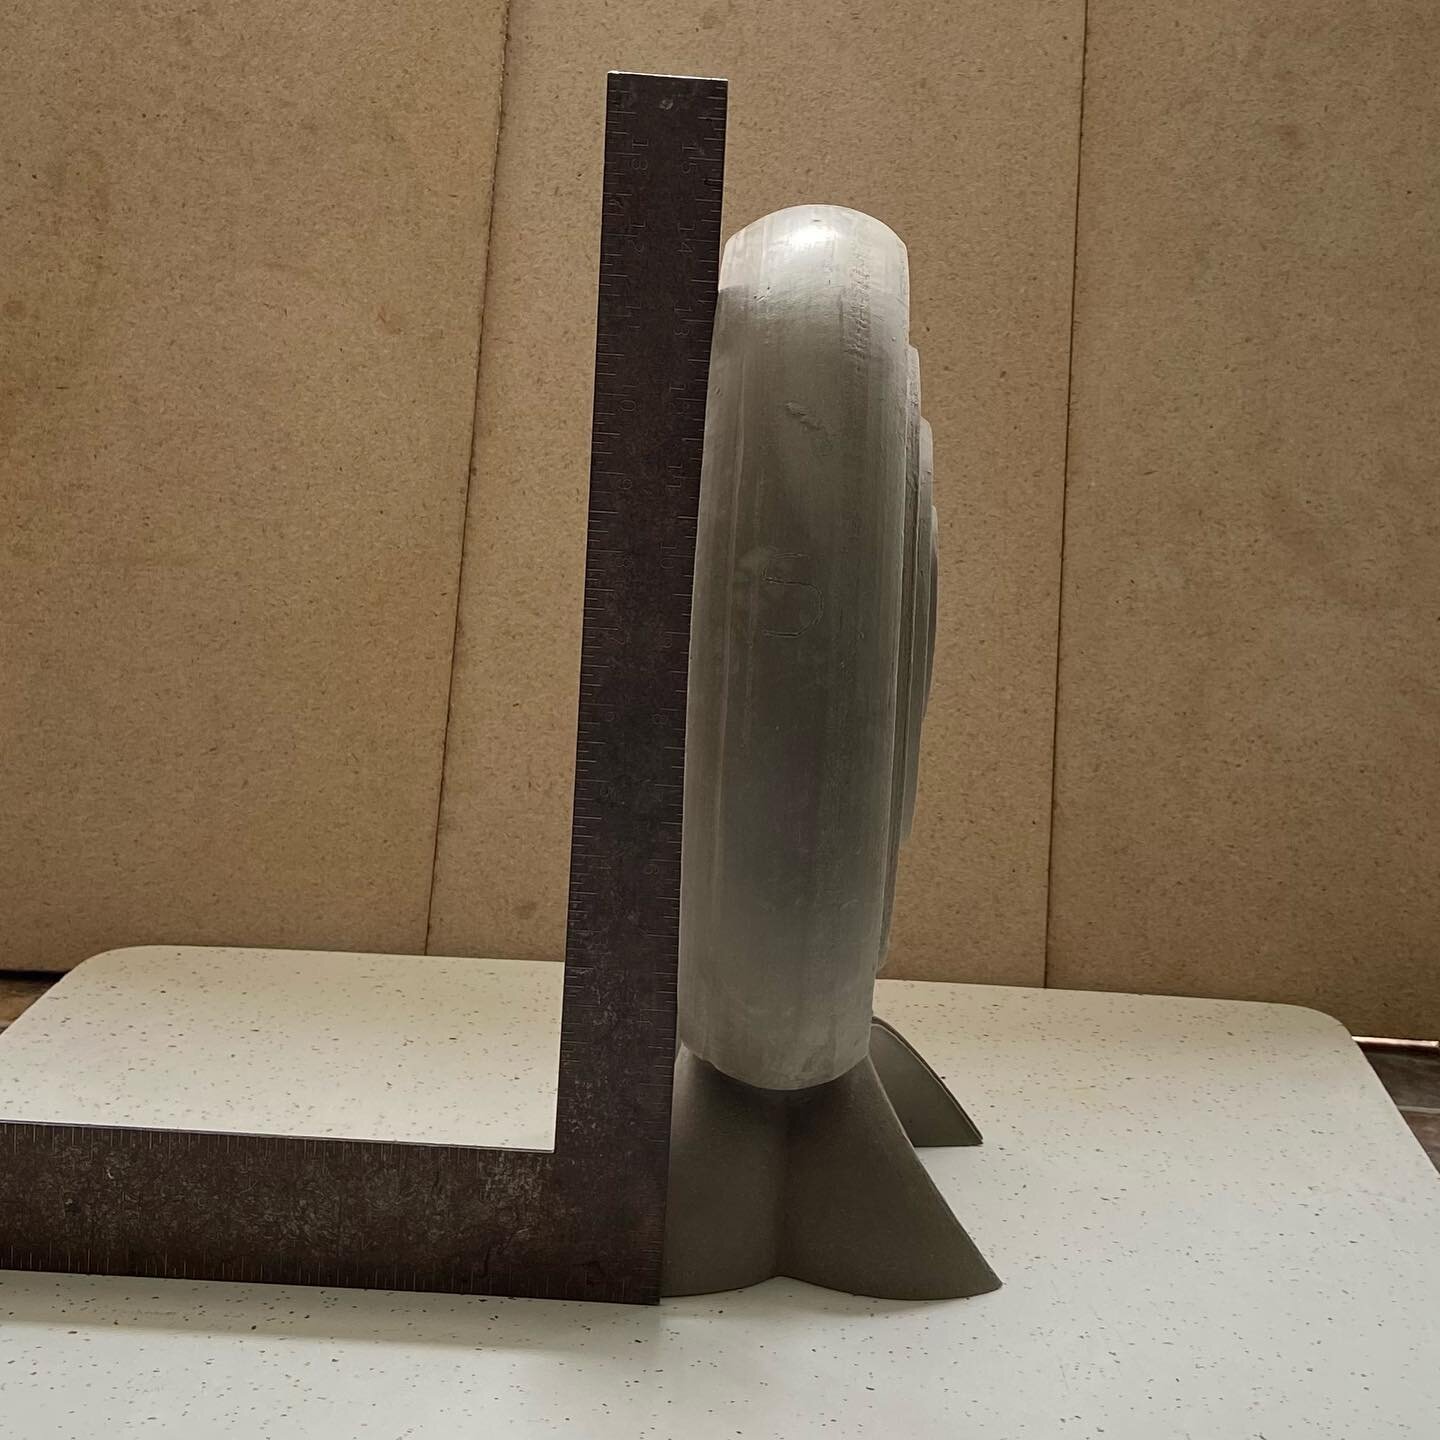


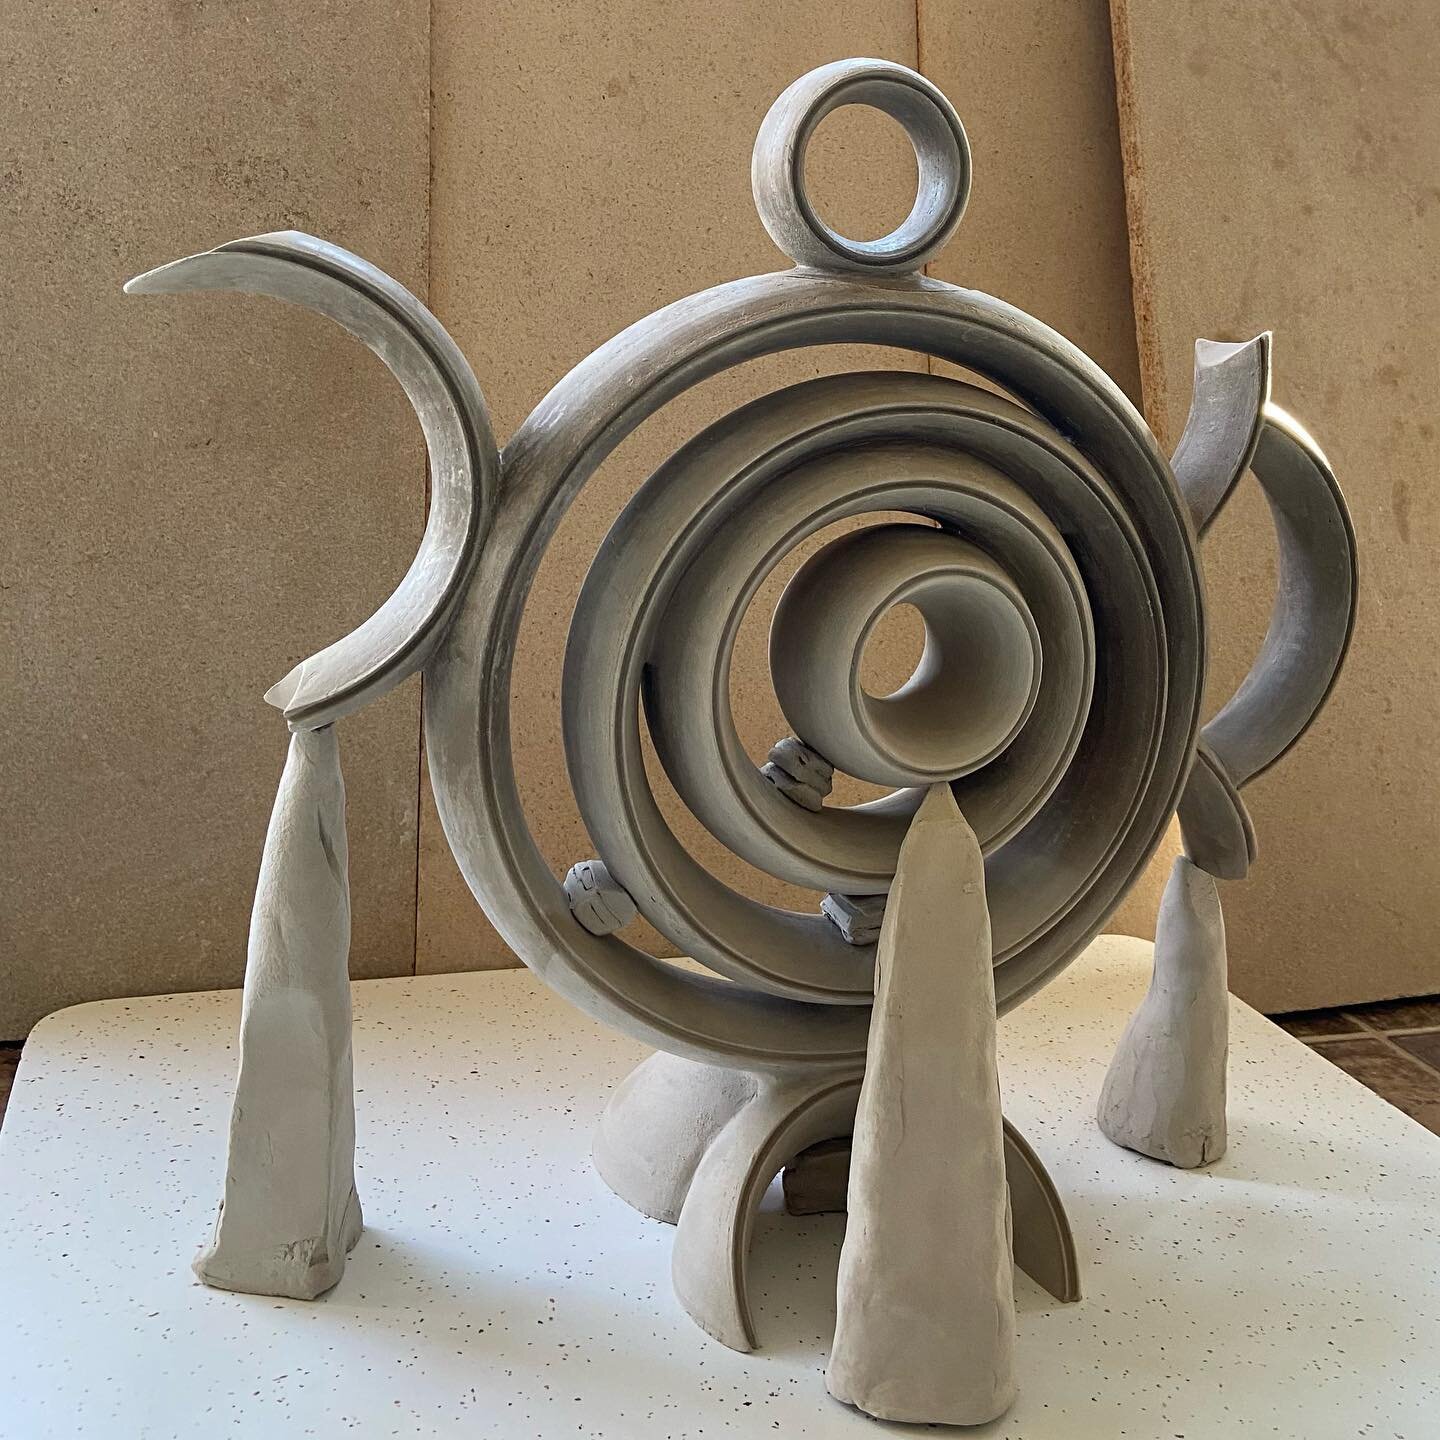
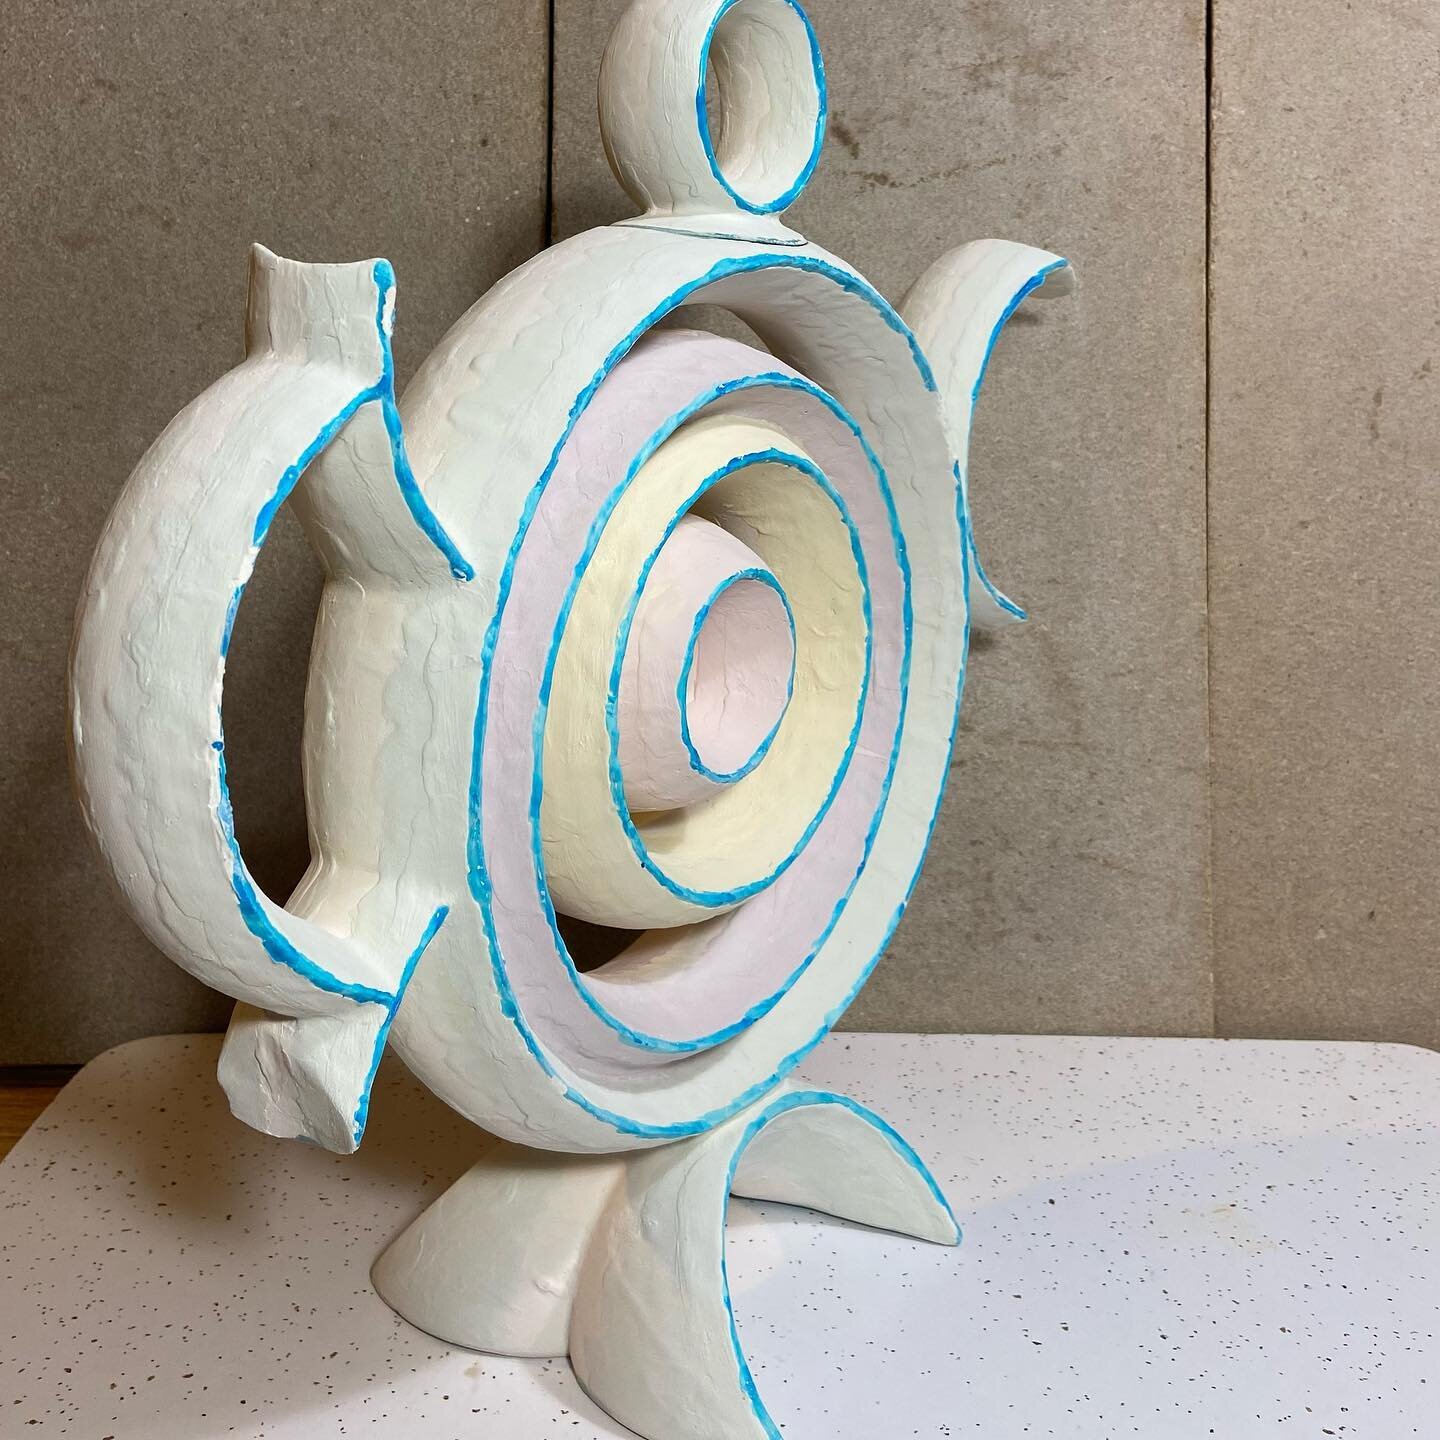
The four ring assembly mounted on the base, grooved side, plain side. I used the square to position the ring assembly vertically on the base, but after I bonded the assembly securely onto the base, I checked again with the square and the assembly was leaning a little. I first considered cutting the assembly off the base and re-positioning it, but that seemed dangerous because of all the cutting and handling required. Then I decided to shave down the higher side of the base bottom with the rasp tool. This worked well, with only slight stress on the bond between the assembly and the base. Checking again with the square showed a perfect vertical orientation! The last two pictures show 45 degree views.


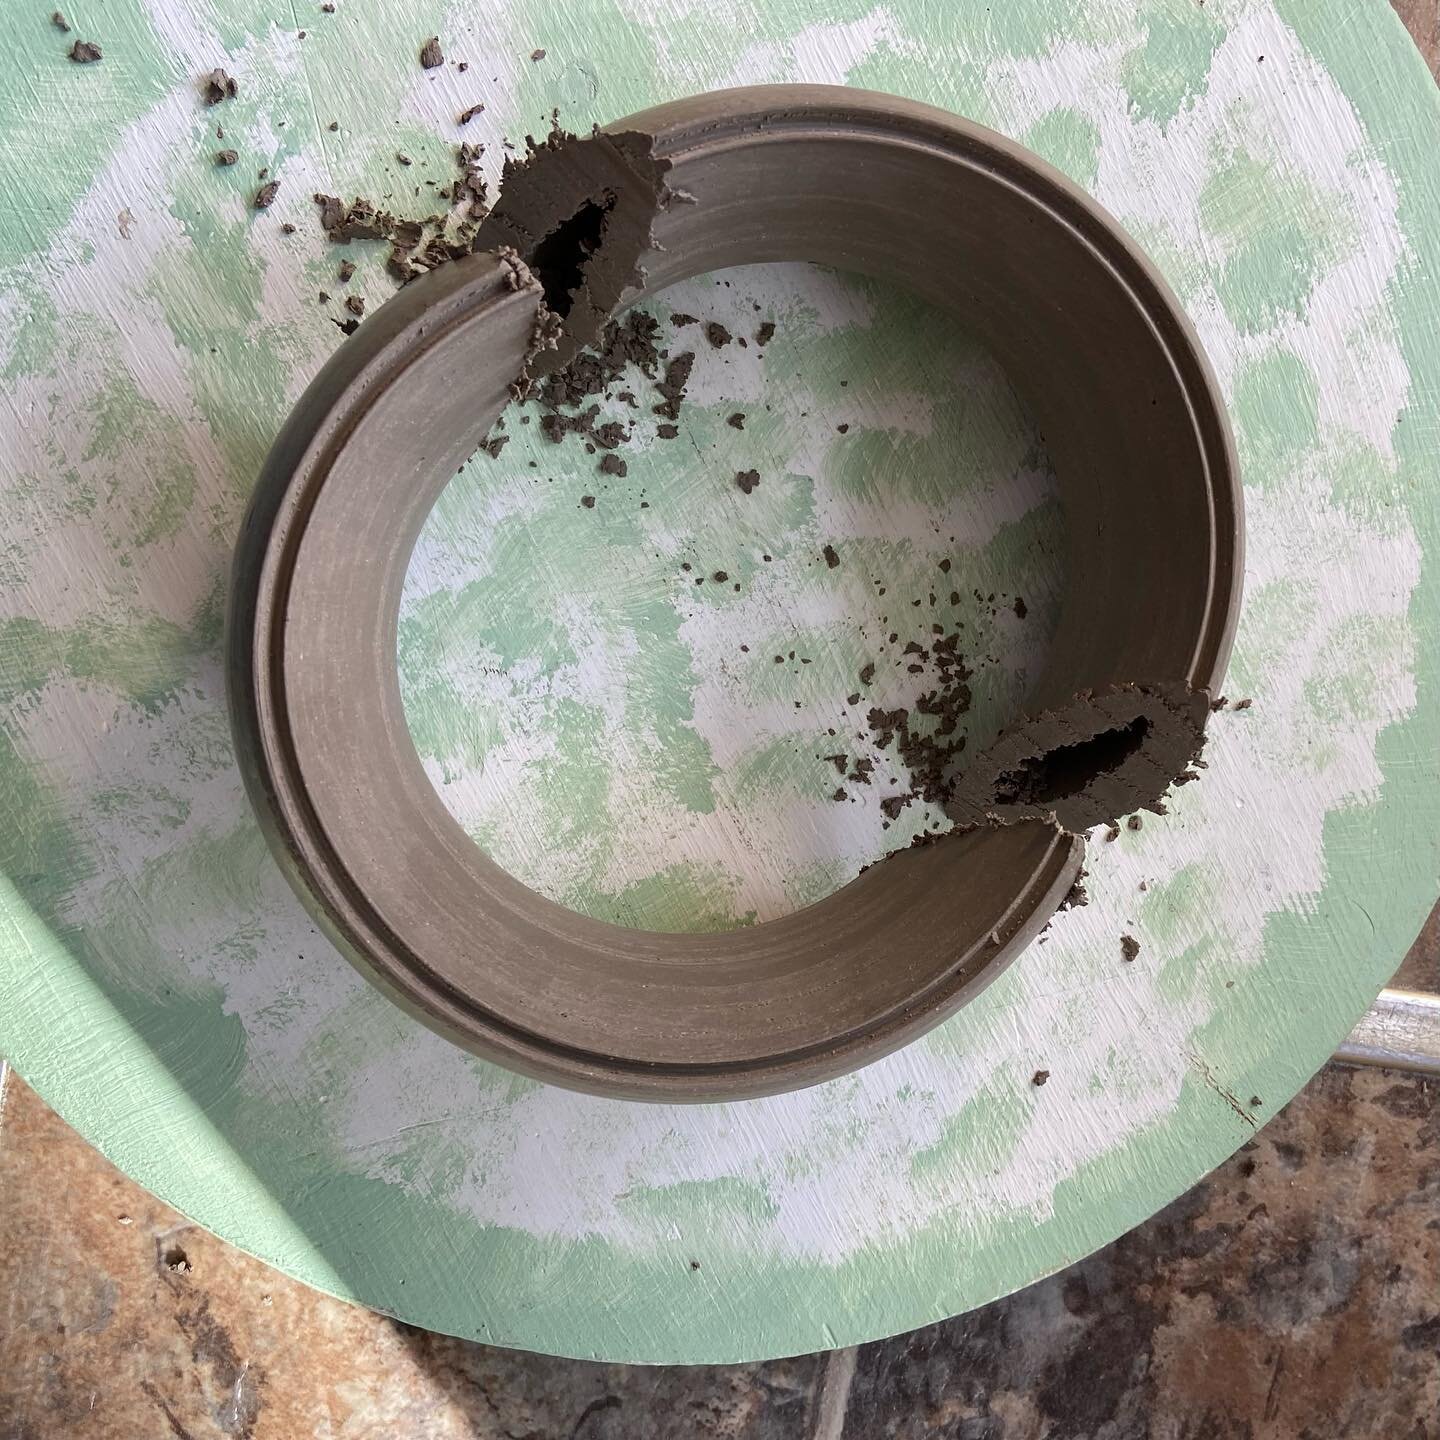
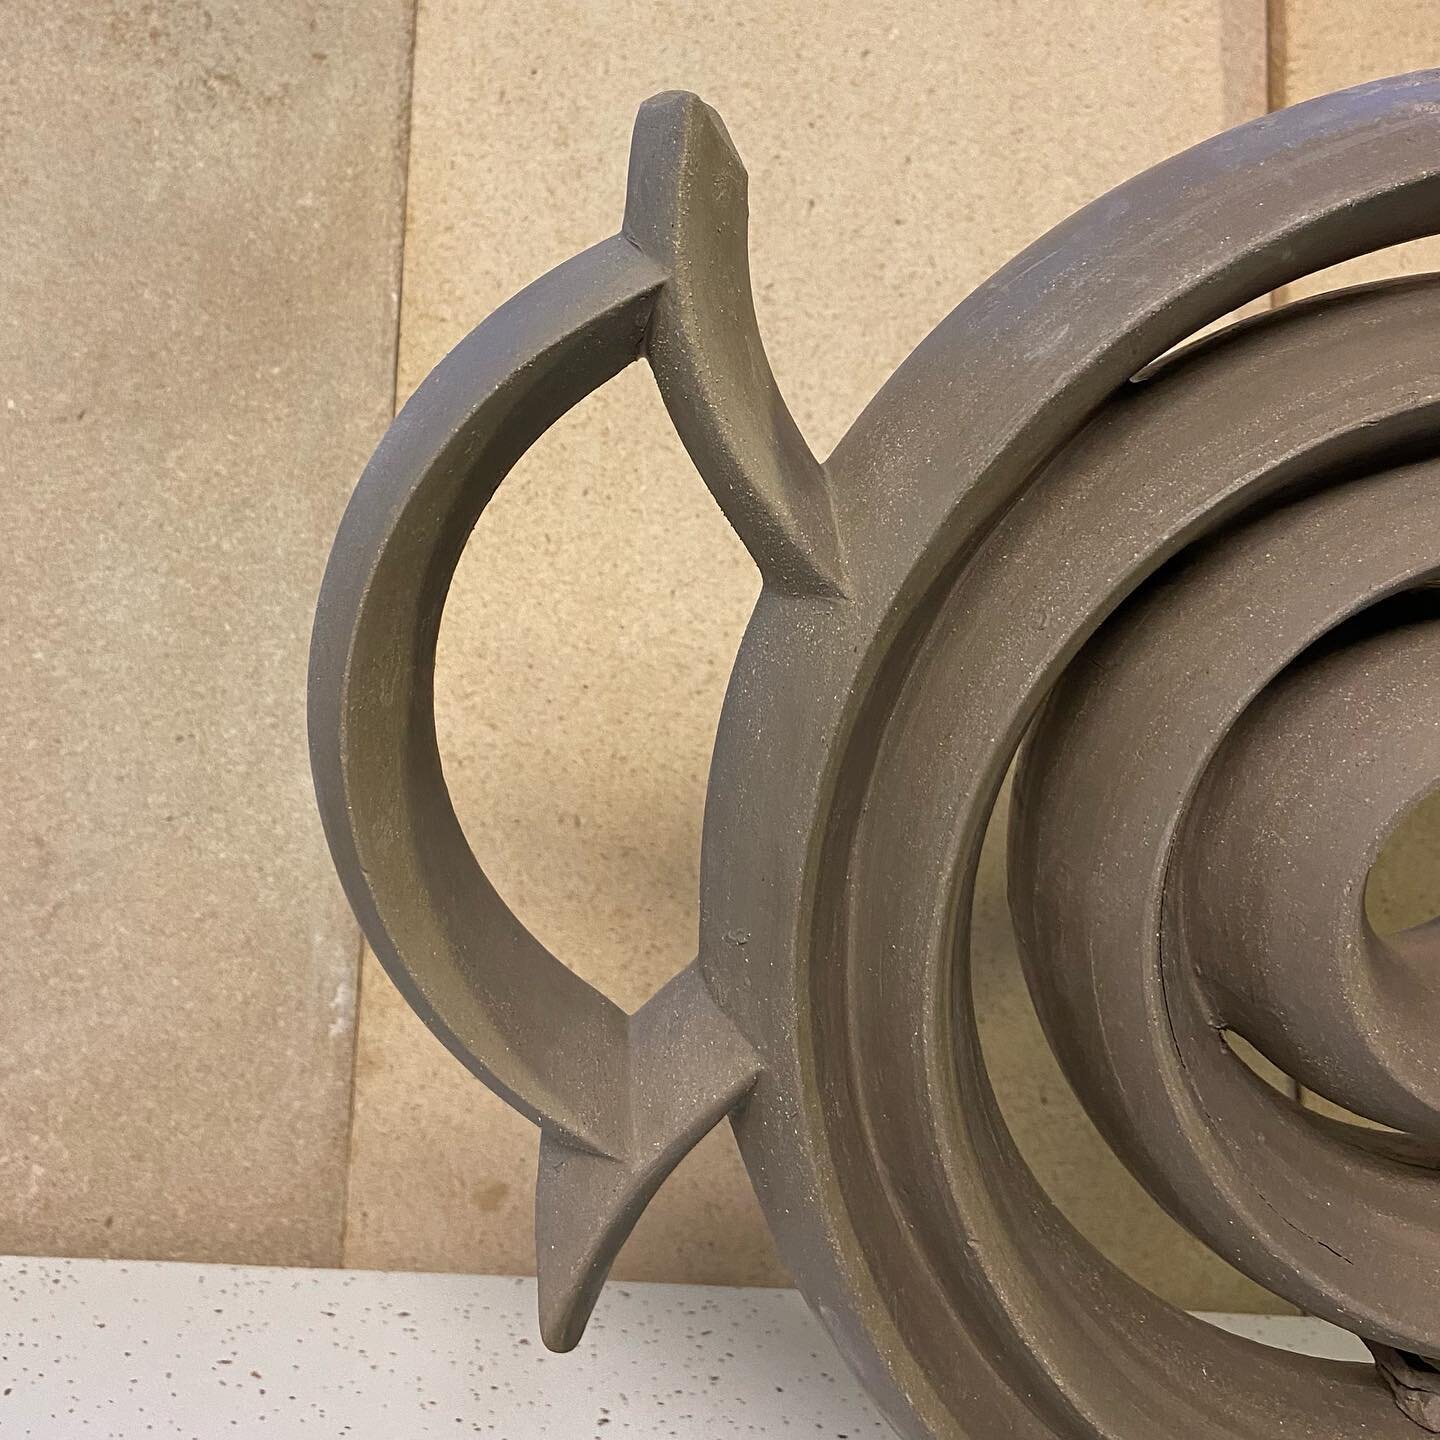
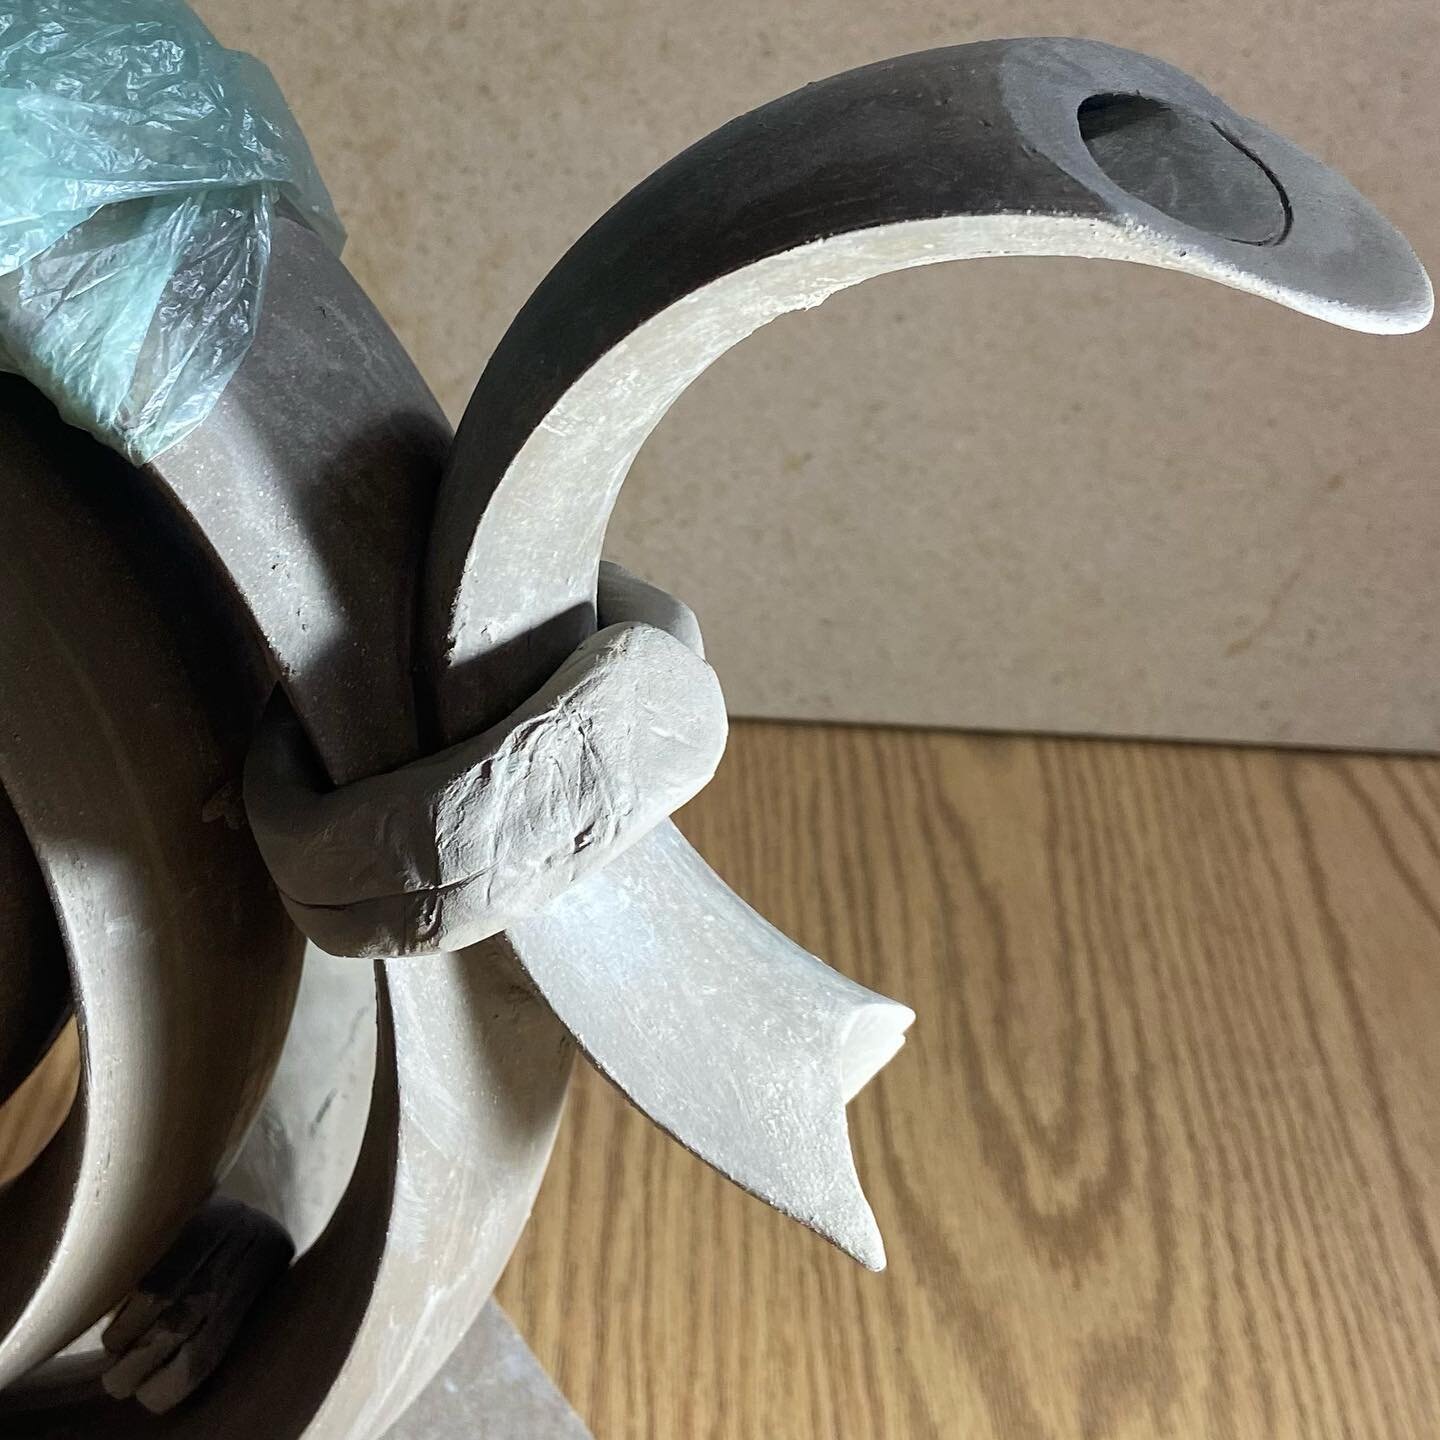
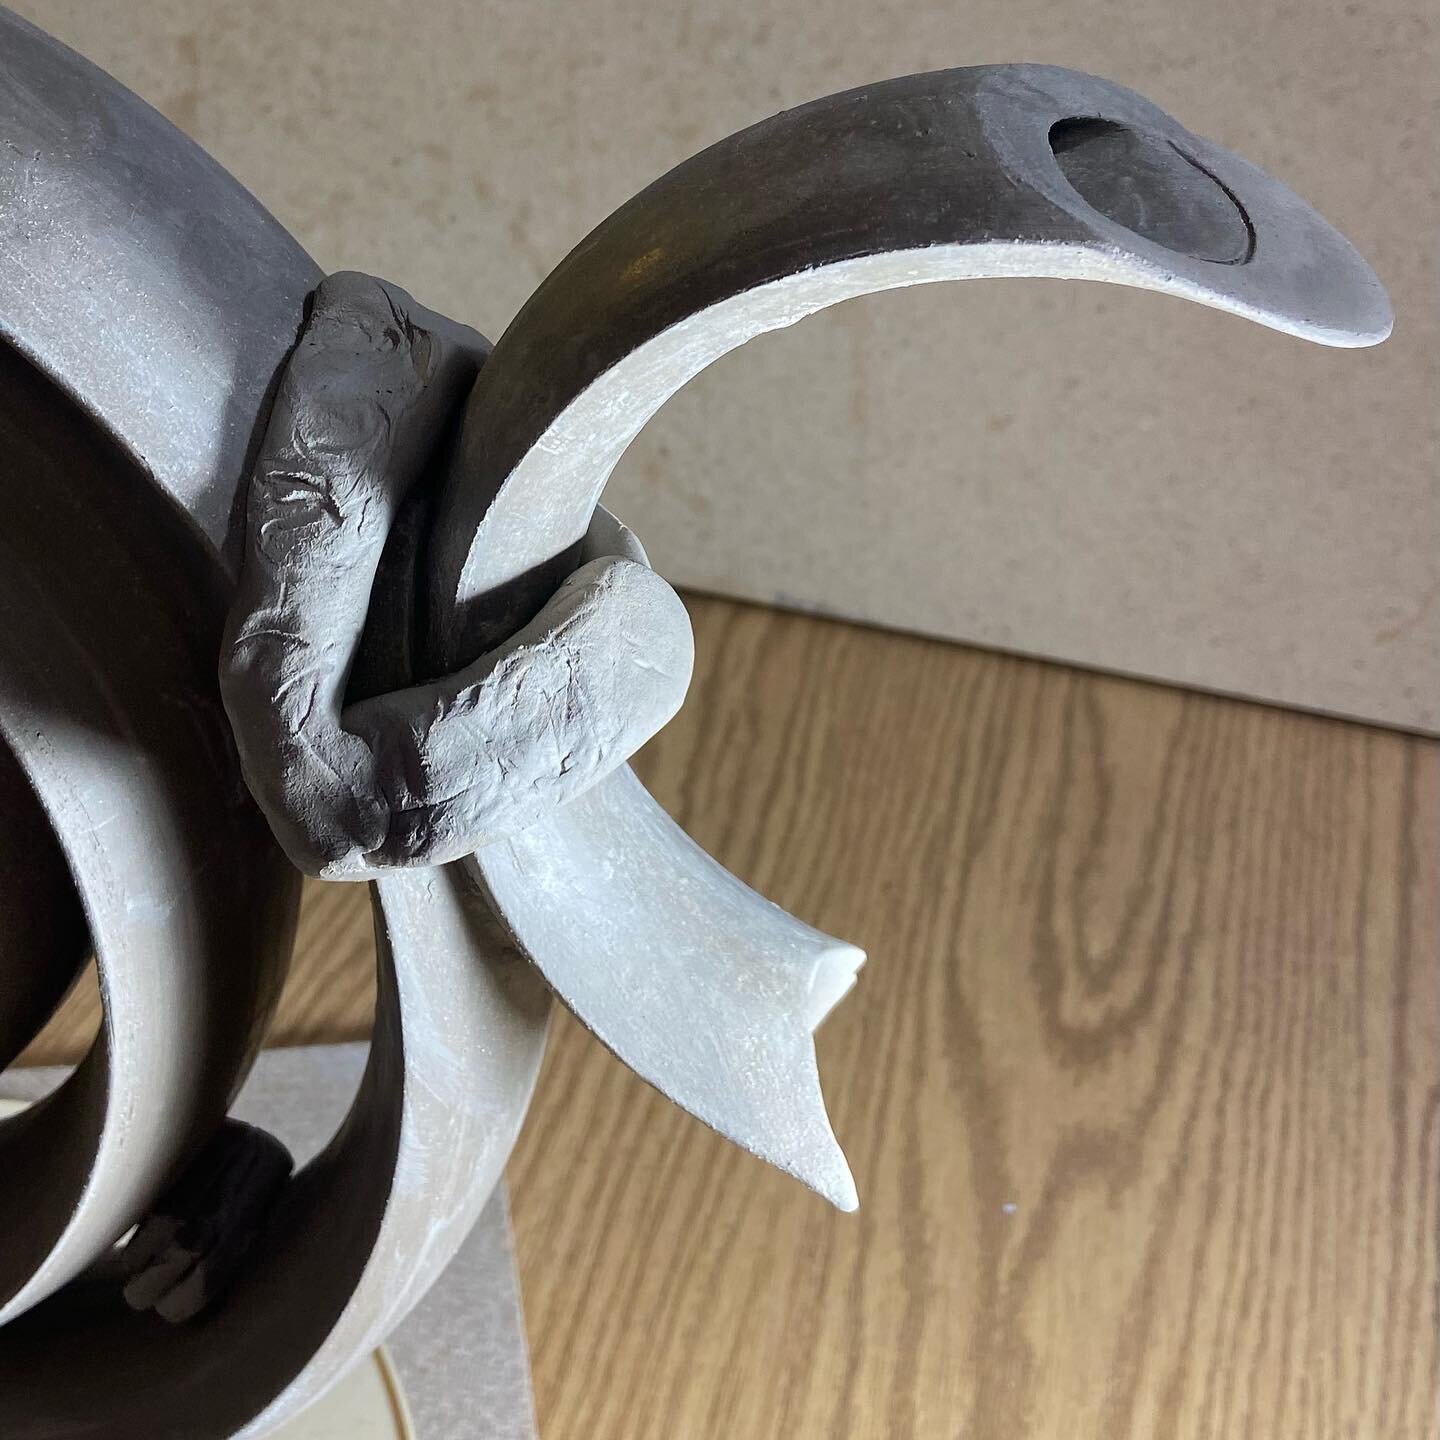
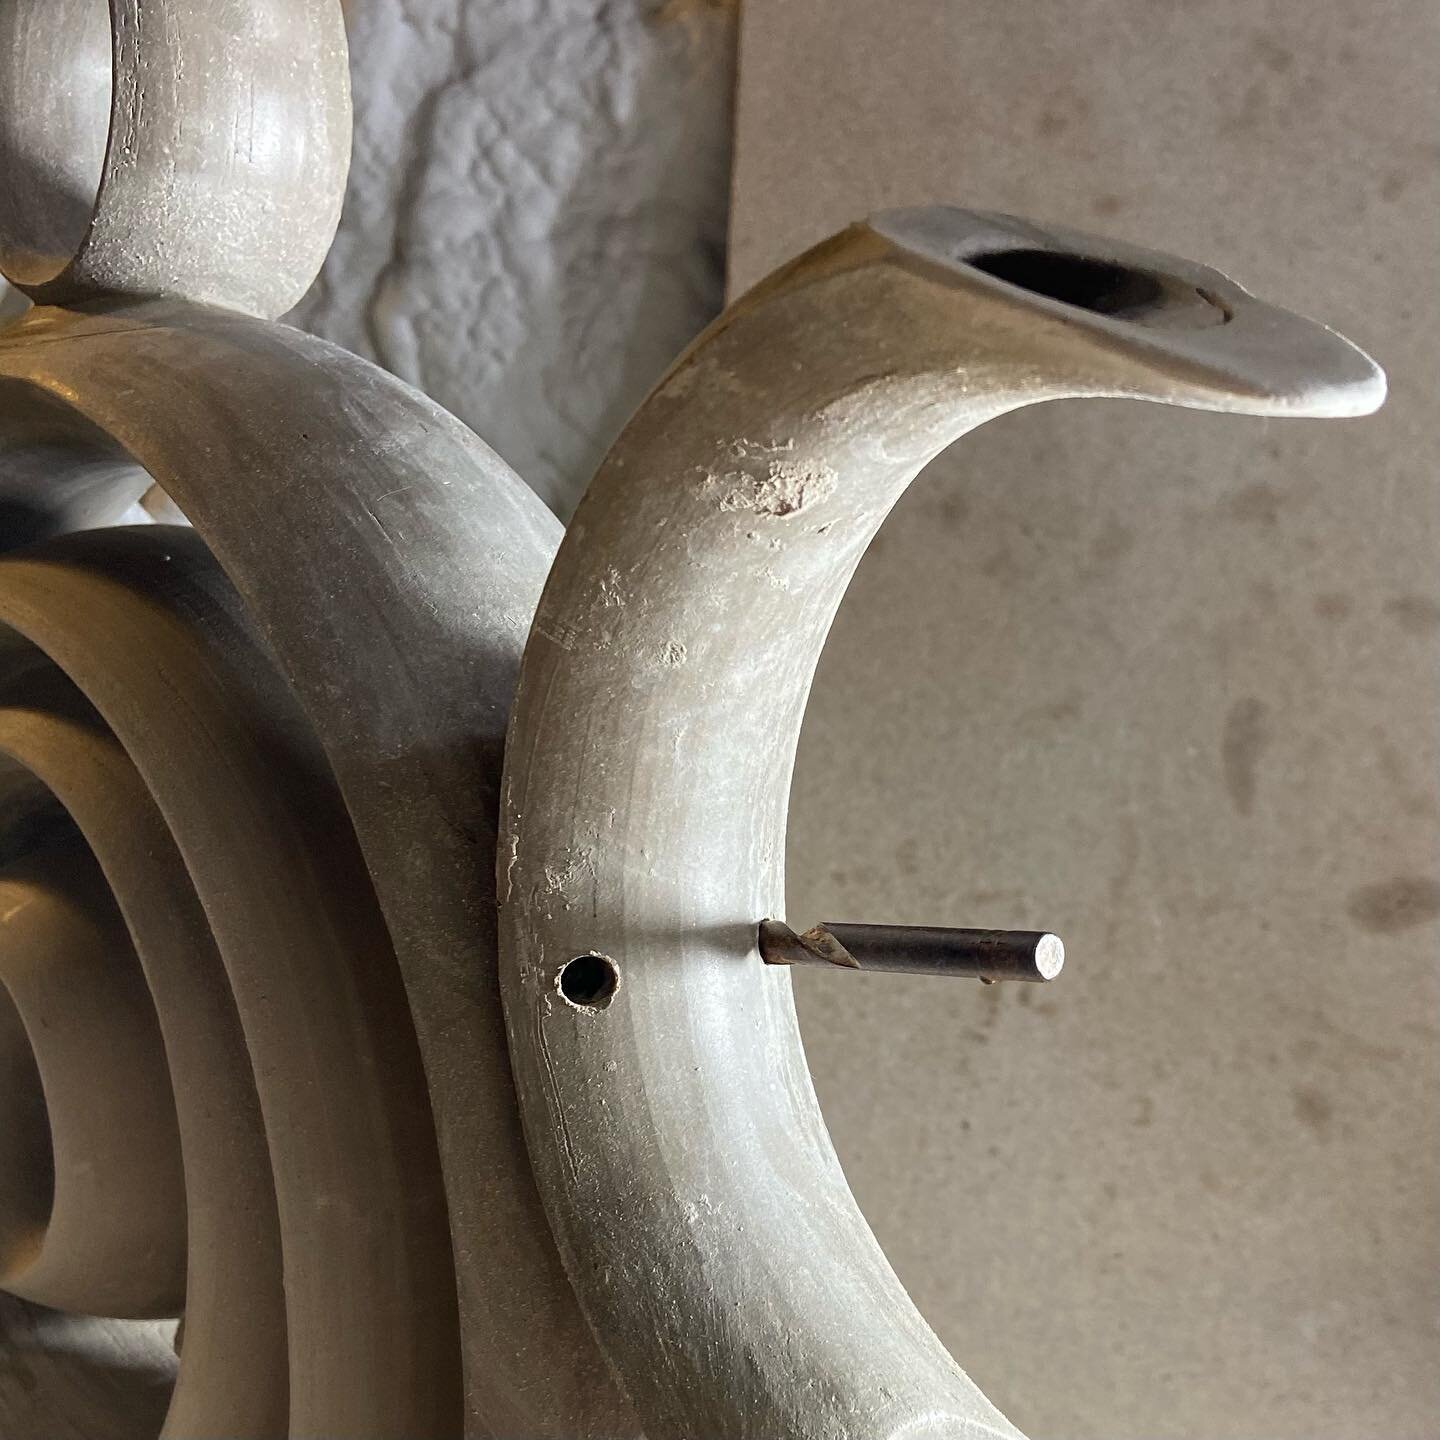
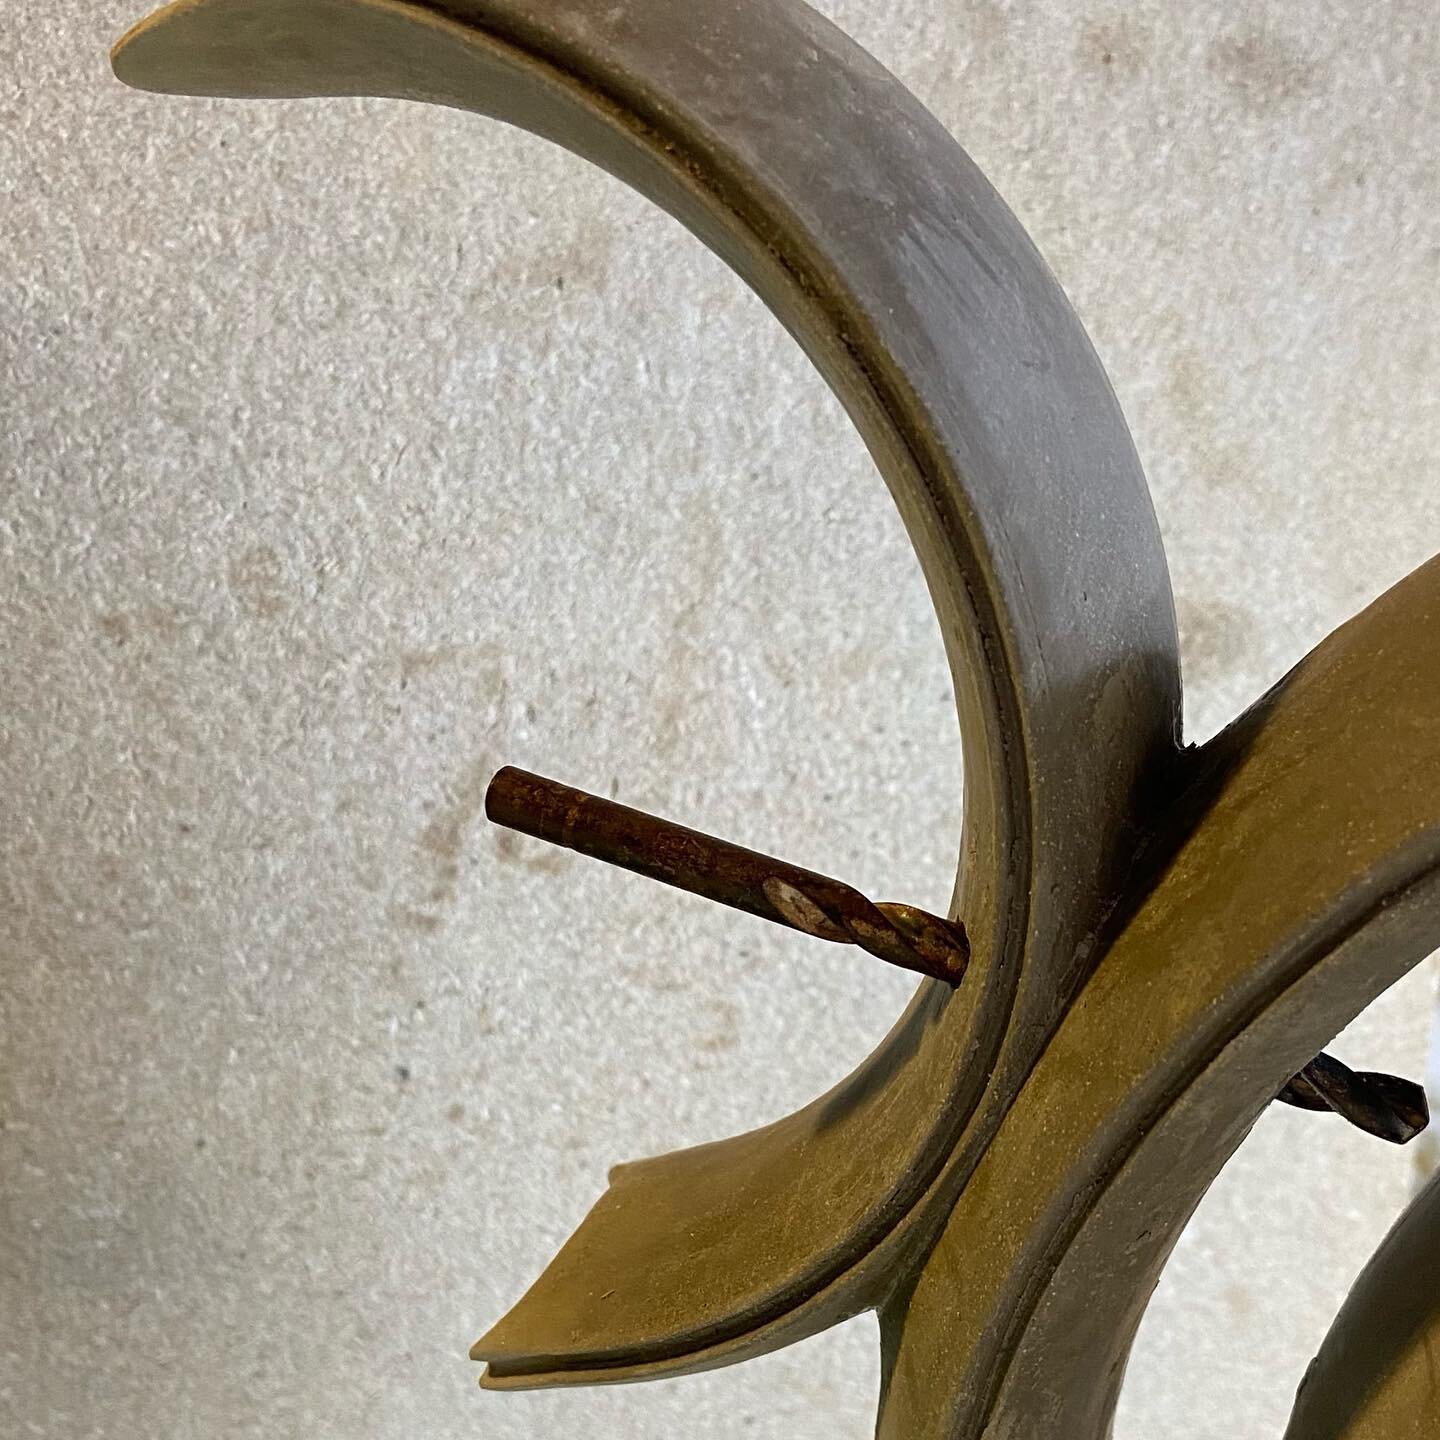
Making the Teapot handle from a hollow ring. Cutting the ring into three arc sections. Drilling a hole in the outer Teapot ring. All hollow sections have to have a hole somewhere for air to pressure balance during firing. Otherwise heated air is pressurized inside the closed section during firing and the segment separates or pops at the weakest bond as the piece cools. Tea water will flow into and out of the handle when the Upright Ring Teapot is used to serve tea. This may be unlikely as this Teapot sculpture will be very heavy to lift. Tea will also cool quickly as the ratio of tea volume to surface area is high, unlike a close-to-spherical teapot. I hope this Teapot offers other contemplation values besides high functional utility!


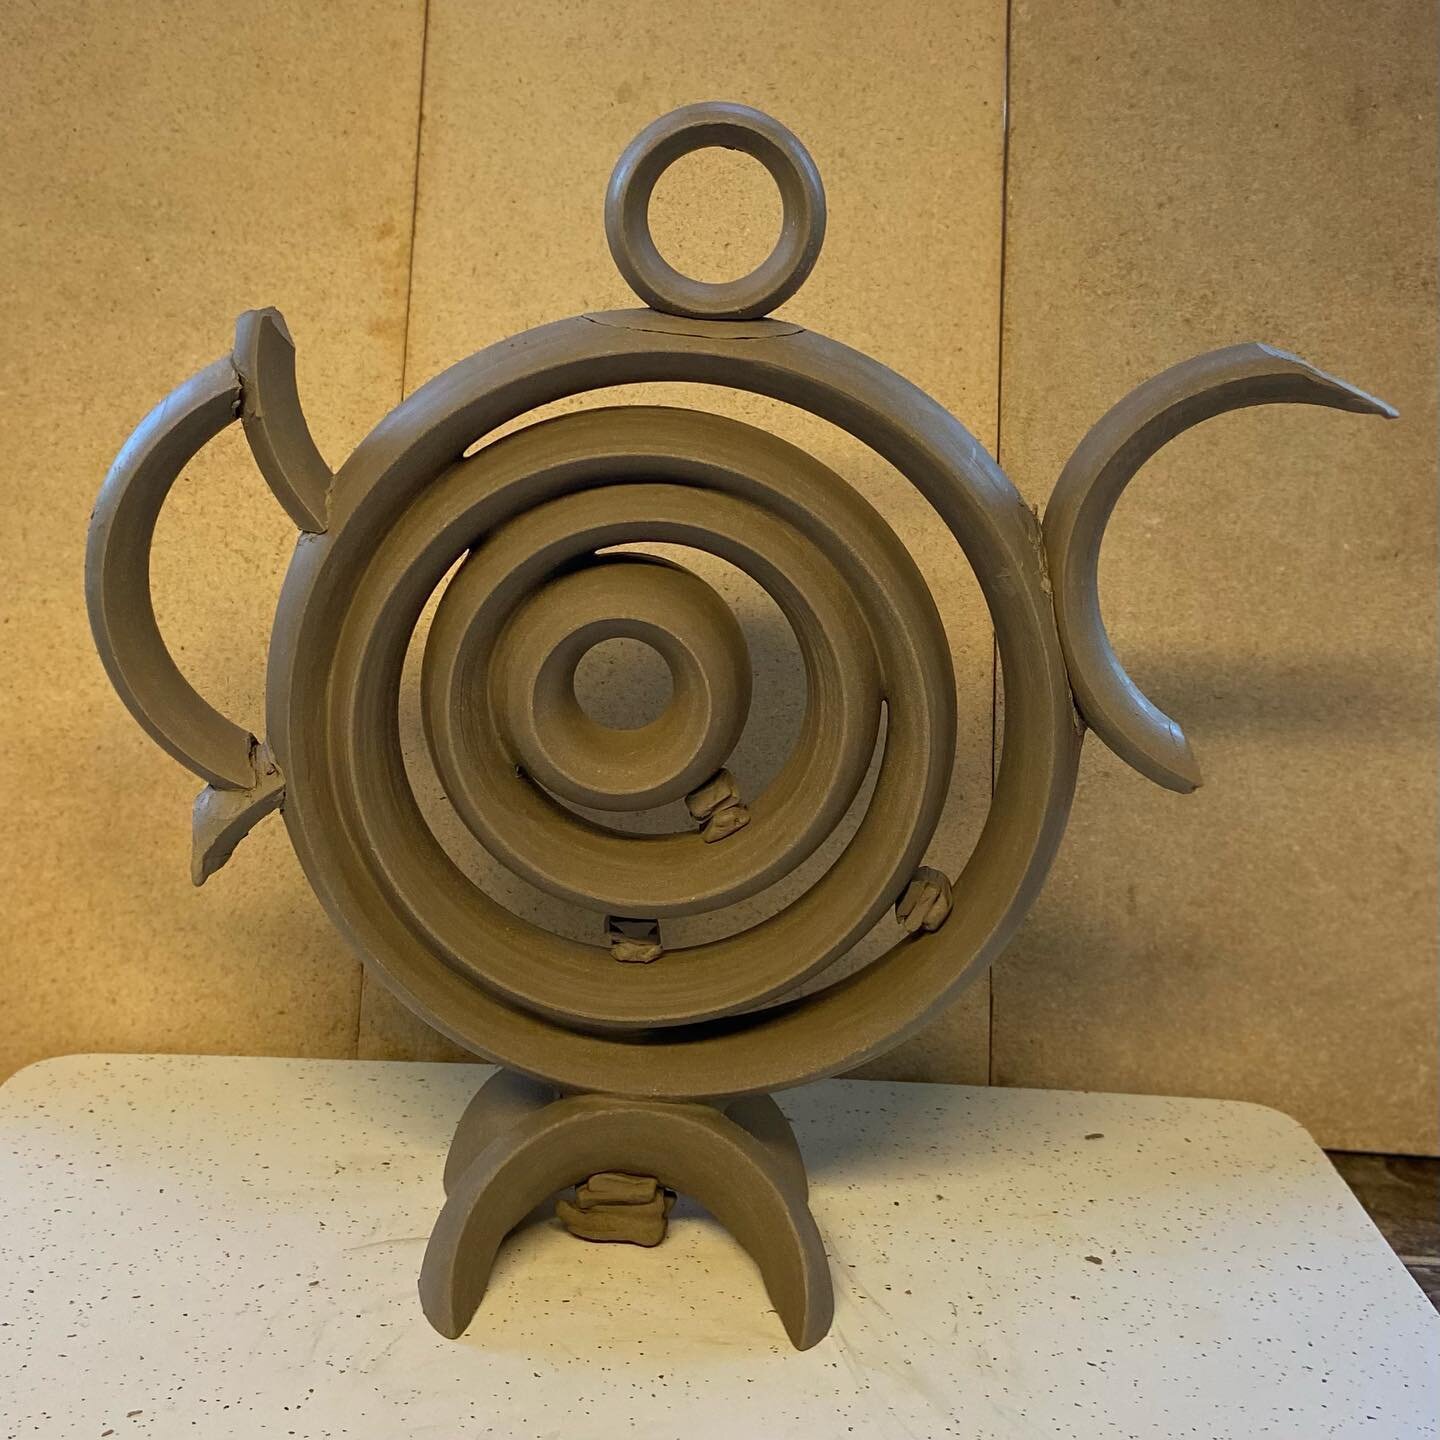
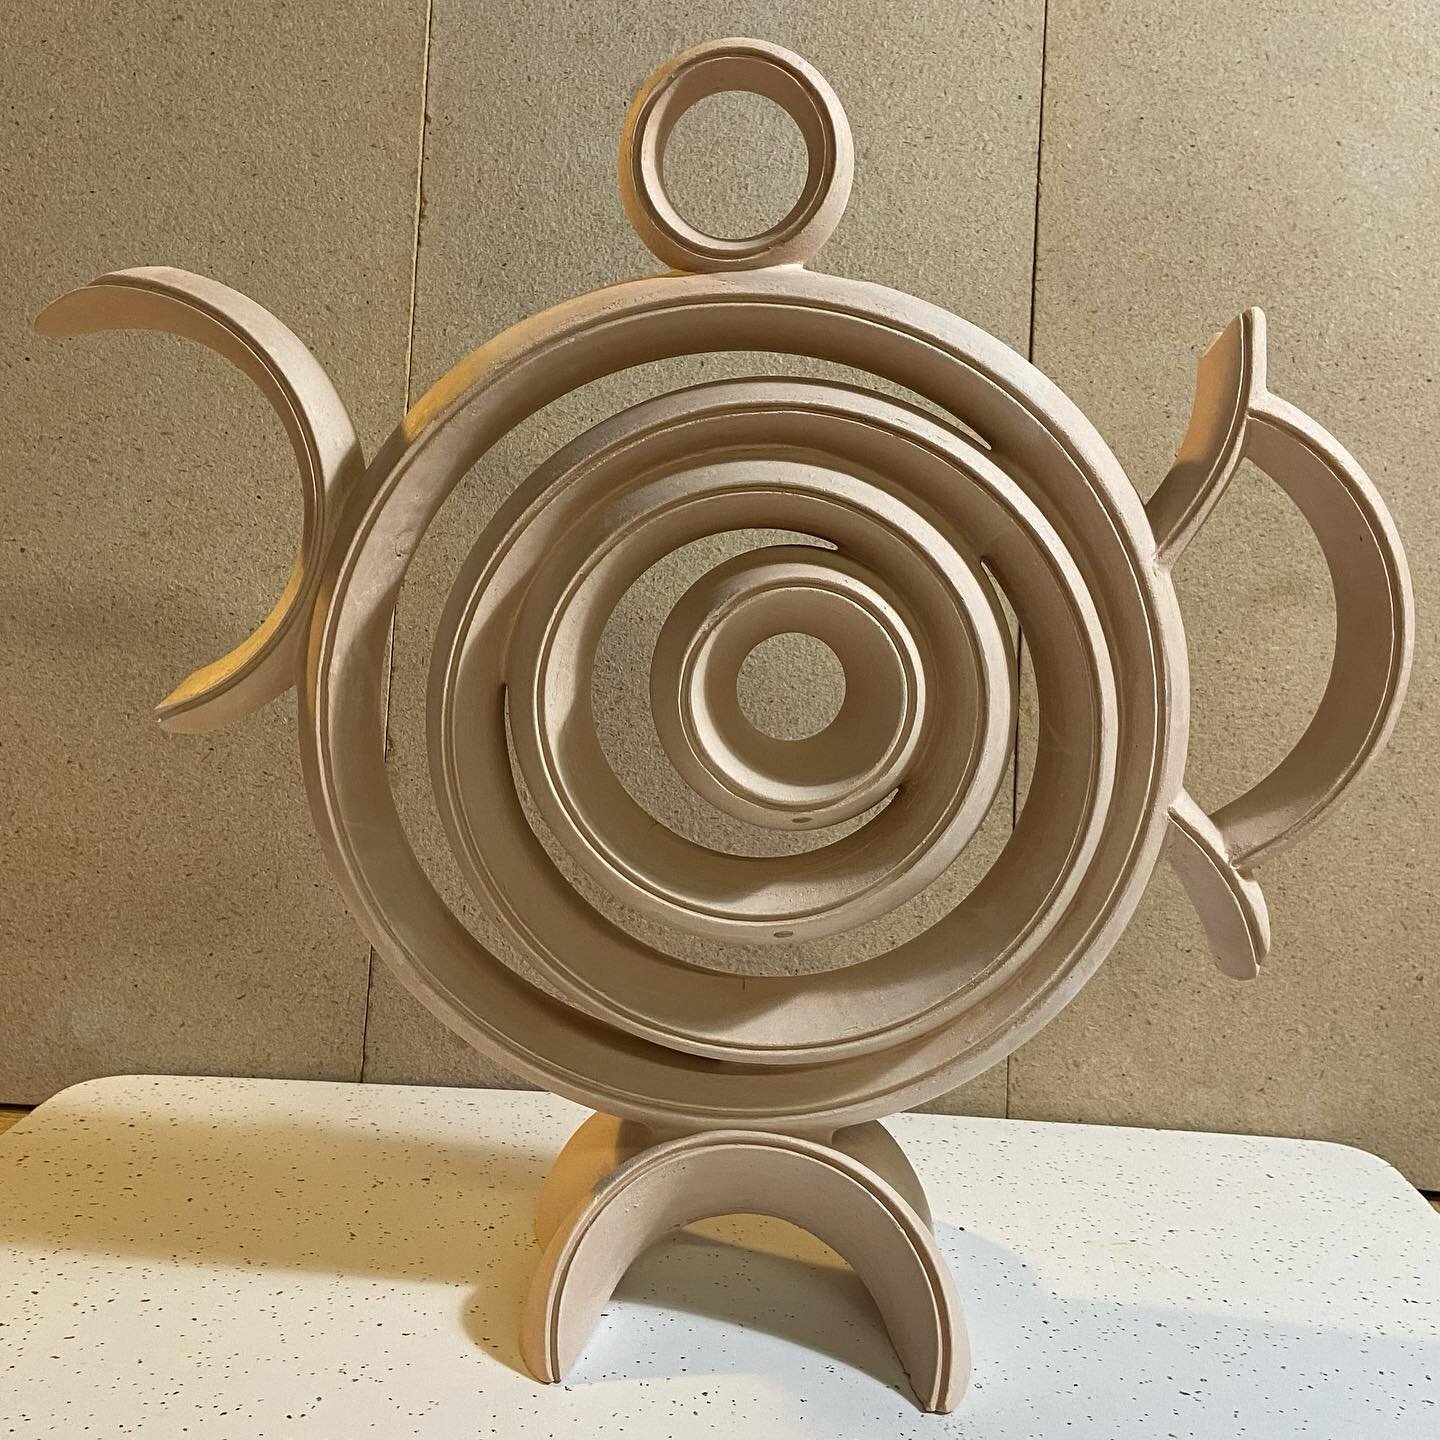
Cutting the spout from a hollow ring and placing the lid finial ring on the Teapot lid. The attached arc section spout piece, and the previous placement of the handle arc section piece are provisional sketches and show rough temporary attachments. They will be removed after consultation with an and agreement among Susan, Linley and me about placement, balance, and cohesion of presentation. Slab panels will be bonded to exposed hollow arc segments ends, all bonds will be securely adhered, seams will have same hardness clay slivers jammed in with wooden edge tools, and joins will be cleaned up. I do provisionally sketch in the planning stage of a Teapot sculpture, but in 3-dimensions with clay, not on 2D paper, which only offers one view. You will see slightly different proportions when the final attachments are completed.


Fixing the slab and panels onto the exposed hollow ends of the ring arc sections. Securely attaching the spout. Both sides are slip-gooed then positioned and squeezed together. A wooden tool is slice-combed into the seam, opening it up so thin same hardness clay slivers can be jammed into the seam where the joint is held squeezed together with my other hand. The finished spout is shown attached, and the cleaned up seam joint is pictured.


Assembling the handle arc sections. The holes to allow air into the hollow handle arc. The joint with same hardness clay slivers jammed into the seam. Views of the final handle assembly with cleaned up seams.


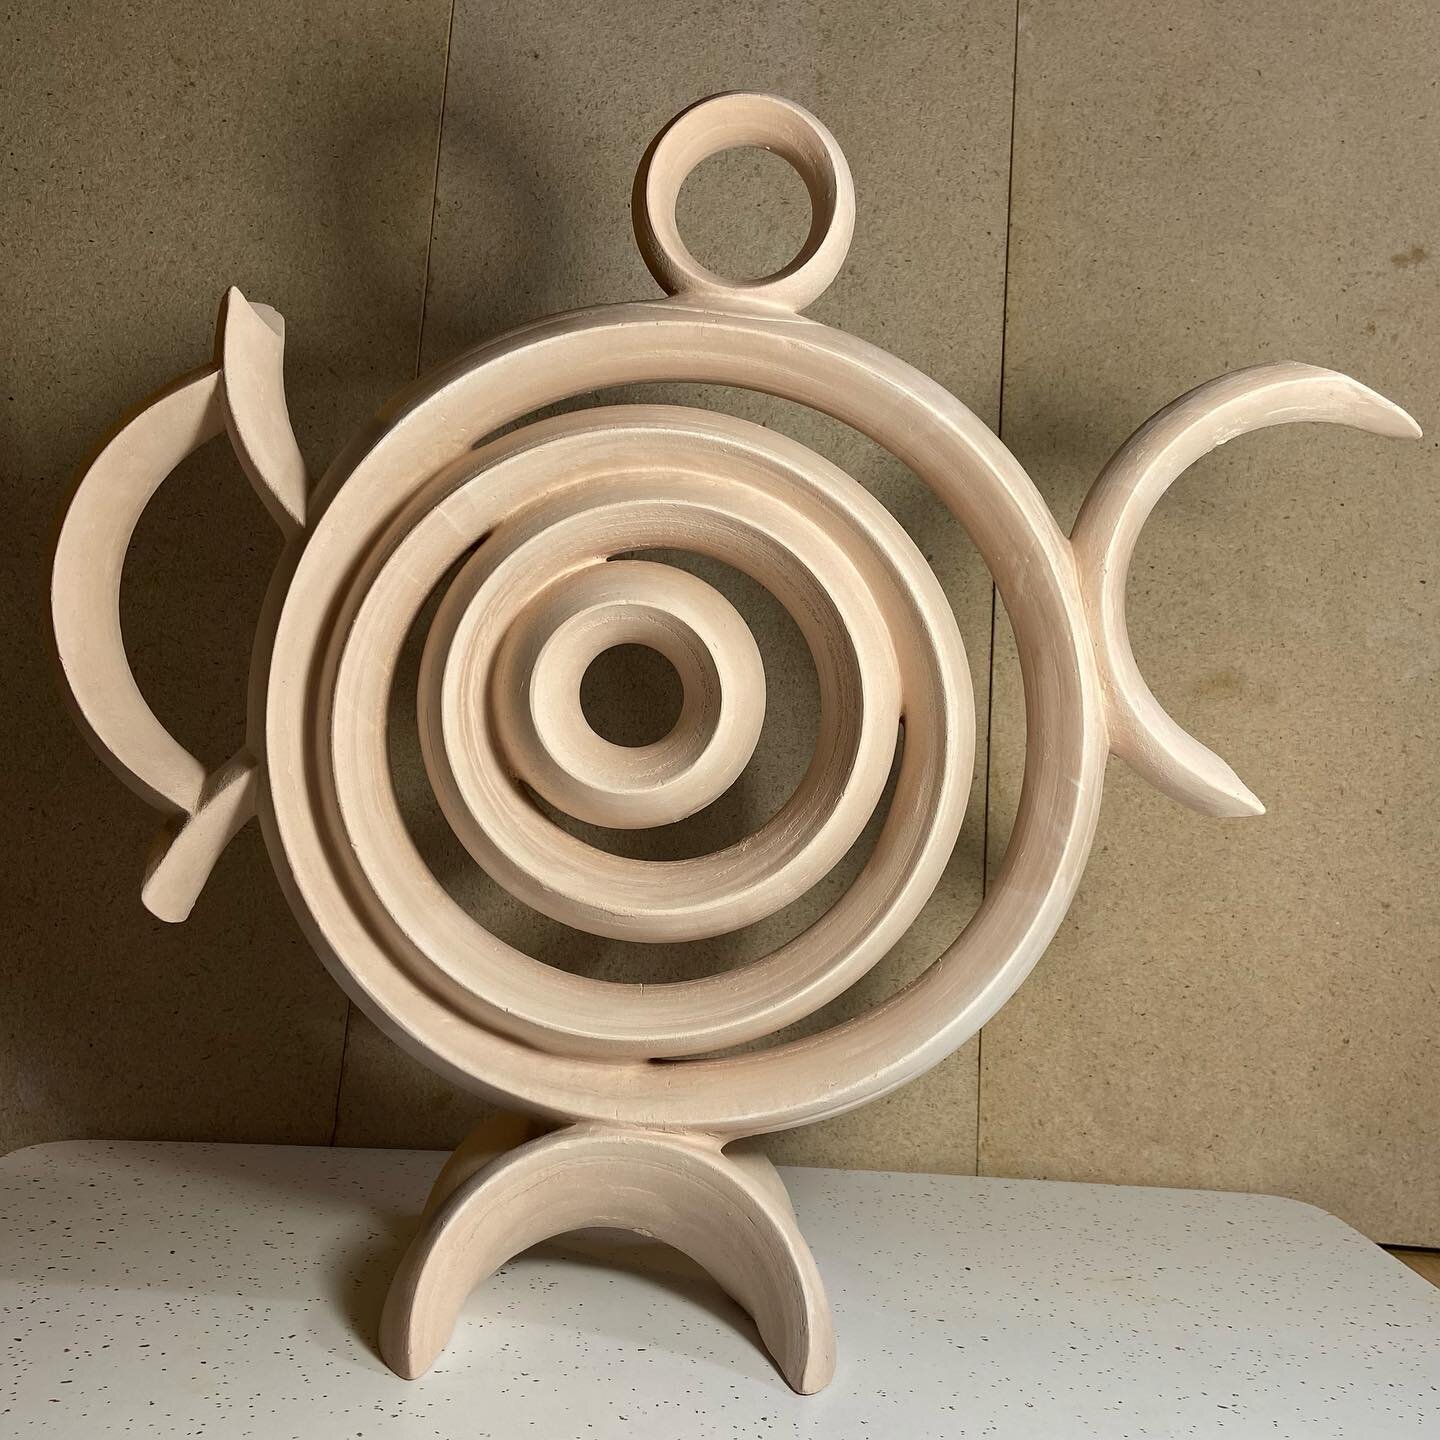
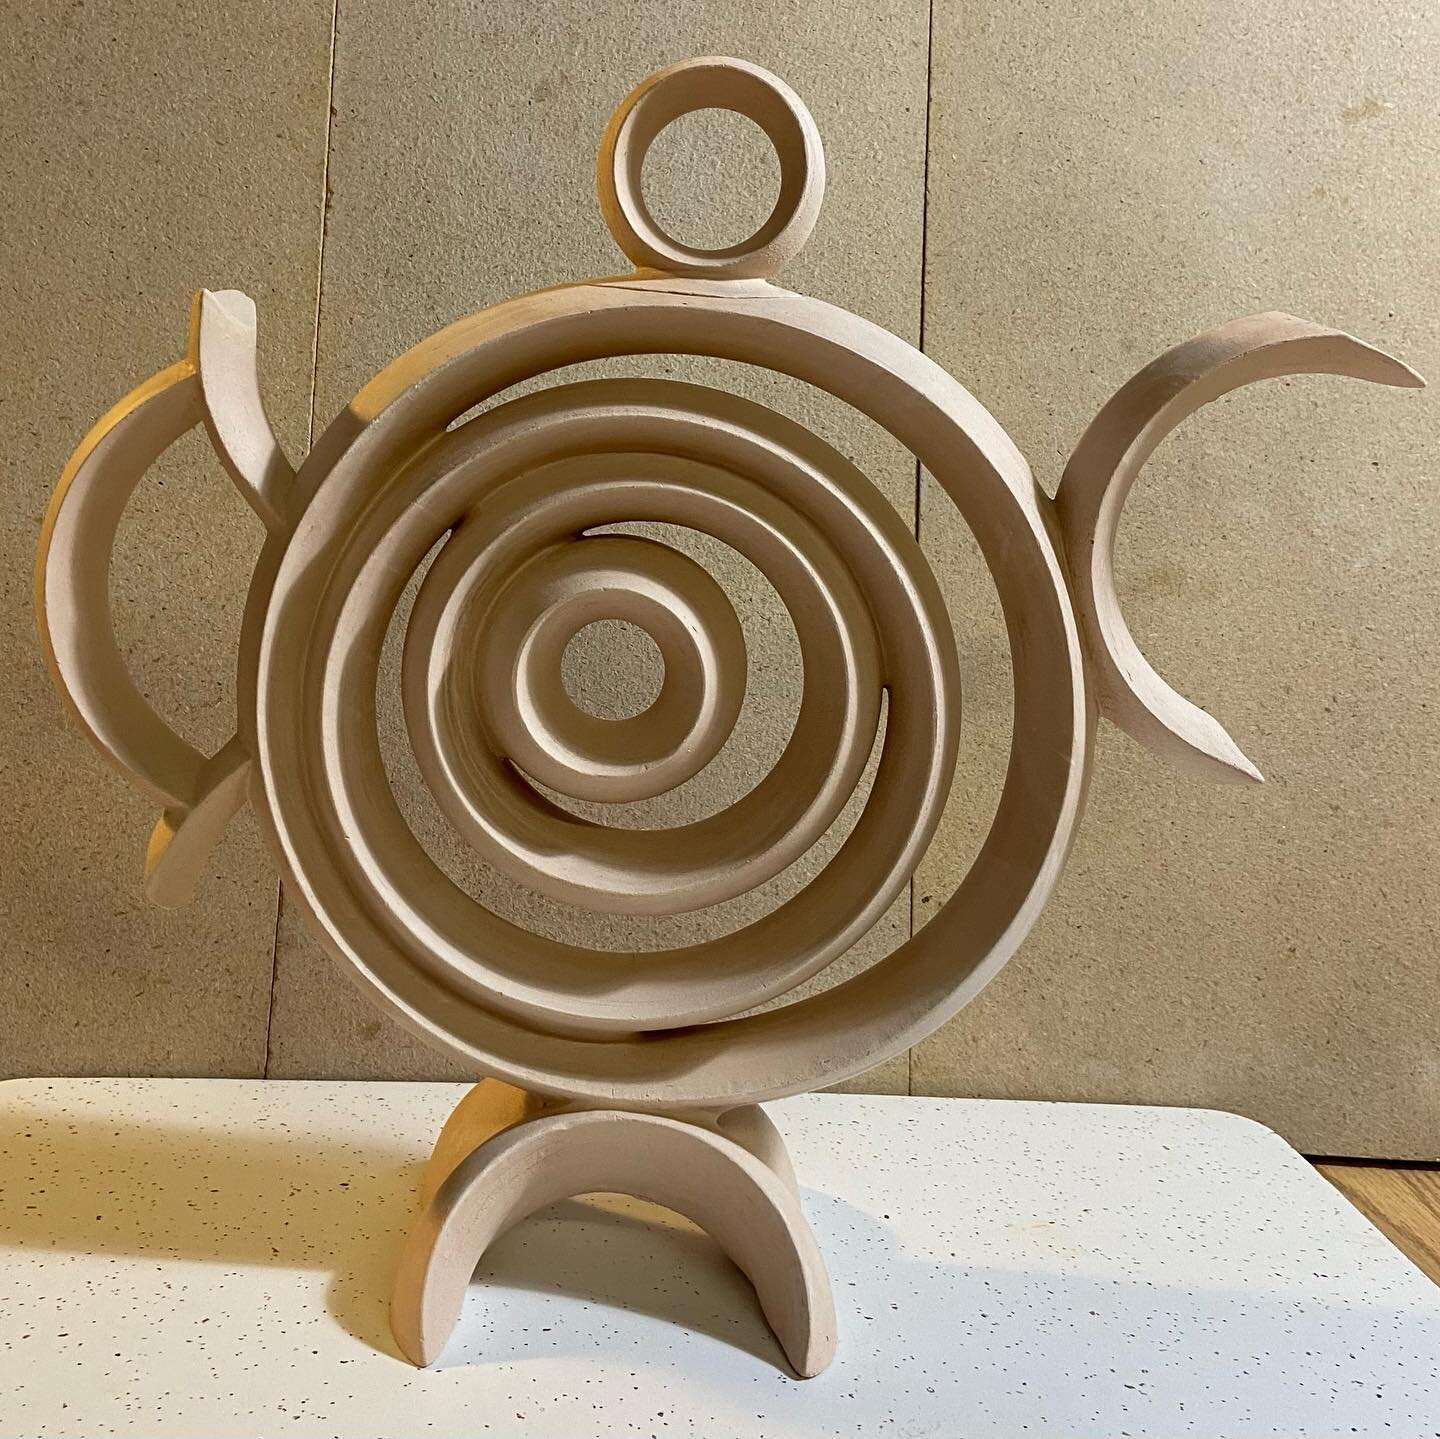
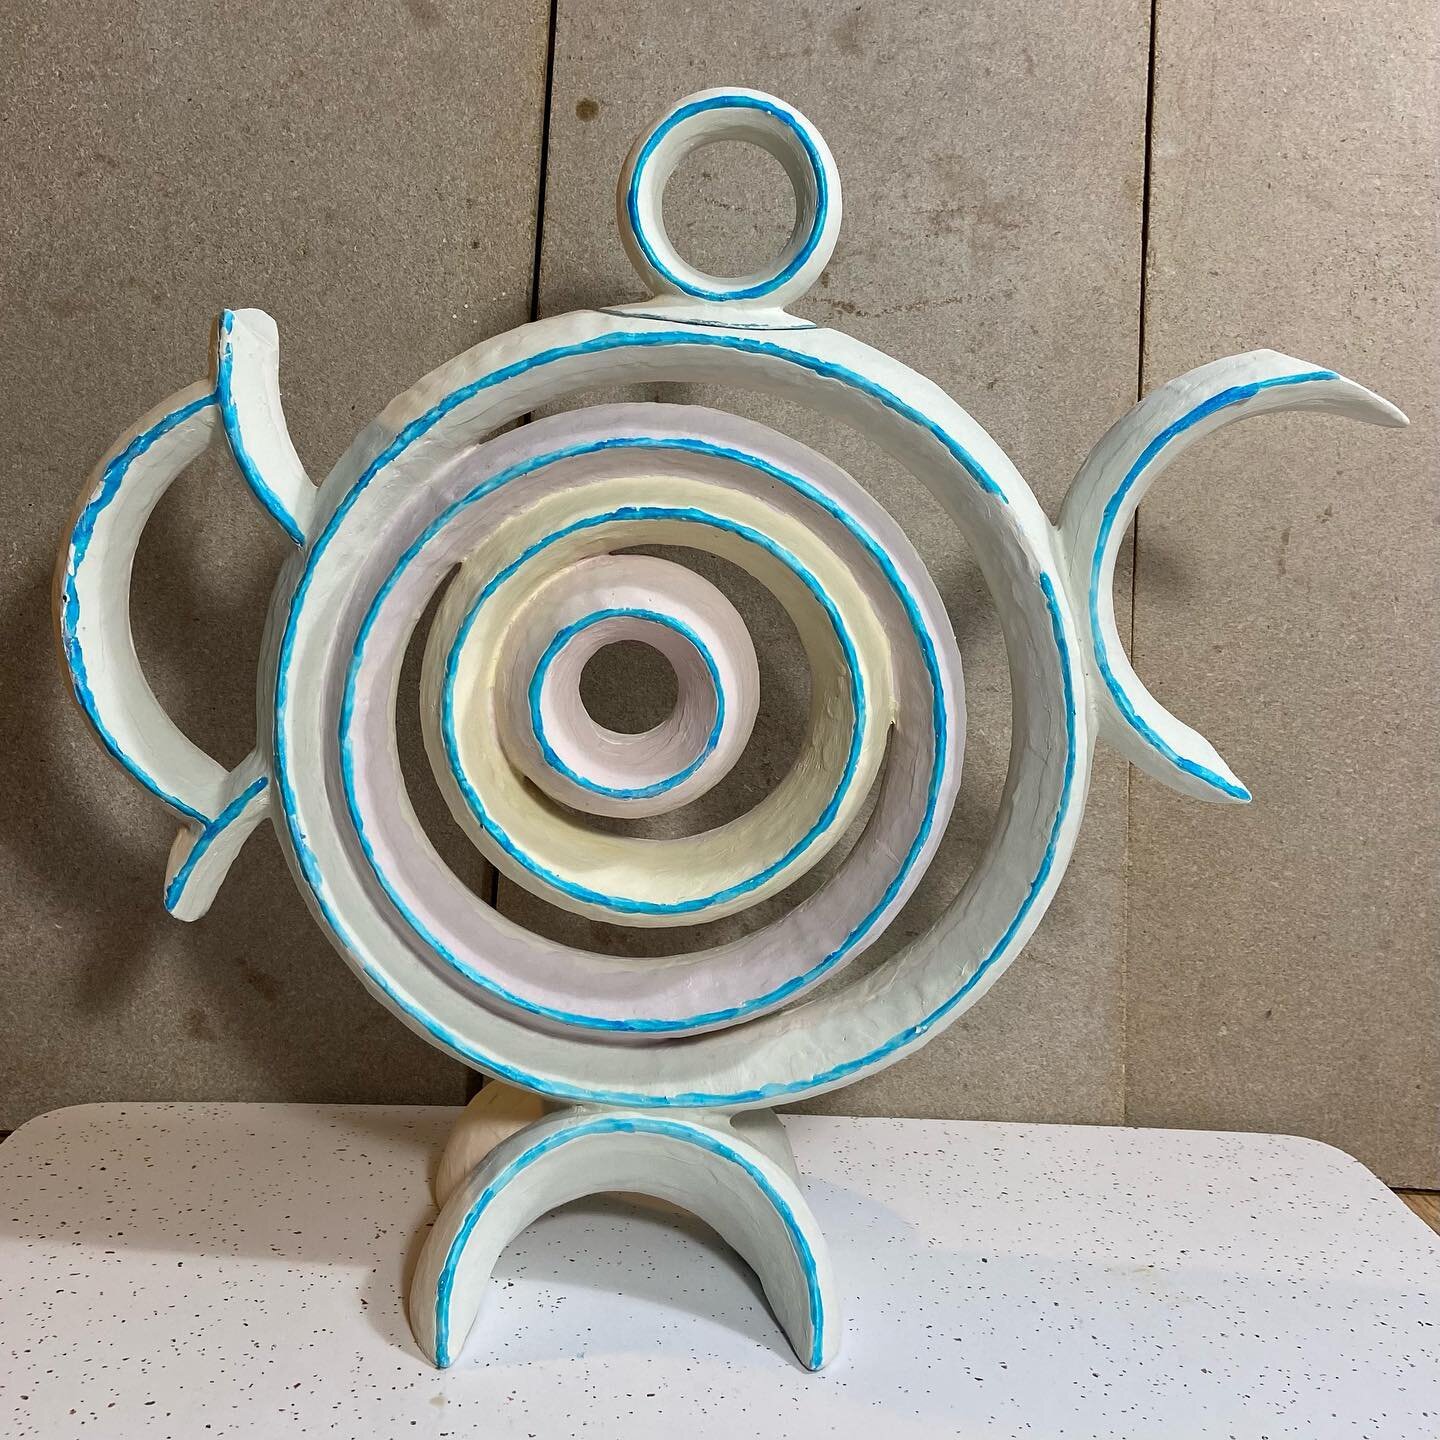
The Teapot is completed with the lid finial ring attached. The first view is on the plain edge side I have been showing you, followed by the view of the grooved edge side. Details of the grooved edge side. The lid, which is cut out of the top of the outside ring with an X-Acto knife, has a “tongue” which extends into the handle side of the Teapot so the lid doesn’t fall off when the Teapot is tilted to pour out tea. Note that the four concentric rings assembly is positioned on the base slightly off center toward the spout side. This balances the relative weight of the visually heavier handle and the visually lighter spout. The lid ring finial is also positioned slightly off center toward the spout so it is not centered directly over the inner ring of the Teapot assembly.


This post is for ceramic artist followers. Boyle’s Law of Fluids states that all liquids and gases always move toward even distribution. For clay workers, this means that water in more gooey zones will migrate to more dry zones. We bond clay pieces together in the leather hard stage because although the clay is stiff, all individual clay particles are still completely water-coated, so the water encircling each clay particle can wick or travel from wetter zones to drier zones to balance the overall dryness equally. First I good the two surfaces to be joined, then squeezed them together to squeeze out as much clay goo as possible. Then while holding the join tight I sliced into the join with the wooden tool to compress both sides of the join, and still holding tight I jammed a same hardness clay sliver into the partially sliced open join. After it dried a little I cleaned up the joint so the two pieces meet gracefully. Then I wrapped the whole Teapot up so that the very little water escapes the clay sculpture. Only a hermetically sealed container would let no water escape, and if the piece is not wrapped tightly inside that container water would move out of the piece into the surrounding air until a humidity balance occurred, and the piece would dry out somewhat even though it was sealed in the container. I wrapped each joint area individually – the handle, spout and lid finial in this case – then swaddled the whole Teapot in two layers of a large dry cleaner bag, including underneath the base. Never pull a bag over your piece like putting a loaf of bread into a bag. You can knock off pieces in the bag-pulling-over process, and you only have one plastic bag layer keeping the piece damp instead of two. Use buffalo clips to secure the bag wrap, then wrap-swaddle a second double layer bag around your piece. More buffalo clips and your piece will stay leather hard indefinitely. I had my unfinished Pink Pentagonal Cross-Section Reassembled Ring Teapot wrapped for eight months with this method while I worked on other obligations! Check it out in “Teapots Held In Private Collections.”


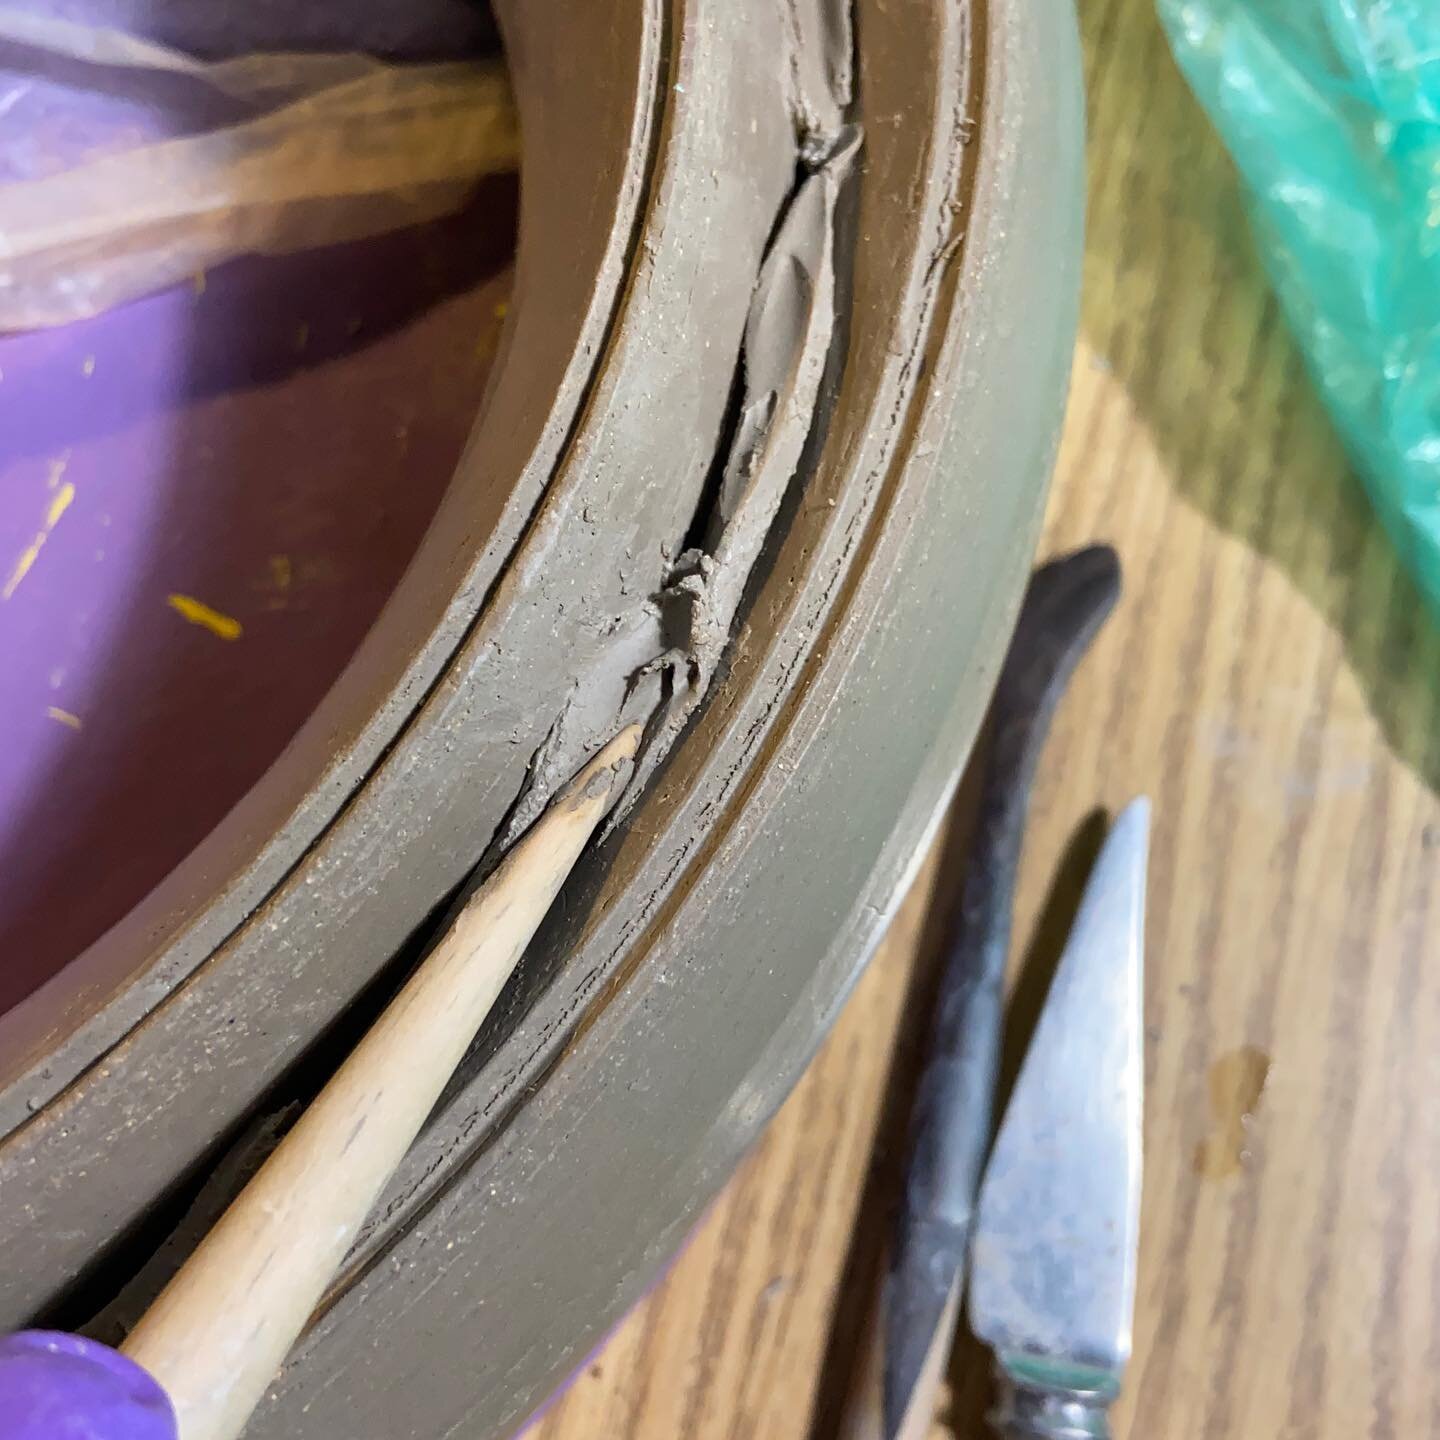
Although the Teapot is double wrapped–swaddled with four layers of dry cleaner plastic, it is still drying out slowly because of the low humidity winter air – Boyle’s Law again! If the Teapot were wrapped in humid July air, it would dry out more slowly. As the water in the leather hard clay leaves the piece, the clay particles draw closer together and eventually touch, and that zone “locks up“ and becomes rigid. If there is a zone of less-tightly-packed wetter clay surrounded by more dense clay, a crack will develop along the wetter clay/more dense clay border because the previously-wetter clay shrinks more than the previously-more-dense clay. After I discovered this crack, I paint-brushed a small amount of water along the crack, which wicked down into the crack, softening the surfaces on each side. Then I pressed a metal knife tip into the crack and slightly grooved it. After paint-brushing a slight layer of water onto the groove made by the metal knife tip I cut thin slivers of stiff clay and peanut-butter-spread the stiff clay into the crack. Not any more or only a little water should be added—only apply the minimum to ensure a bond! I kept compressing/smoothing the clay along the crack, going beyond the visible crack at both ends. We shall see if the crack reappears. I will look all over the Teapot with a magnifying glass to see if more cracks appear. There are a total of 15 join-bonds of separate leather-hard clay components in this Teapot Sculpture, so more cracks are certainly possible.


In the Department of Things That Happen, the spout came off as I was unwrapping the Teapot to check on the drying process. When an artist invests more time in a single piece, the risk increases of a detail that can sink the whole boat of time invested. So I set out to reattach the spout. First I wetted each bond surface several times, allowing the water to sink in a minute between each wetting. Then I clay –gooed each surface and pressed them together, squeezing tightly and cleaning up the meeting surfaces. I rolled some soft clay ropes and wrapped them around and over the re-bonded spout. As the clay ropes dried to the same hardness as the spout and outer ring, they shrank and tightened around the new bond. I kept checking but didn’t see any cracks develop at the bond where the spout and ring meet. I will describe the next step I did to increase the chance of the successful spout re-attaching in the next post.

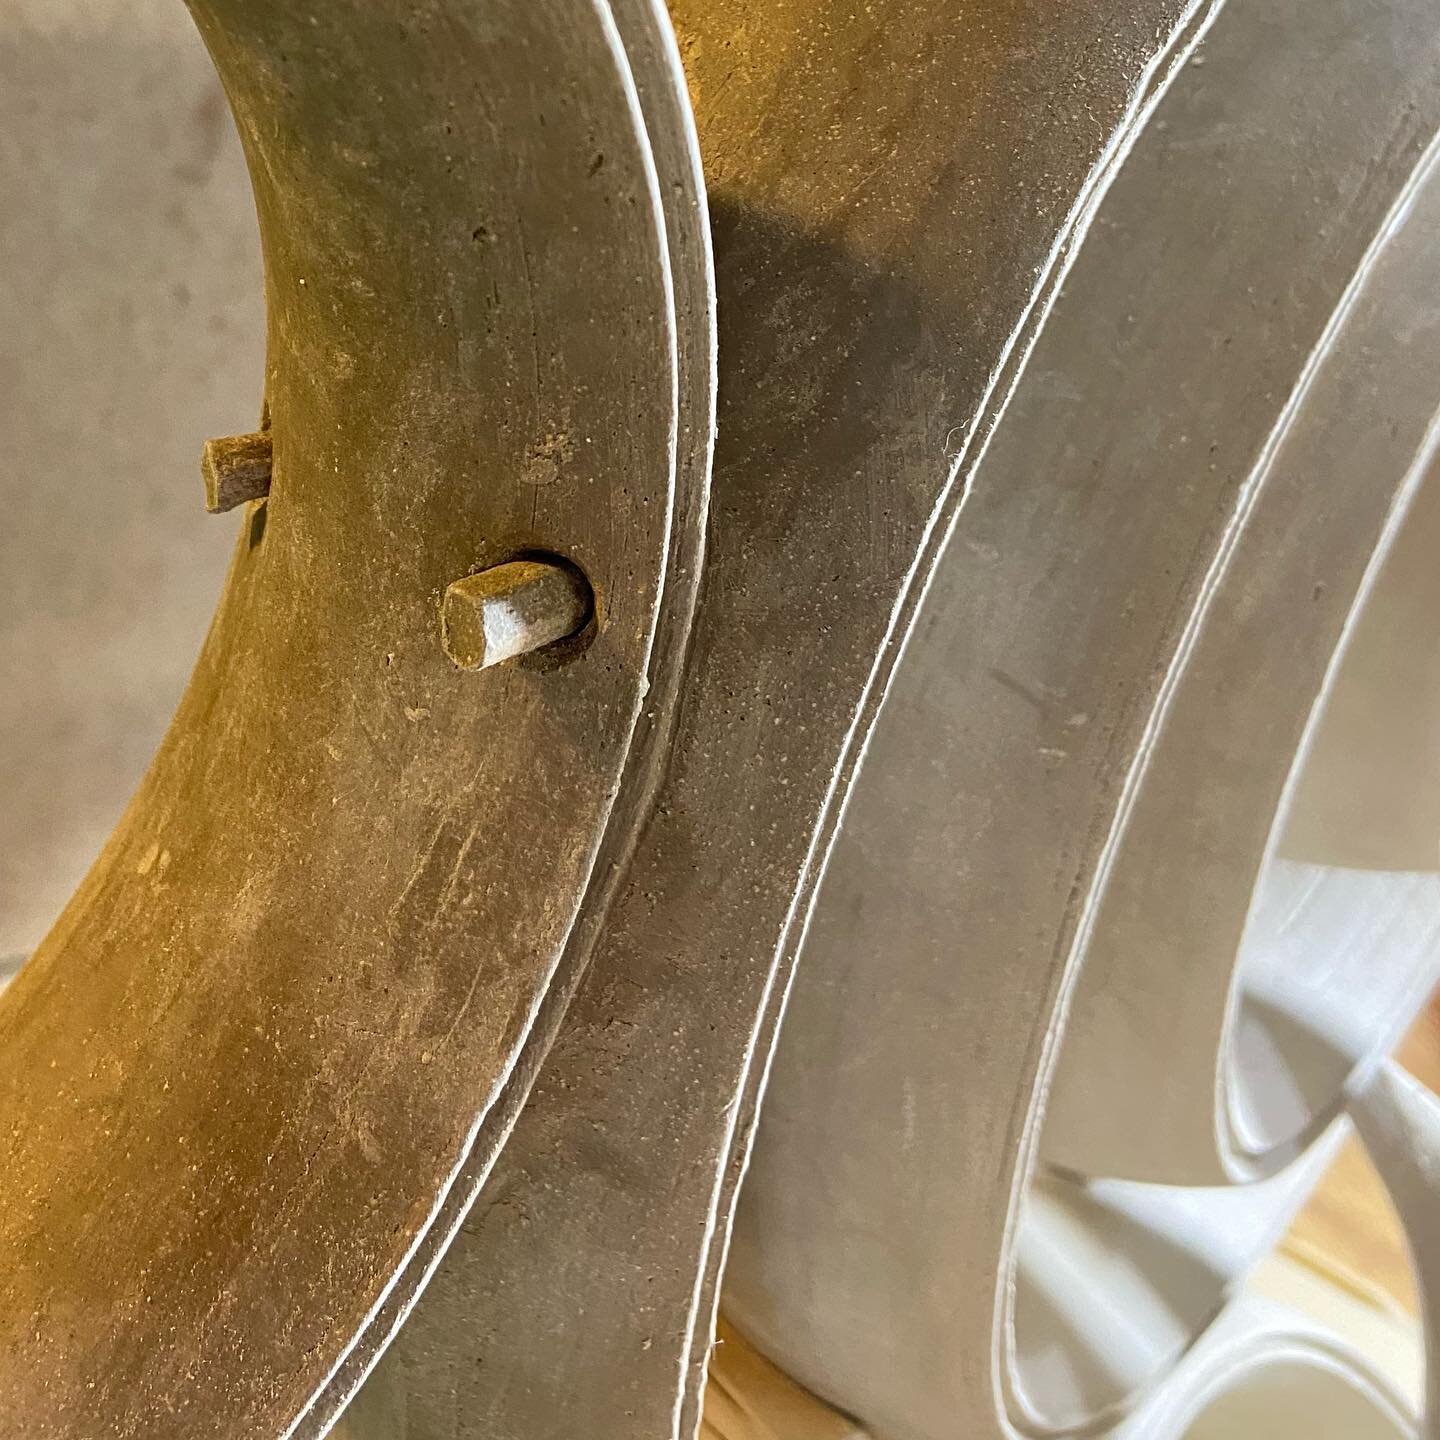

I wanted to do everything I could to keep the spout from falling off again, so I decided to try and anchor it on with clay “bolts,” something I have never tried or even seen before. Clay has a grain, less strong but similar to wood grain. My clay “bolts” are longitudinally stronger because the throwing process aligns and compacts the flat clay particles. First I took off the clay “ropes” and drilled two holes on either side of the attached spout above the halfway point of the spout/ring attachment. Then I carved round cylinder “bolt” rods from left-over spout ring arc-sections I had saved “just in case.” I widened the holes on the surface of each side of the bolt hole like a woodworker would widen a screw hole at the surface to countersink a screw so it would lay flat to the wood. With very minimal water added, I pushed-combed-flattened the clay “bolts” to the spout and ring surfaces at each end of the “bolt.” I tried to have the clay bolts the same wetness as the spout and ring. If the bolts were wetter than the spout and ring they would shrink more and break apart inside. If they were more dry they would not shrink as much and push out one or the other side. At this point in the Teapot Sculpture drying process the bolts and spout/ring were both a little more dry than leather-hard, but still filled enough with water that the water could move between the bolt and the teapot and spout clay. The last photo shows a very slight crack formed around the bolt surface which you may not even be able to see. I hope the glaze coating obscures the crack. I don’t know if inserting these “bolts” will help anchor the spout on, but I am doing all I can to save this Teapot!
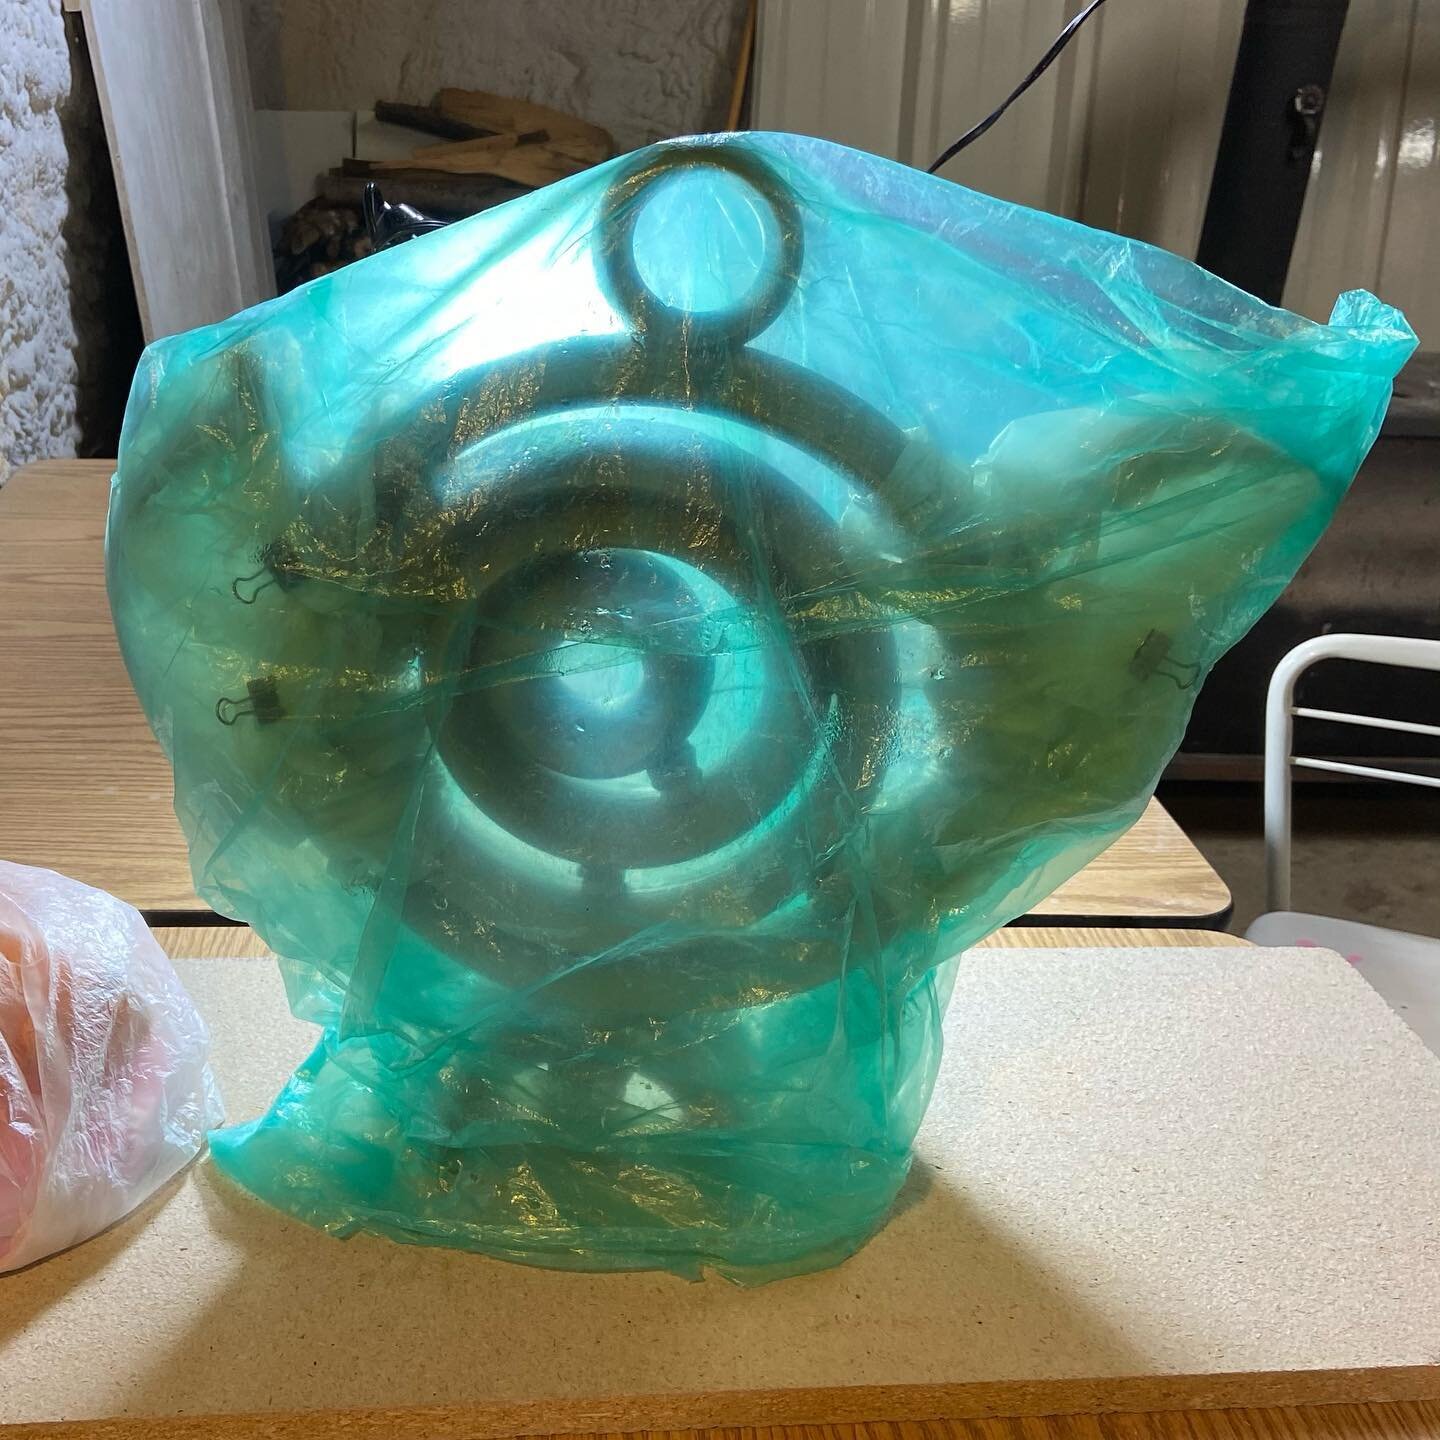


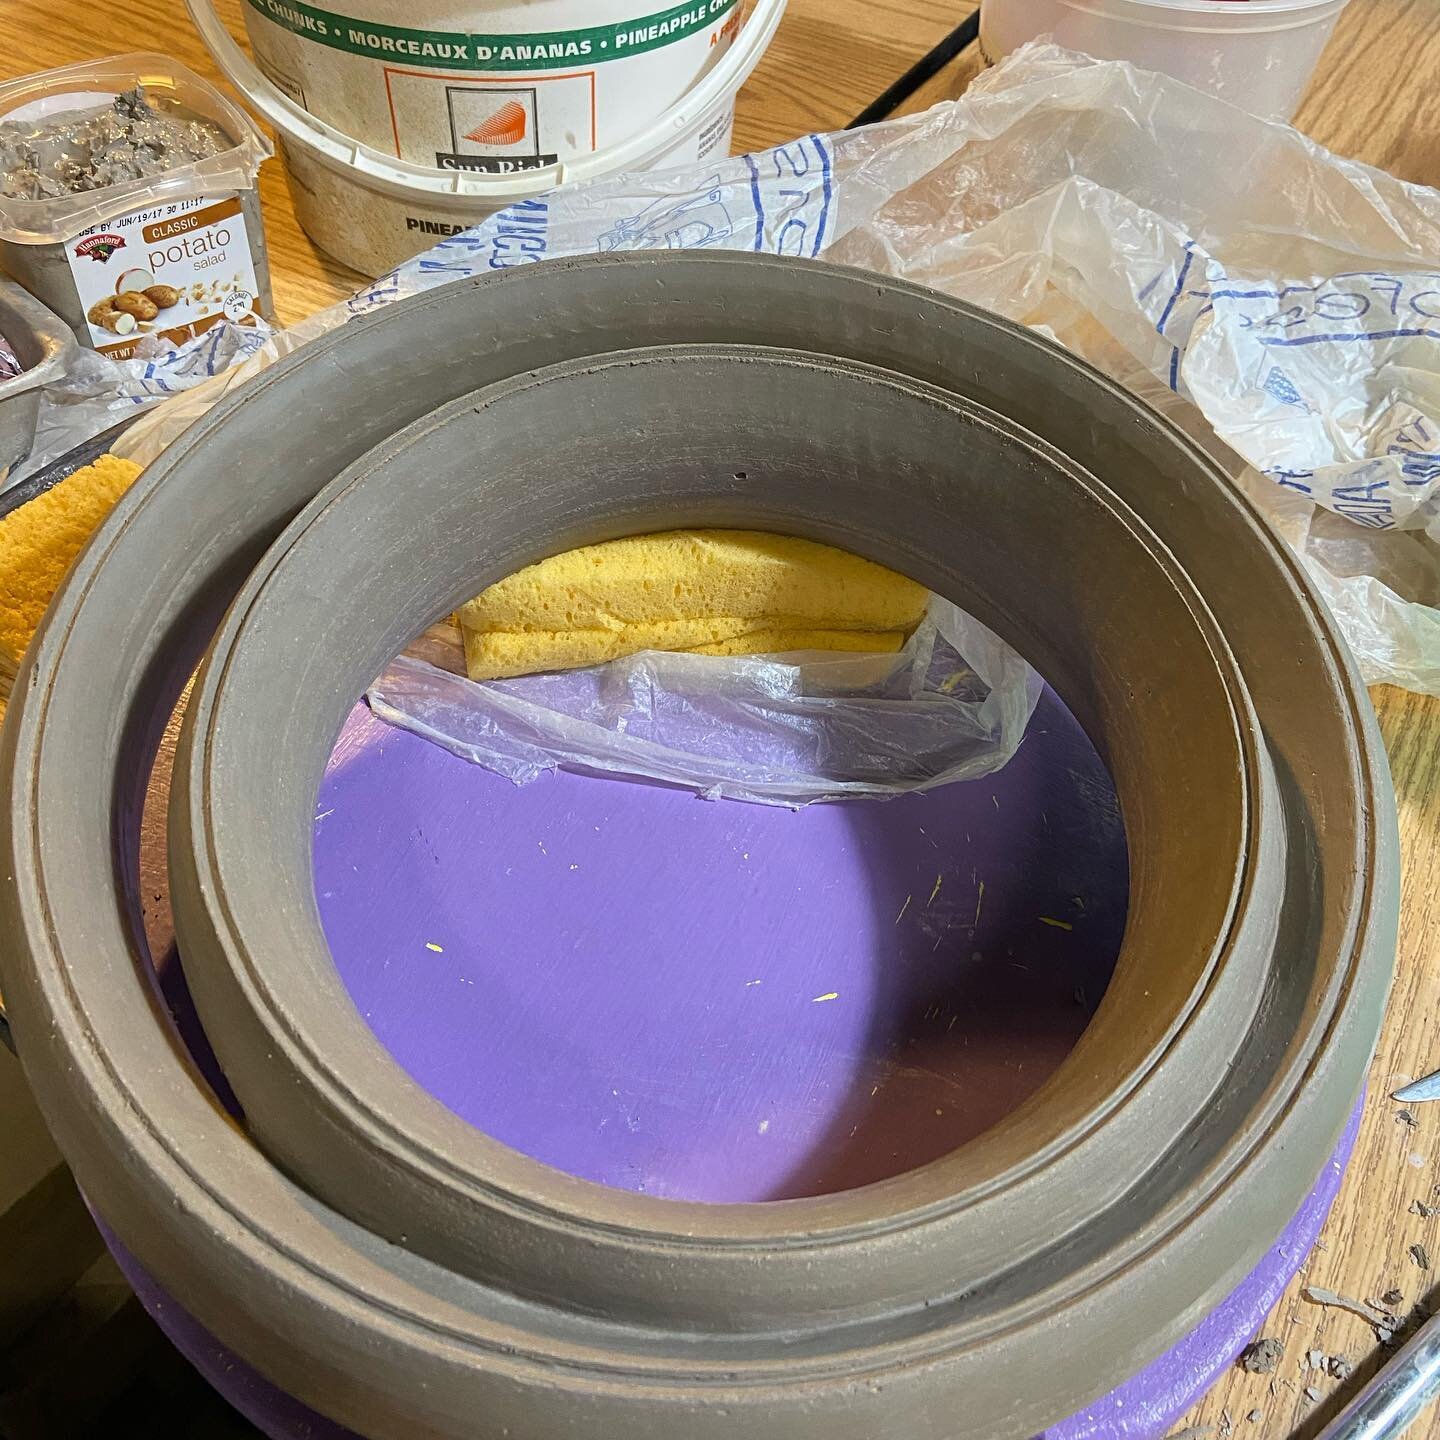
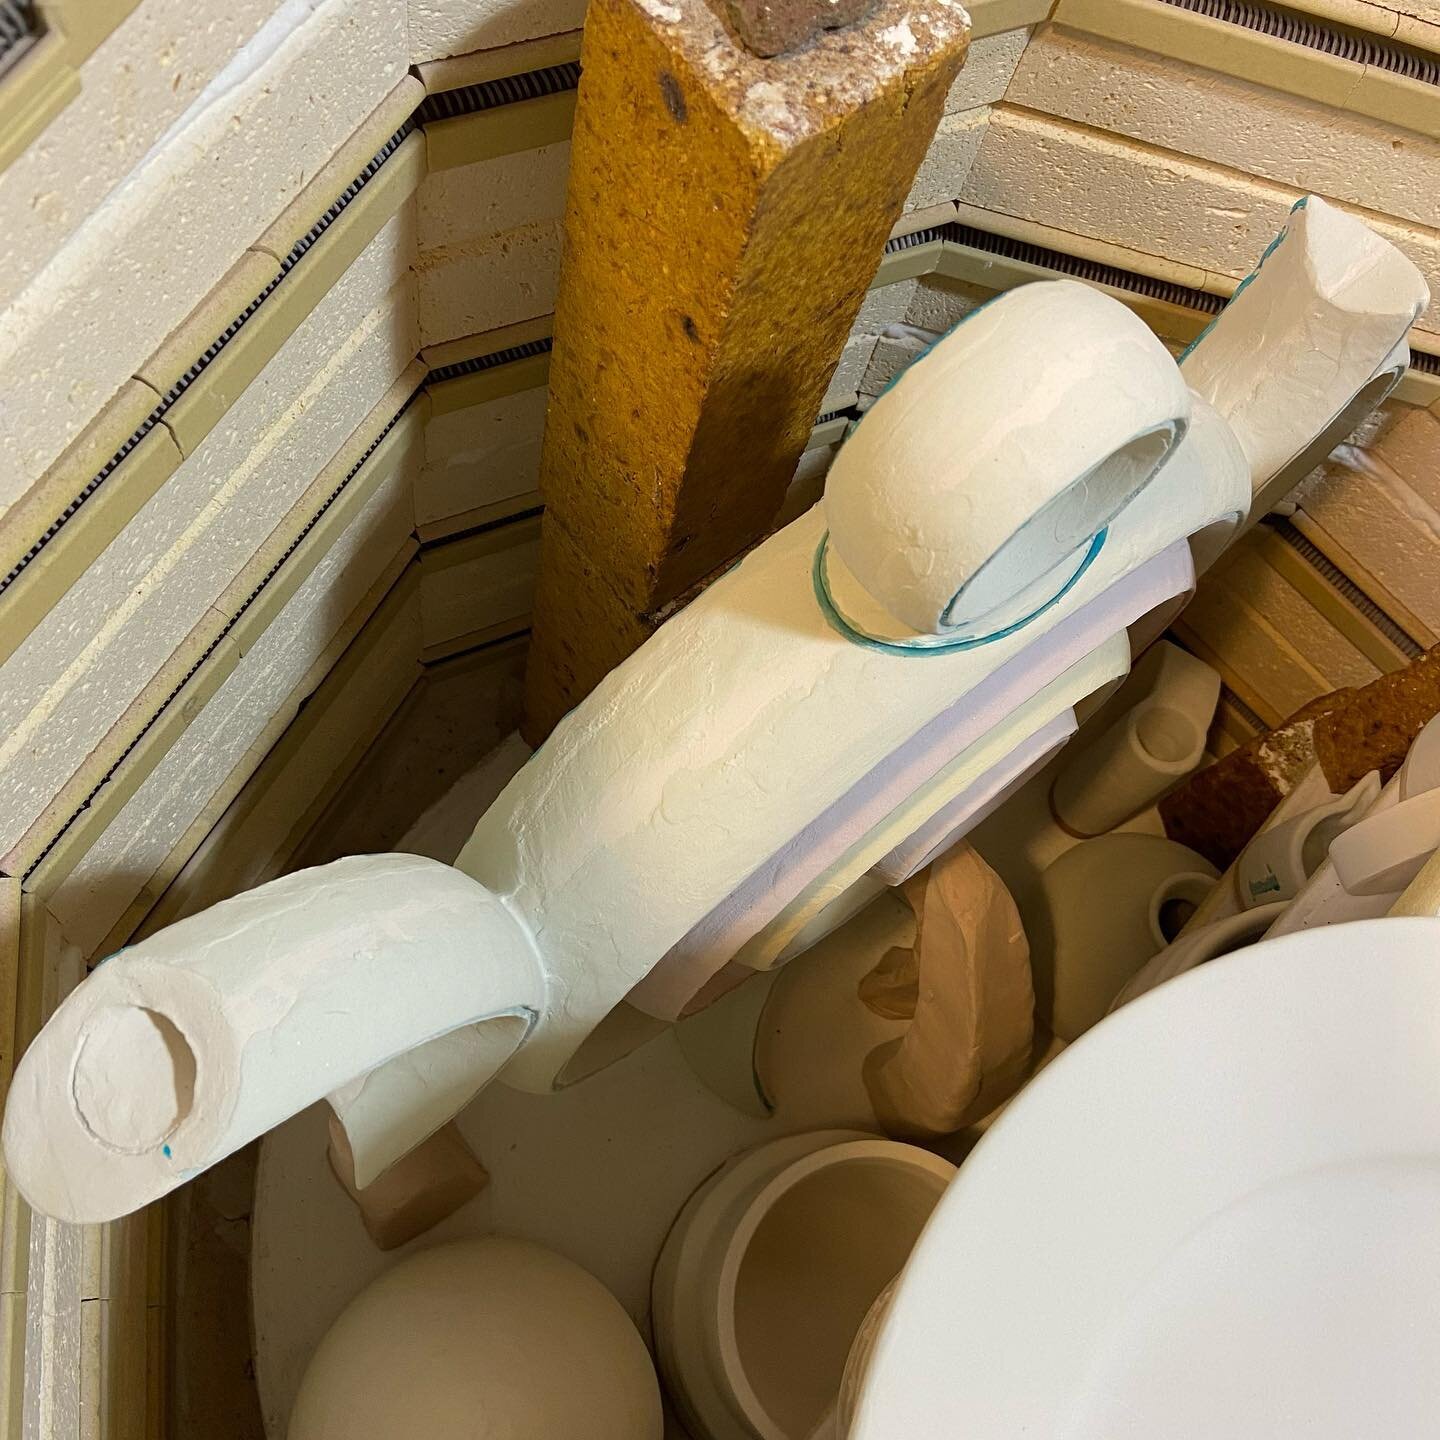
The Teapot was now completed, with the spout hopefully attached/bolted on, and I slowly dried it out. Notice in the green plastic wrapped photo how much air space is between all the components. The Teapot sits on the somewhat absorbent particleboard, and the spout and handle are double wrapped inside to slow down their drying. As the main four rings, lid and base dry, the water in the spout and handle will be wicked out into the more dry components (Boyle’s Law again again!) So the spout and handle are drying too, by water migrating out into the Teapot body, but more slowly. The photos of the completed Teapot show how it will be loaded into the biscuit kiln. The support blocks between the rings and under the base will be left for the biscuit firing and removed after that firing, but in addition I have made four props that will be used in the biscuit and glaze firing. I drilled prop seating-holes into but not through the inner and second-from-inner rings, and made pointed end props to support the bonds above the rings, so the weight of the rings doesn’t cause them to sag and tear open the ring bonds. I thought about putting props on both sides, but decided the supports on the slightly protruding groove side should be sufficient. There is danger everywhere! Wax will be painted where the props and spout/handle touch so the props don’t glue on in the glaze firing. I have done this prop procedure in the past with many of my Reassembled Ring Teapots. I will heat up the biscuit kiln VERY SLOWLY to about 185°F, well below the 212°F boiling point of water, so I don’t explode the Teapot by turning trapped water into steam, then turn the kiln off and let it cool down, before slowly heating it up again after a day or two. The next photos I post will (hopefully) be the successfully biscuit-fired Teapot Sculpture.
Big sigh of relief – Mr. Teapot made it through the biscuit firing with no cracks and no spout -falling-off difficulties! Two different lighting treatments. The last picture is of the spout side “bolt“ ends. They protruded a tiny bit on the spout side, but I will sand them down and hopefully the glaze will cover them up. The next post will be of the Teapot glazed but not yet fired. Tentative name: “Eight-Ring Circus Upright Rings Teapot.“

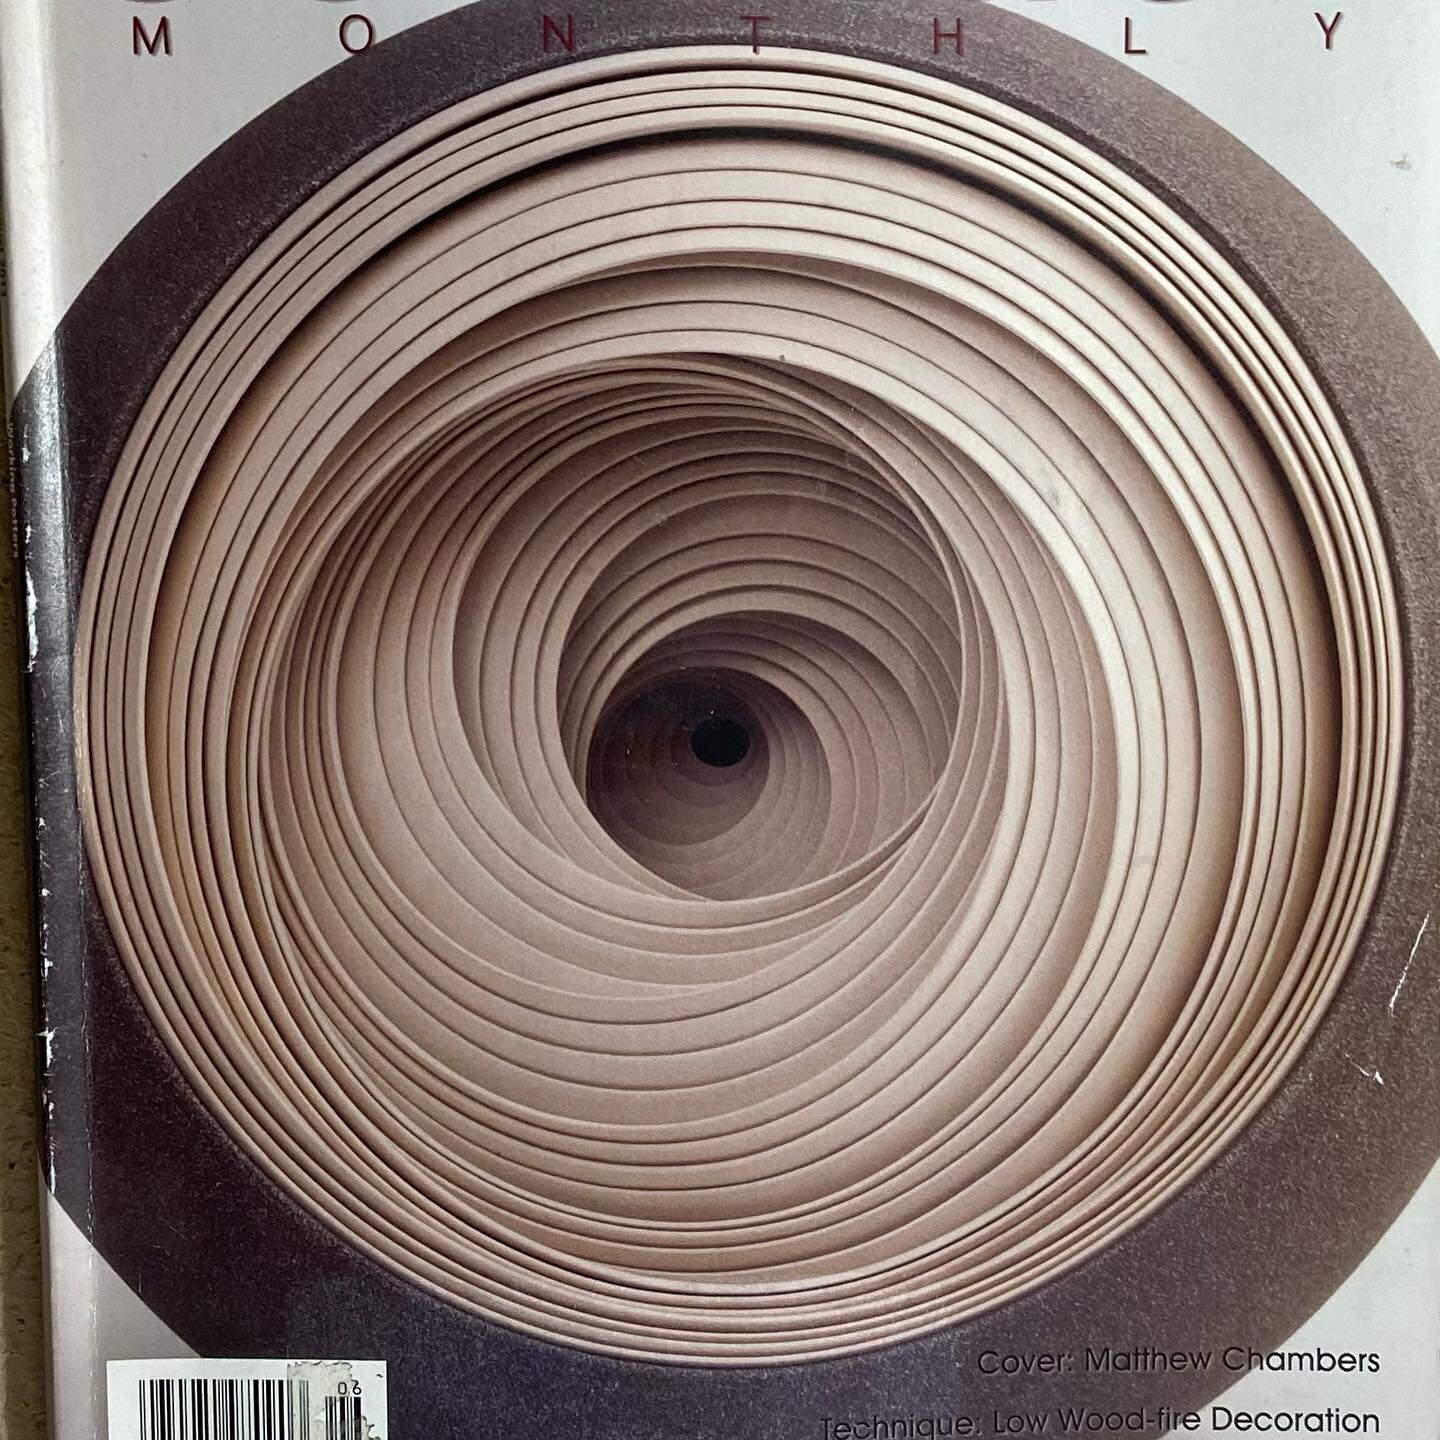
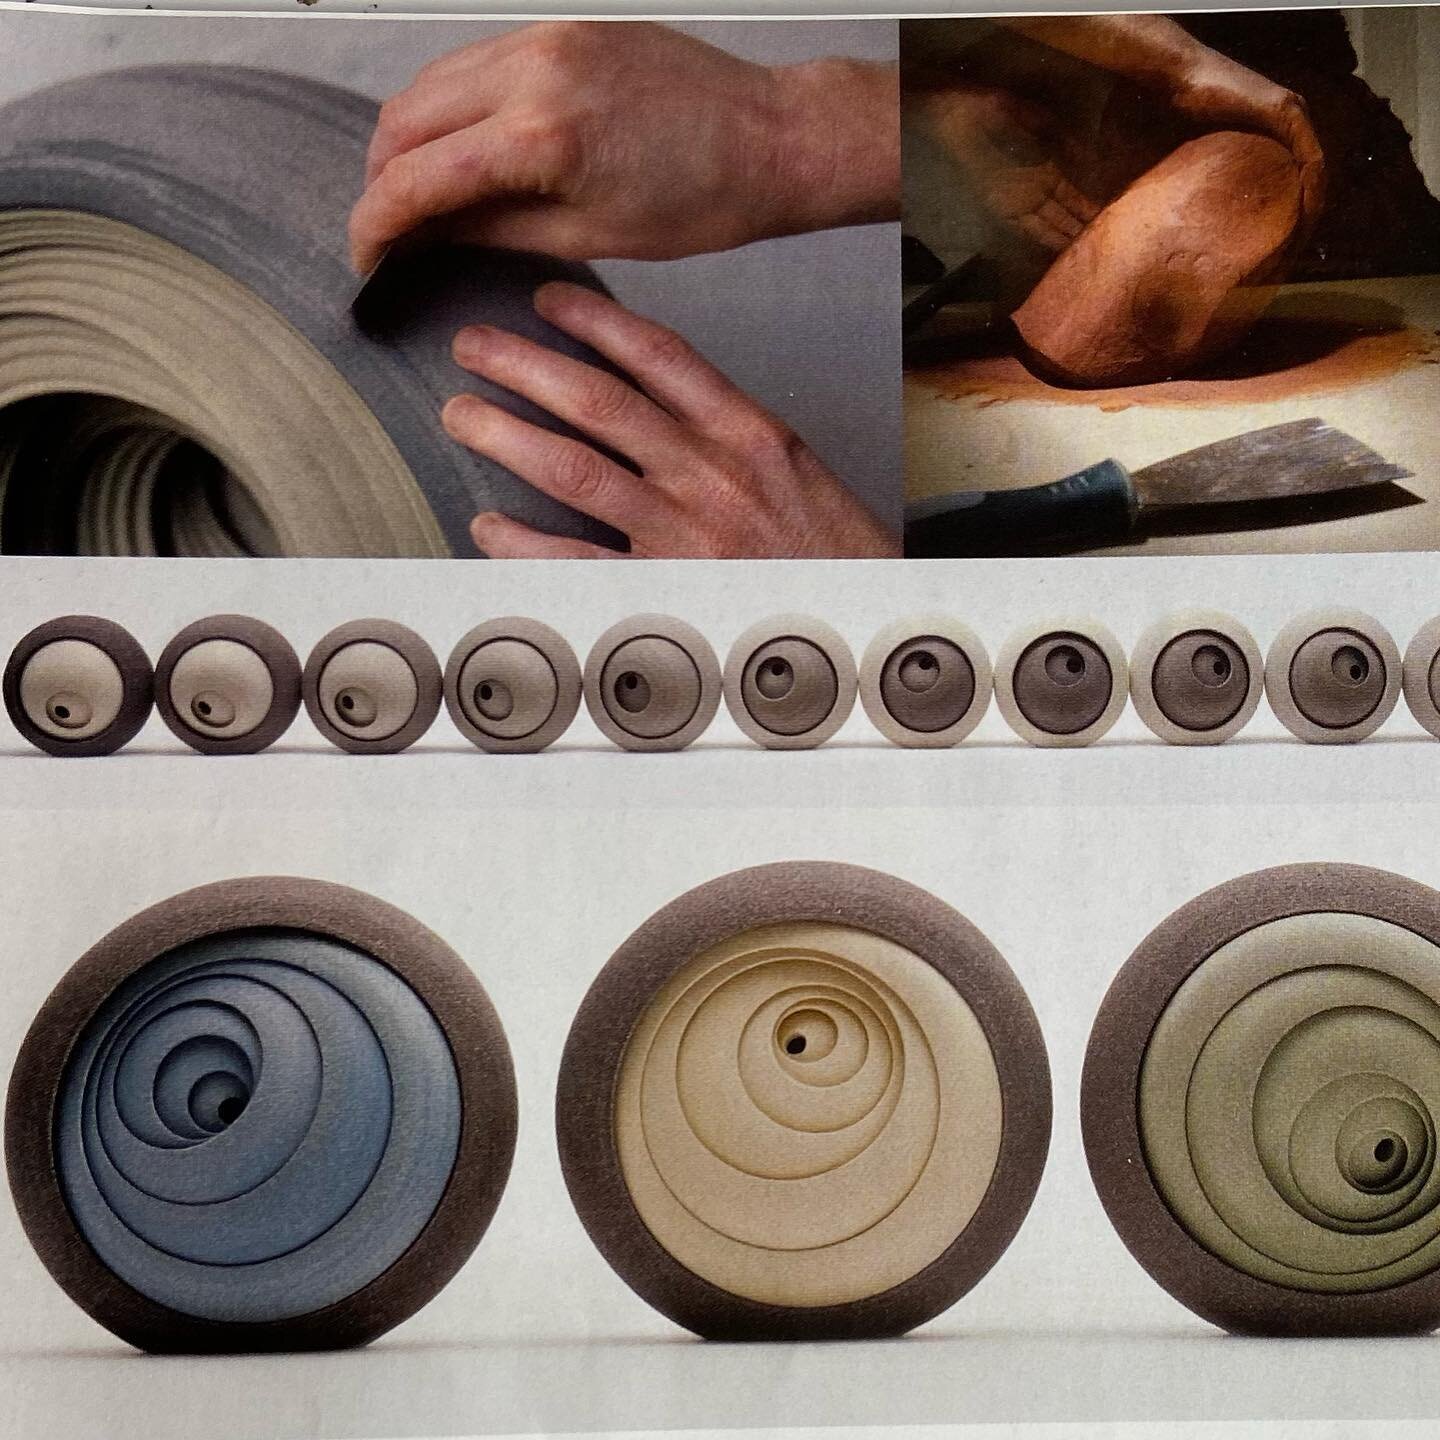
I think it’s time that I give credit to Matthew Chambers, the English ceramic artist from the Isle of Wight whose work inspired me to create this Teapot. I would have acknowledged Matthew’s inspirational work earlier in the series, but I misplaced the magazine issue, and just found it again today. His work was featured on the cover of the June-July-August 2013 issue of Ceramics Monthly magazine. Search his name and you will see a lot of amazing ceramic artwork on his website, all variations on sets of two, three, or four joined fin-rings embedded off-center inside each other. It took me a while, but soon after seeing the article in Ceramics Monthly I started thinking about a Teapot with hollow rings mounted off-center inside each other, with more rings or ring arc segments making up the handle, spout and lid finial. Thanks, Matthew Chambers for your beautiful creative ceramic artwork!


Glazing this “Eight-Ring Circus Upright Rings Teapot” is, like all my previous posts showing the making of the Teapot, an elaborate process. I like a glazing strategy of a first layer of our opaque glossy white glaze followed by a second layer of various colors. We didn’t have enough volume of glaze, or a large enough container, to dip the Teapot, so I had to pour the white glaze over the Teapot laid on its side over a plastic tray. First I painted (with a thin brush) dark green glaze in the outer ring groove and the grooves on the handle, spout, and lid finial. Then I painted dark blue glaze in the second-ring-in groove, then teal blue glaze in the third ring groove and black glaze in the innermost ring groove. I painted liquid wax resist carefully over the glazed grooves. The wax resist, a liquid emulsion (like floor wax) of tiny beads of wax suspended in water, resists the glaze covering poured over it. I poured the opaque white glaze over the Teapot as evenly as I could. The white glaze gathered in the recessed grooves despite the wax resist, so I had to clean them out with a knife tip. When I turned the Teapot over there were several unglazed areas I had to paint the opaque white glaze onto with a large brush, as evenly as I could. There were also many drips I had to shave off with a knife. Now the Teapot was coated as evenly as I could manage with the opaque glossy white glaze. The next post will show adding the second-layer glaze colors.


The final glazing. Before painting in the opaque white unglazed areas from the first poured glaze layer, I scraped off the drips, making the whole first white glaze layer as smooth as I could. Then I painted dark colors in the grooves and painted wax resist over the dark colors in the grooves. I then painted wax resist over the plain-edge side so the plain-edge would be white. Then I painted our pale green glaze on the inside and outside of the outside ring from both sides, and green on the handle, spout and lid ring. I painted a double layer of green right next to the grooves and plain edge, then a single layer and very thin layer painted from both sides close to the ring center, leaving a wavy thin white band in the center of the outer ring, handle, spout and finial ring. I then repeated the darker-on-the-edge to lighter layers of violet purple on the second ring in, then yellow on the third ring in and pink on the innermost ring. I wasn’t sure about the density of the dark colors in the grooves, so I re-painted them. The closeup shots show the bumpy glaze surface, which I hoped would smooth out in the firing process. The photo with the supporting props showed how the Teapot would be placed in the kiln, and the last photos show the Teapot in the kiln. I will turned on the kiln the night of April 4, 2021, exactly two months since I started making the first outer ring on February 4, and the firing reached cone 5 sometime the following morning. The next post will show formal photos of the fired Eight-Rings Circus Upright RingsTeapot!


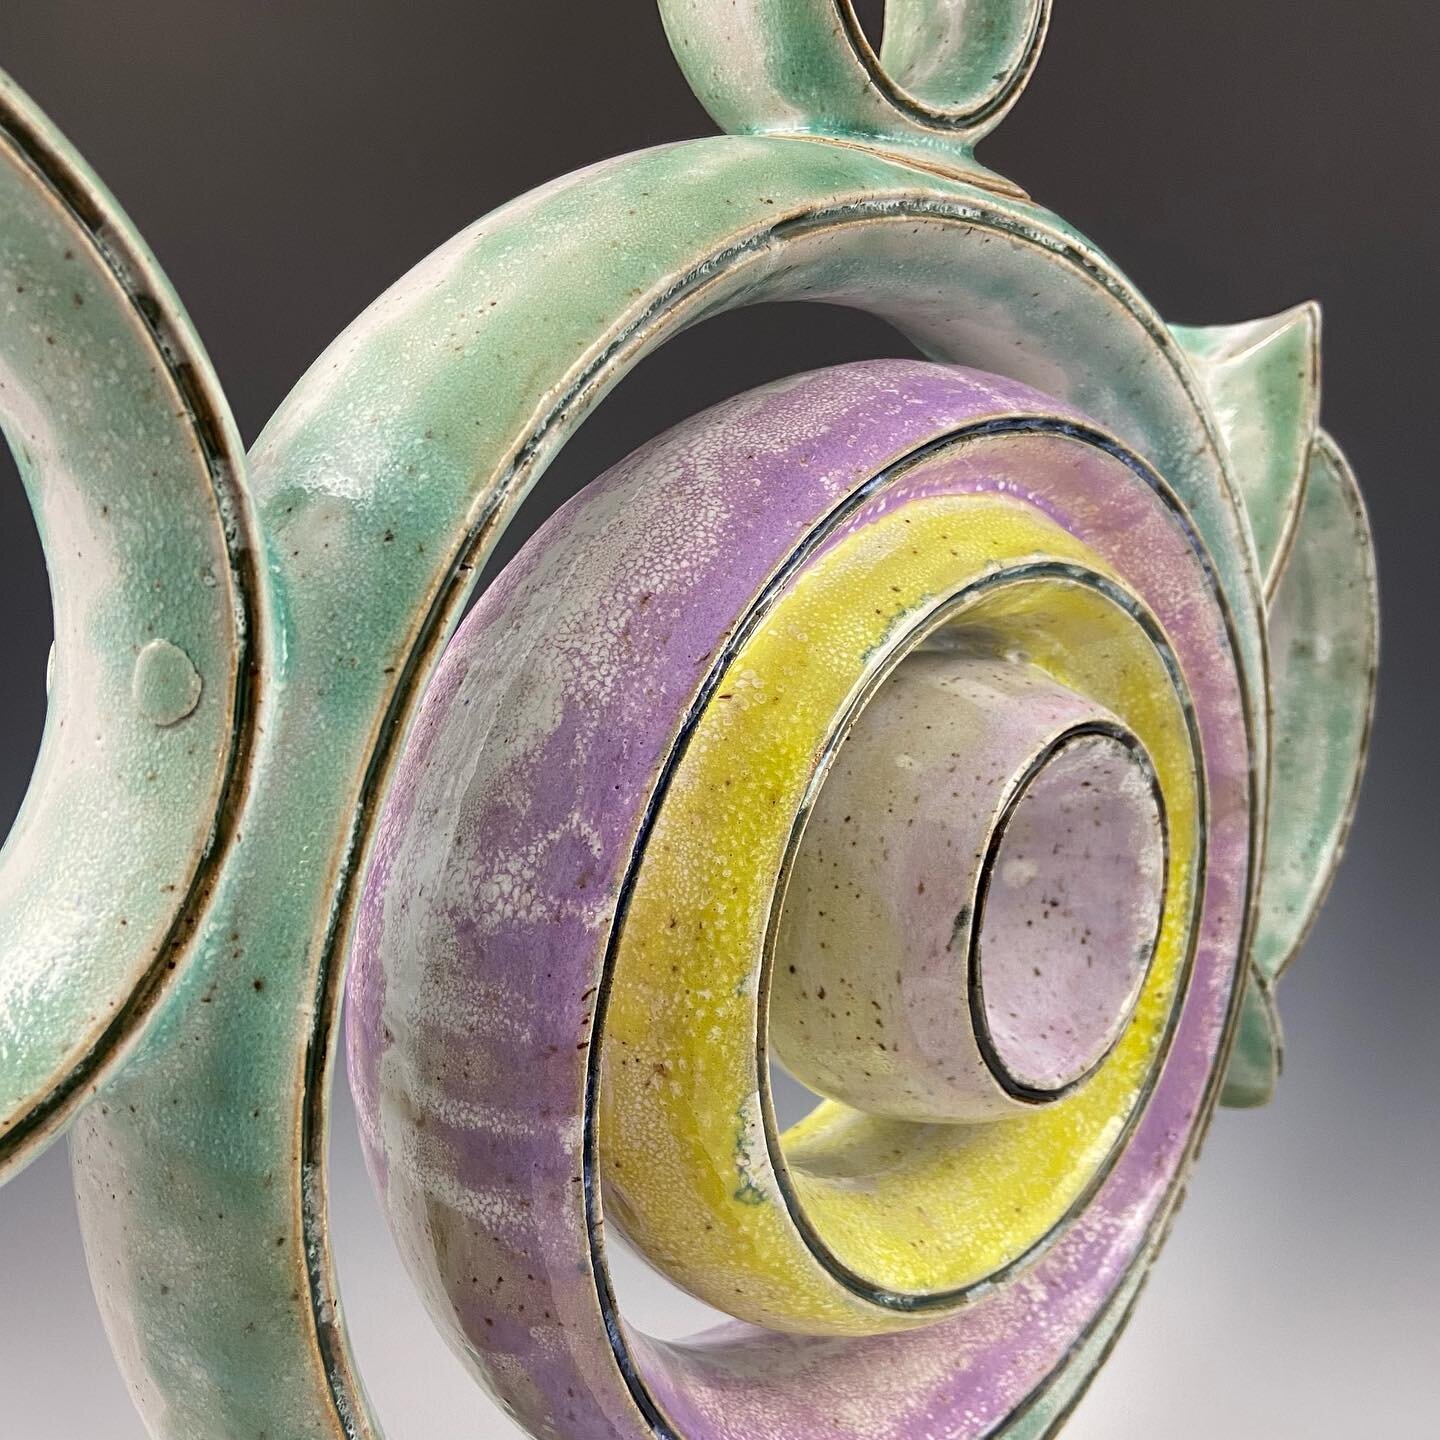
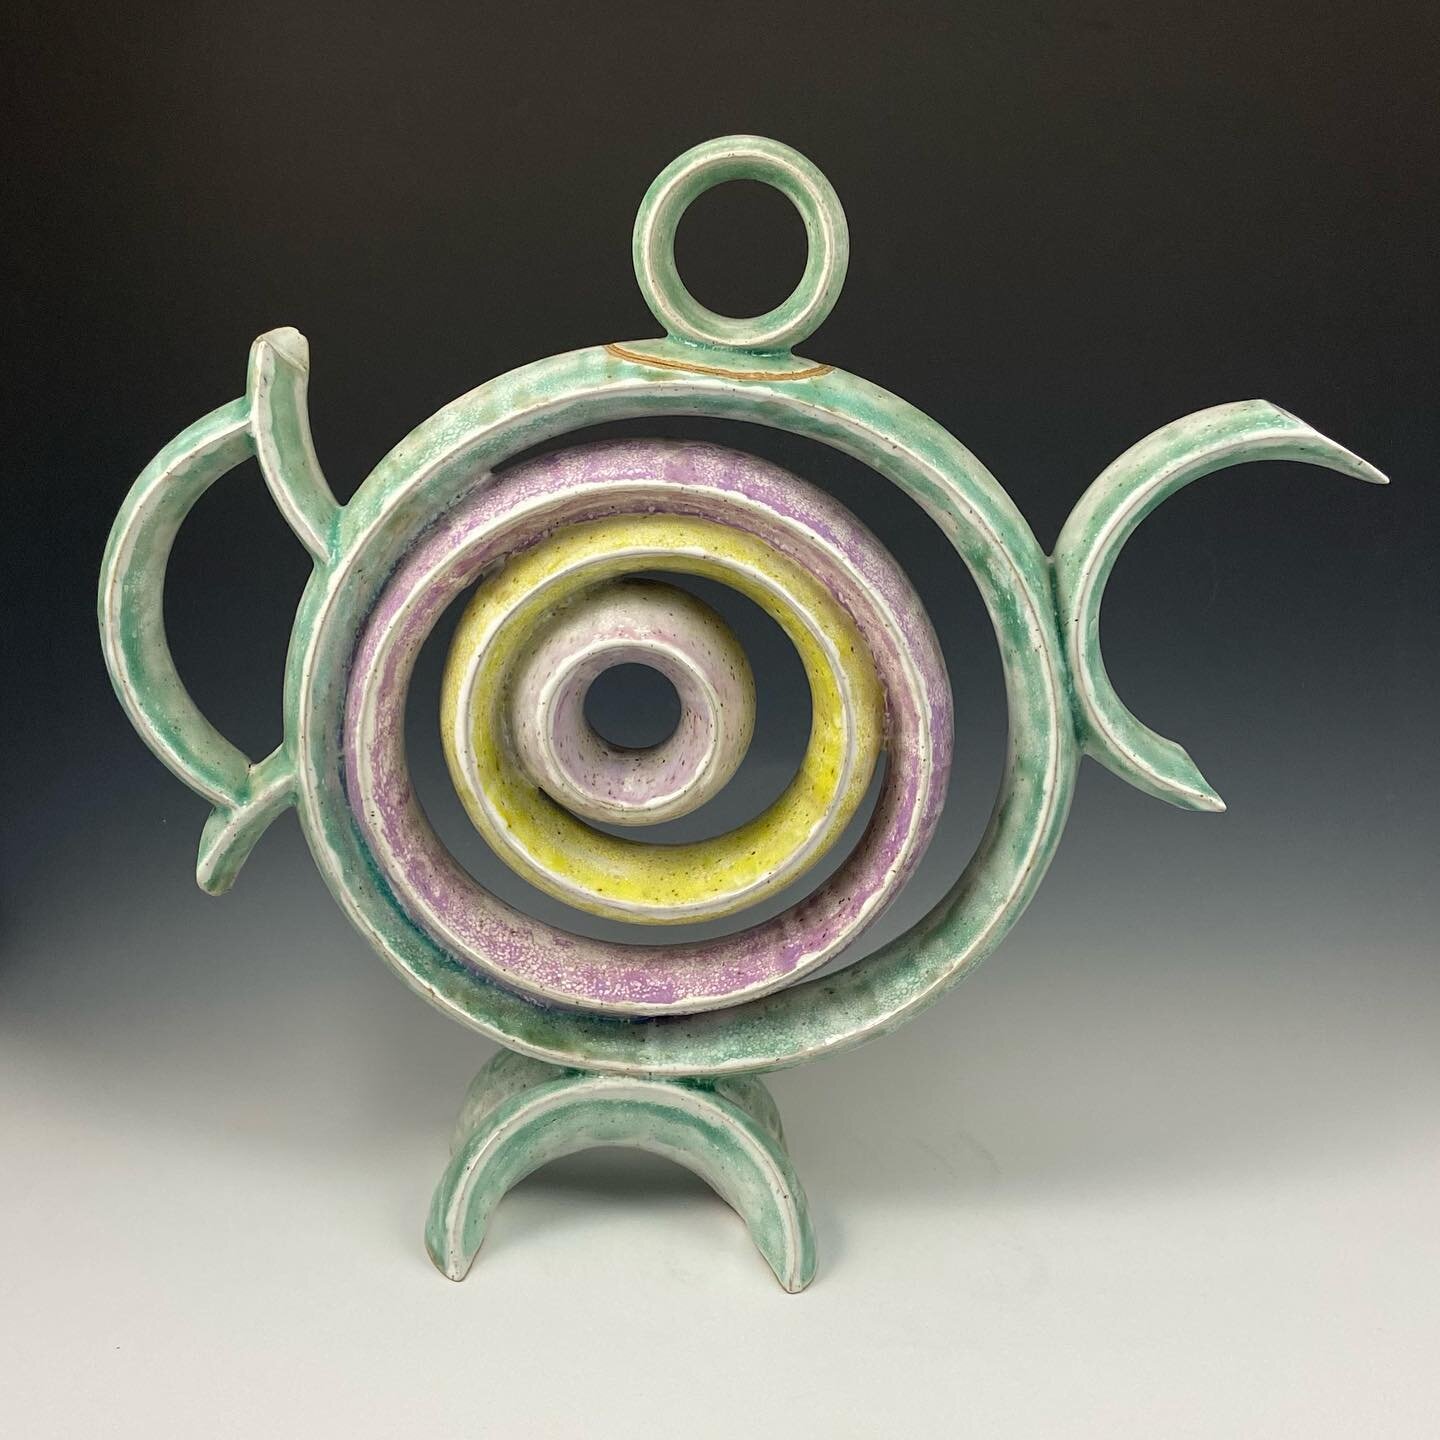
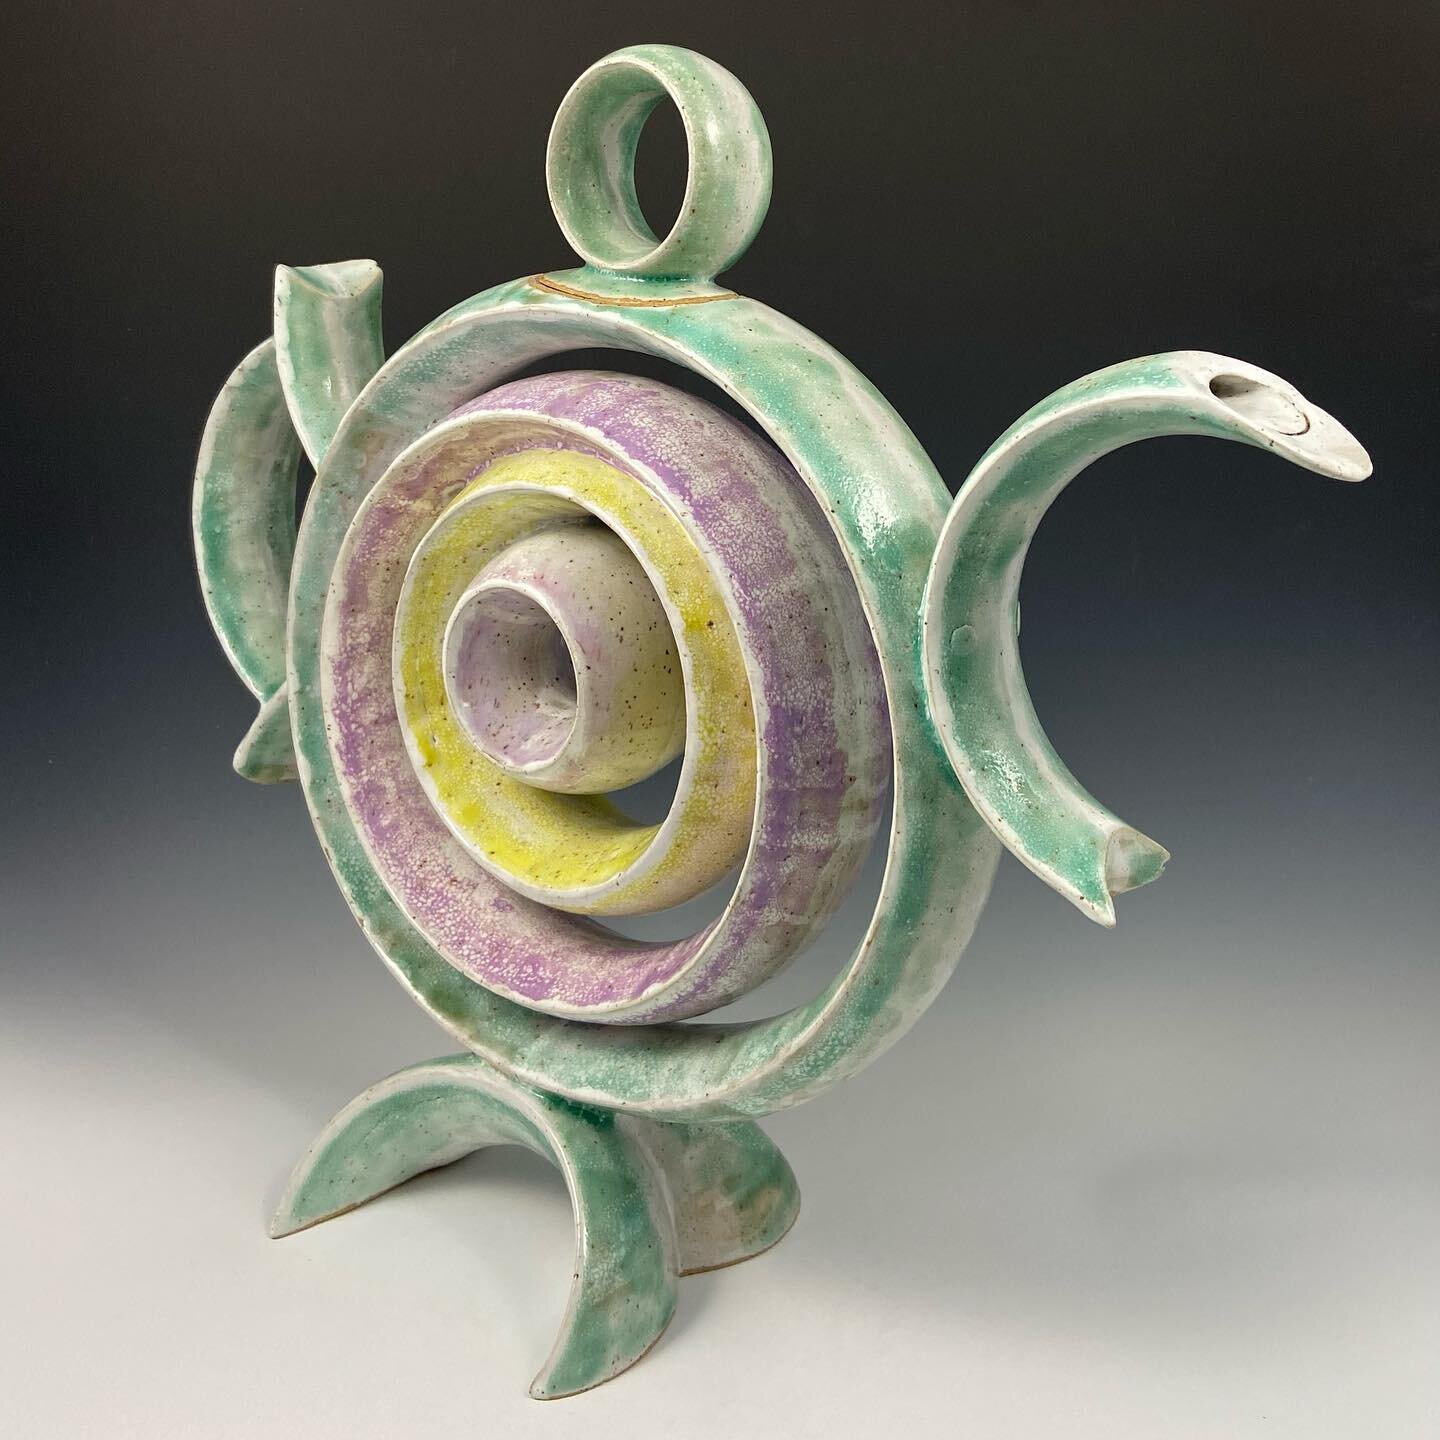
“Eight-Ring Circus Upright Rings Teapot.” Mr. Teapot came out of the glaze firing very well, and the Making Process is complete! I like a variety of colors, but am disappointed when varied color regions confuse a clear presentation of a sculpture’s shape. Here the rings-inside-rings are clear divisions of the presentation and can carry different colors without detracting from the overall unity of the Teapot Sculpture. Most of my Upright Ring and Reassembled Ring Teapots are glazed in a single color because of their visual complexity.